There’s something undeniably magical about Easter mornings—the soft glow of spring sunlight, the gentle rustling of colored grass in Easter baskets, and the laughter of kids discovering sweet surprises. One of my favorite traditions growing up was the simple joy of homemade treats that captured the spirit of the season. These Easter Bunny Coconut Tails are one of those nostalgic recipes that bring warmth to any celebration, whether you’re sharing with family or gifting to friends. Plus, they’re surprisingly easy to whip up, making them perfect for last-minute holiday fun or a memorable addition to your dessert table.
What I love most about these coconut tails is how quickly you can transform just a few ingredients into bright, pastel-hued bites that feel both festive and indulgent. If you’re looking for a recipe that’s charming, fuss-free, and crowd-pleasing, you’re in the right place. Let’s dive into why these coconut treats are a must-have for your Easter festivities.
Why You’ll Love Easter Bunny Coconut Tails
- Fast: Ready in under an hour, with minimal prep and no baking required.
- Easy: Just mix, color, roll, and chill—perfect even if you’re new to the kitchen.
- Giftable: These pretty pastel bites look delightful nestled in a cute box or jar, perfect for sharing.
- Crowd-pleasing: Sweet, chewy, and coconutty, they’re a treat that kids and adults alike adore.
Ingredients
This recipe keeps things beautifully simple, relying on a handful of pantry staples and a splash of color to make the magic happen. Here’s what you’ll need:
- 1 can (14 oz) sweetened condensed milk – This rich, creamy base brings sweetness and moisture, binding the coconut perfectly.
- 1 teaspoon vanilla extract – Adds a warm, classic flavor that complements the coconut’s natural sweetness.
- 4 cups shredded sweetened coconut – The star ingredient, providing that chewy texture and tropical flair.
- Extra shredded coconut – For rolling and coating the balls, giving a snowy, festive finish.
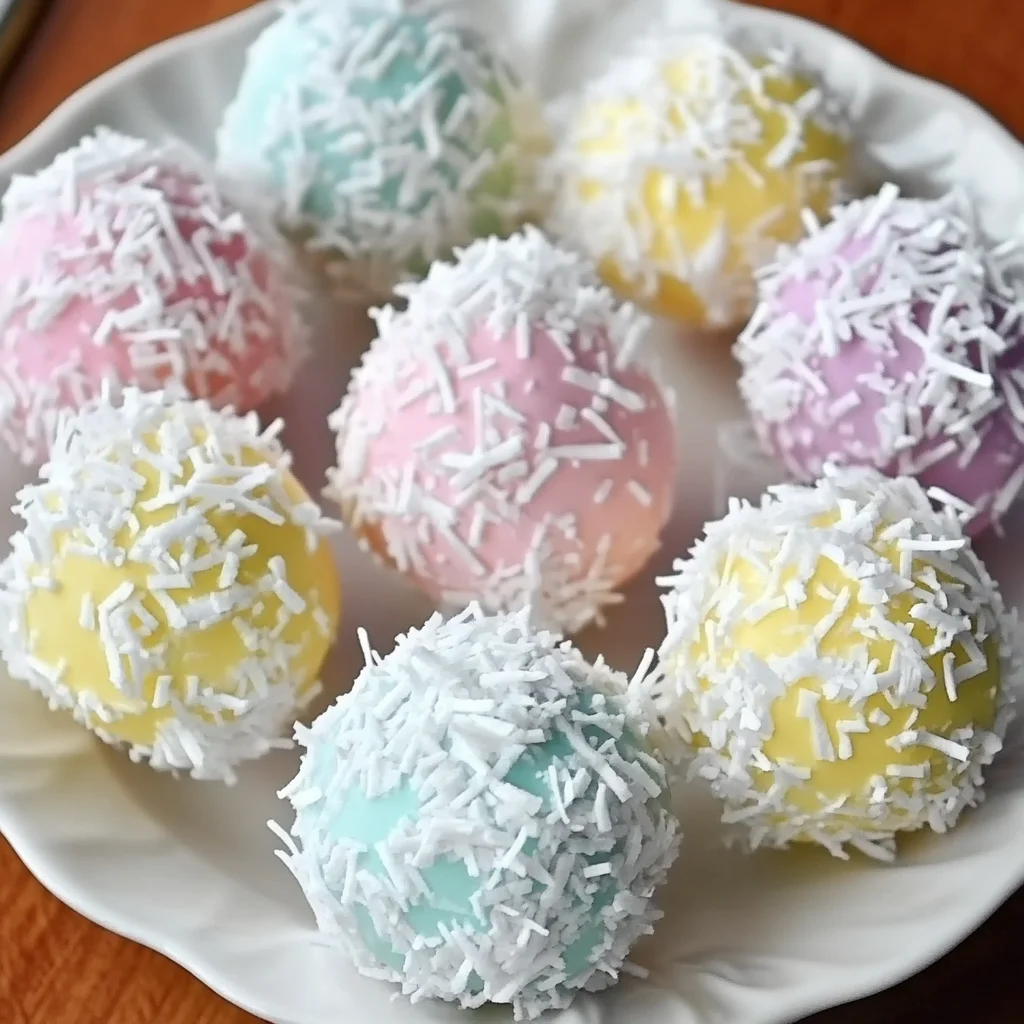
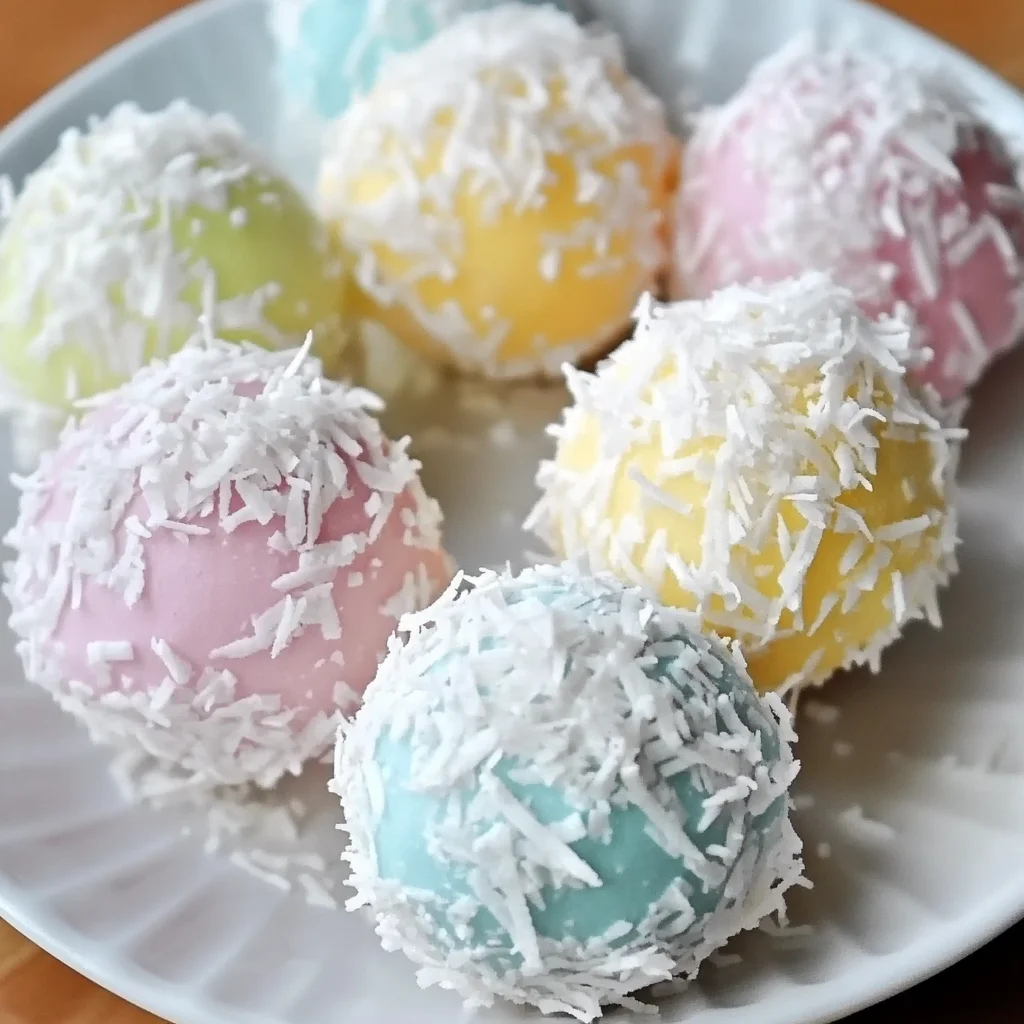
- Gel food coloring (pastel pink, yellow, blue, green, purple) – These gentle hues turn your coconut tails into Easter-ready delights. I prefer gel coloring because it won’t thin out the mixture like liquid colorings might.
Each of these ingredients comes together to create a treat that’s not only tasty but visually charming—perfect for decorating your Easter dessert spread or handing out as homemade gifts. If you enjoy this kind of no-bake coconut goodness, you might also love checking out some other sweet treats like the Pineapple Cream Cheese Pound Cake, which has a similar tropical vibe and is just as easy to make.
How to Make Easter Bunny Coconut Tails
Making these Easter Bunny Coconut Tails is a breeze, and I’m going to walk you through every step so you feel confident and ready to create a batch of your own.
- Mix your base: Start by pouring the sweetened condensed milk into a large mixing bowl. Add the vanilla extract and stir gently until well combined. The vanilla adds that comforting, homey aroma that I always find so inviting.
- Add the coconut: Gradually sprinkle in the shredded sweetened coconut. Use a sturdy spoon or spatula to fold the coconut into the condensed milk. As you mix, the coconut will absorb the liquid, and the mixture will start to stick together. This is exactly what you want—no loose flakes here!
- Divide the mixture: Once fully combined, split the coconut mixture evenly into 4 to 5 separate bowls or sections in your mixing bowl. This makes it easier to add and mix in your gel food coloring without getting the colors muddled together.
- Color your coconut: Add a few drops of gel food coloring to each portion. Stir well to distribute the color evenly. Don’t be shy to add more drops if you want a deeper pastel shade. I love this part because it feels like crafting little edible Easter eggs, each with its own personality and hue.
- Form the tails: Take small portions of the colored coconut mixture and roll them into 1-inch balls. It helps to keep your hands slightly damp to prevent sticking. These little balls are the perfect bite-sized treats that are fun to make and even more fun to eat.
- Coat the balls: Roll each ball in the extra shredded coconut until fully coated. This not only adds texture but also gives each tail a beautiful snowy-white finish that’s so fitting for Easter.
- Chill and set: Place your coated coconut tails on a parchment-lined tray. Pop the tray in the refrigerator for at least an hour so the treats firm up nicely. This makes them easier to handle and gives them a satisfying chewiness.
- Serve and enjoy: These little delights can be enjoyed chilled or at room temperature. I like serving them alongside some other spring-inspired desserts for a colorful, festive treat table. You might even pair them with a refreshing drink or a light cake, such as a Strawberry Cream Cheese Pound Cake for a perfect spring pairing.
Substitutions & Additions
One of the best parts about this recipe is how adaptable it is! Here are a few ideas to make these coconut tails your own, whether you’re accommodating dietary needs or just feeling creative:
- Unsweetened coconut: If you prefer less sweetness, swap the sweetened coconut for unsweetened. You may want to add a bit more sweetened condensed milk or a touch of honey to balance flavors.
- Flavor twists: Substitute vanilla extract with almond or coconut extract for a fun flavor change. A splash of lemon or orange zest can add a bright, citrusy note.
- Color fun: Feel free to experiment with different gel colors or even combine two shades to create pretty marbled effects on your coconut tails.
- Mix-ins: Stir in mini chocolate chips, chopped nuts, or dried fruit for extra texture and flavor. Just be mindful of how it affects the mixture’s stickiness.
- Shape variations: Instead of rolling balls, you can shape the mixture into little bunny ears or other Easter-themed shapes using your hands or cookie cutters for a personalized touch.
If you like the no-bake, easy dessert vibe of this recipe, you might also enjoy some other creative no-bake treats like the No-Bake Brownie Cheesecake Cups, which are just as effortless but bring a whole different flavor profile to your dessert lineup.
Tips for Success
Even though this recipe is straightforward, a few little tips can make your experience even better and ensure perfect Easter Bunny Coconut Tails every time.
- Use gel food coloring: Gel colors give you vibrant, pastel hues without making the coconut mixture too wet. If you only have liquid food coloring, add sparingly.
- Keep hands slightly damp: This prevents the coconut mixture from sticking to your fingers while rolling the balls.
- Chill well: Don’t skip the refrigeration step. It helps the tails hold their shape and improves the chewy texture.
- Prepare ahead: These can be made a day or two in advance and stored in the fridge, making Easter morning less hectic.
- Use parchment paper: Lining your tray with parchment prevents sticking and makes cleanup a breeze.
- Mix thoroughly: Make sure the coconut is evenly coated with the sweetened condensed milk mixture for consistent texture and sweetness.
How to Store Easter Bunny Coconut Tails
Storing your coconut tails properly keeps them fresh and delicious for days after you make them. Here’s how I like to handle storage:
- Refrigerate: Keep the coconut tails in an airtight container in the fridge. They’ll stay fresh and chewy for up to one week.
- Freeze for longer storage: If you want to prepare in advance or save leftovers, you can freeze these treats. Place them in a single layer on a baking sheet to freeze, then transfer to a freezer-safe container or bag. They’ll keep well for up to 2 months. Thaw in the fridge before serving.
- Room temperature: If you plan to serve them within a day, storing them covered at room temperature is fine, but keep them away from heat or direct sunlight to avoid melting or stickiness.
FAQs
Can I make these coconut tails without sweetened condensed milk?
The sweetened condensed milk is key for sweetness and binding. If you want dairy-free or lower-sugar options, you could try a thick coconut cream mixed with honey or maple syrup, but expect a different texture and flavor.
Can I use shredded fresh coconut instead of packaged shredded coconut?
Fresh shredded coconut has more moisture and a different texture, which can make the mixture too wet. If using fresh, consider drying it slightly and adjusting the condensed milk amount to get the right consistency.
How do I prevent the colors from bleeding into each other?
Divide the mixture into separate bowls before adding color, and mix each portion thoroughly. Avoid mixing colors together once divided to keep the pastel shades distinct.
Can these treats be shaped into other Easter-themed designs?
Absolutely! You can form them into little bunny shapes, eggs, or even carrot shapes using your hands or small molds. Just be gentle as the mixture is soft before chilling.
If you’re excited to try more fun and festive recipes, don’t forget to visit Recettia, where you’ll find a treasure trove of easy and delicious ideas, from comforting dishes to sweet treats.
For more inspiration and festive ideas to brighten your kitchen and celebrations, be sure to follow us on Pinterest—your go-to spot for all things delicious and delightful!
Easter Bunny Coconut Tails
Ingredients
Equipment
Method
- Step 1: Pour sweetened condensed milk into a large mixing bowl. Add vanilla extract and stir gently until well combined.
- Step 2: Gradually sprinkle in shredded sweetened coconut. Fold the coconut into the condensed milk until the mixture sticks together with no loose flakes.
- Step 3: Divide the coconut mixture evenly into 4 to 5 separate bowls or sections to prepare for coloring.
- Step 4: Add a few drops of gel food coloring to each portion and stir well to distribute the color evenly. Add more drops for deeper pastel shades.
- Step 5: Roll small portions of colored mixture into 1-inch balls, keeping hands slightly damp to prevent sticking.
- Step 6: Roll each ball in extra shredded coconut until fully coated for a snowy, festive finish.
- Step 7: Place coated coconut tails on a parchment-lined tray and refrigerate for at least 1 hour to firm up.
- Step 8: Serve chilled or at room temperature. Enjoy as a festive treat or gift.