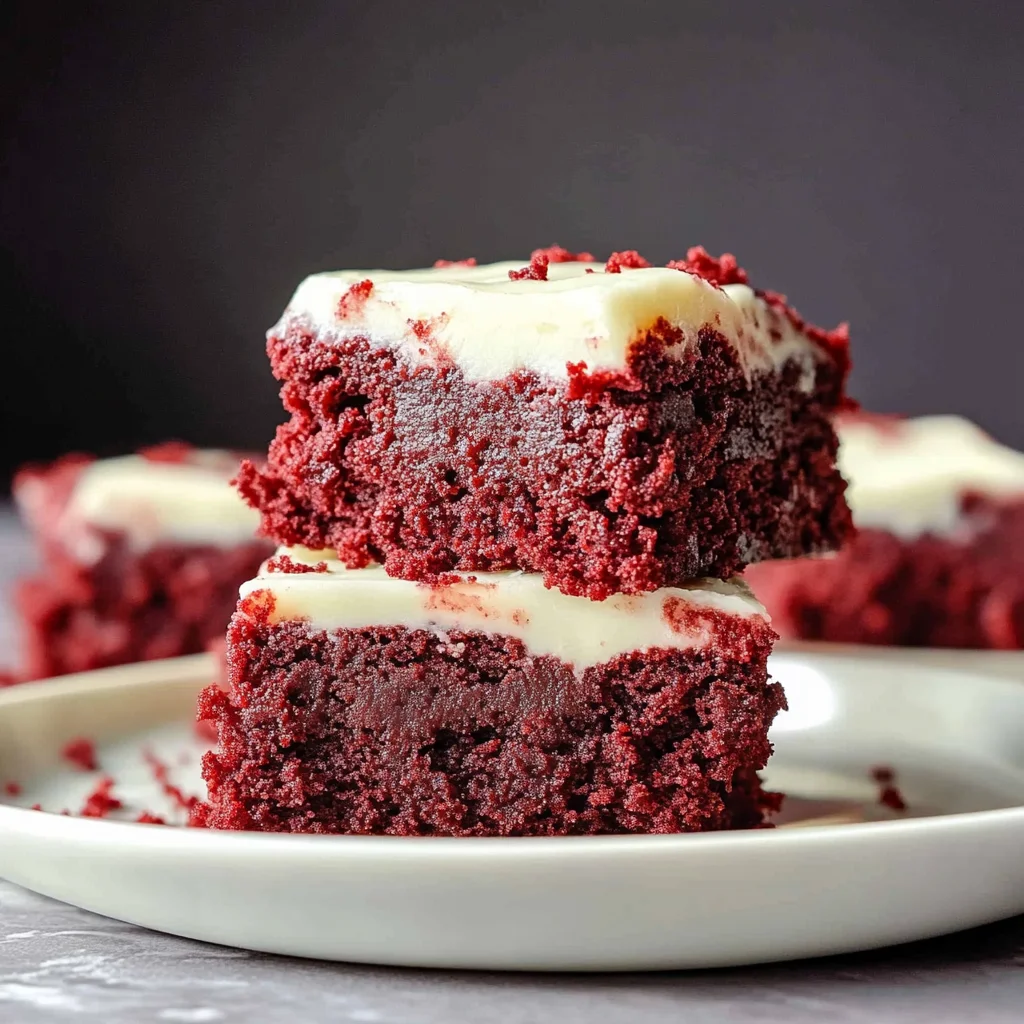
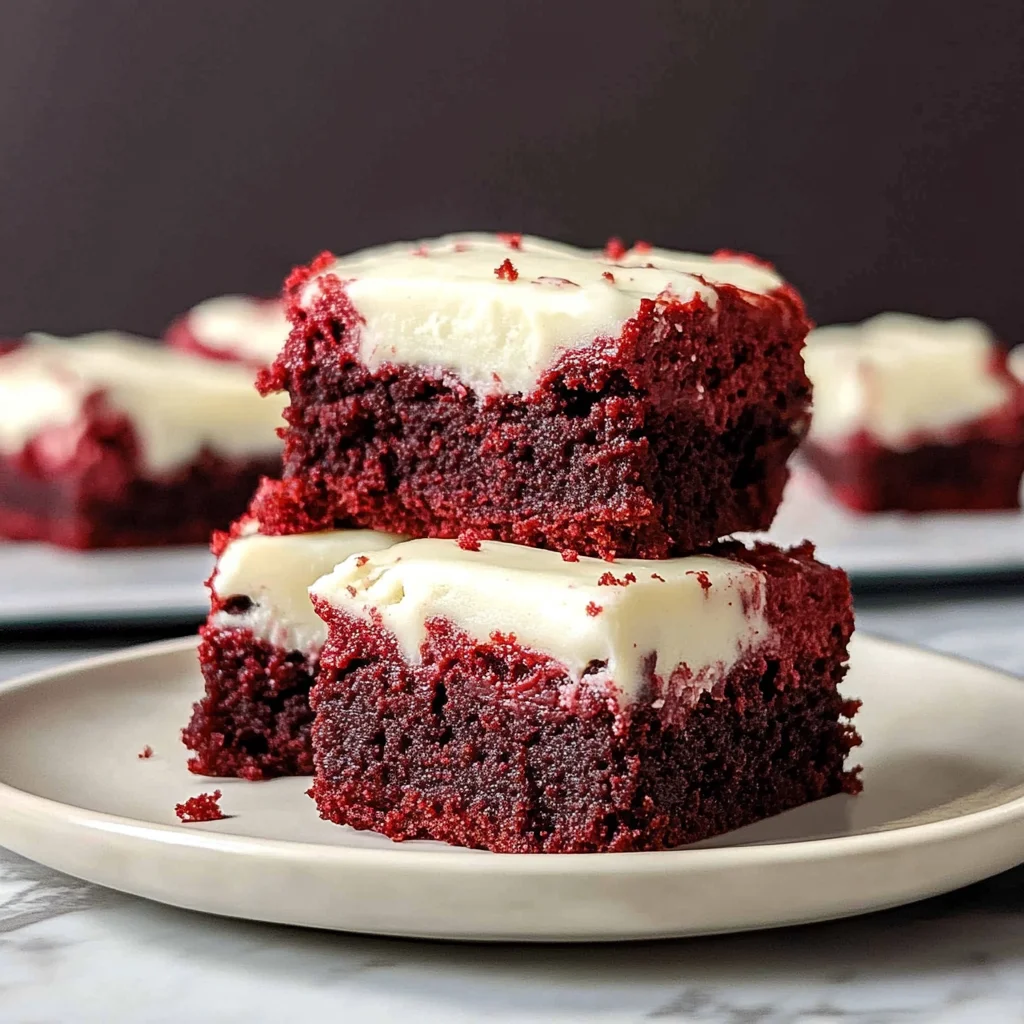
There’s something truly magical about the rich, velvety texture of red velvet, isn’t there? It’s that perfect balance of subtle cocoa flavor kissed with a hint of tanginess and wrapped up in a stunning ruby red color that always brings a smile to my face. Now imagine all of that deliciousness in a brownie – fudgy, tender, and topped with a luscious cream cheese frosting. If you’re anything like me, you’ll find these red velvet brownies to be a nostalgic treat that’s both easy to make and impossible to resist.
Whether you’re baking for a special occasion or just craving a sweet moment of comfort, these brownies come together quickly and deliver big on flavor. I love that they’re as perfect for a cozy night in as they are for gifting to friends and family. Trust me, once you try this recipe, red velvet brownies might just become your new go-to dessert. Ready to dive in? Let’s get baking!
Why You’ll Love Red Velvet Brownies
- Fast: From start to finish, these brownies can be whipped up in under an hour, making them perfect for last-minute cravings or unexpected guests.
- Easy: With simple ingredients and straightforward steps, even beginner bakers can achieve bakery-worthy results.
- Giftable: Wrapped in pretty parchment or a festive box, these brownies make an unforgettable homemade gift.
- Crowd-pleasing: The creamy frosting and rich red color always steal the show at parties, potlucks, or family dinners.
Ingredients
Before you start, gather all your ingredients to make the process smooth and enjoyable. Here’s the full list with a little note about each:
For the Brownies
- 3/4 cup (158 g) butter, melted: You can use regular butter or dairy-free alternatives if needed. Melting it first helps create a fudgy texture.
- 3/4 cup (150 g) light brown sugar: Adds moisture and a subtle caramel flavor to balance the cocoa.
- 1 cup (200 g) granulated sugar: Sweetens and helps create that classic brownie chewiness.
- 2 eggs: These bind everything together and give structure to the brownies.
- 1 tbsp vanilla extract: Enhances the overall flavor with a warm, inviting note.
- 1/2 tsp liquid red food coloring: The signature red hue that makes these brownies special. You can adjust the amount for deeper color.
- 1 1/2 tsp white vinegar: Adds a subtle tang that balances the cocoa and activates the red color.
- 1/4 cup (22 g) cocoa powder: Just enough to add that hint of chocolate without overpowering the velvet flavor.
- 1/4 tsp salt: Brings out the sweetness and rounds out the flavors.
- 1 cup + 3 tbsp (148 g) all-purpose flour: The base that gives the brownies structure without making them cakey.
For the Cream Cheese Frosting
- 4 oz plain cream cheese, room temperature: The star of the frosting for that creamy, tangy richness.
- 1/4 cup (53 g) butter, softened: Adds smoothness and richness; dairy-free butter works great too.
- 1/2 tsp vanilla extract: A hint of warmth to complement the tangy cream cheese.
- Pinch of salt: Balances the sweetness in the frosting.
- 1 1/2 to 2 cups (180 g) powdered sugar: Sweetens and thickens the frosting to your desired consistency.
- 2 tbsp cornstarch (optional): Helps thicken the frosting if you’re making a dairy-free version.
How to Make Red Velvet Brownies
Now that all your ingredients are ready, let me walk you through the simple yet rewarding steps to bake these luscious brownies from scratch. Don’t worry—I’ll share some tips along the way to make sure your brownies turn out perfect every time.
- Preheat your oven to 350°F (175°C). Line an 8×8 inch square baking pan with parchment paper. Make sure to leave an overhang on the sides—this makes lifting the brownies out so much easier once they’re baked.
- Melt the butter. You can do this on the stovetop or in the microwave. Once melted, pour it into a medium mixing bowl. Add both the light brown sugar and granulated sugar. Whisk them together until the mixture forms a smooth paste that pulls cleanly away from the sides of the bowl. This step ensures your brownies will be moist and chewy.
- Add the eggs, vanilla extract, red food coloring, and white vinegar. Mix well until everything is fully combined. If you prefer a deeper red color, feel free to add a little more food coloring here. I always recommend starting with less and adding more gradually – it’s easier to control the color that way.
- Sift together the cocoa powder, salt, and flour. This step is important because it prevents lumps and helps distribute the cocoa evenly throughout the batter. Then, gently whisk the dry ingredients into the wet mixture until just combined. Try not to overmix; you want the brownies tender, not tough.
- Pour the batter into your prepared pan. Use a spatula to smooth out the top evenly. This helps the brownies bake uniformly and look beautiful when sliced.
- Bake for 30-40 minutes. Start checking at 30 minutes by inserting a toothpick into the center. You’re looking for a few moist crumbs attached—not wet batter. The top should have a nice, crinkly texture. That’s how you know the brownies are perfectly fudgy inside.
- Let the brownies cool completely in the pan. This step is crucial before frosting to prevent the cream cheese topping from melting.
- Make the cream cheese frosting. In a medium bowl, beat together cream cheese, softened butter, vanilla extract, and a pinch of salt until smooth and fluffy. Gradually add powdered sugar until the frosting reaches your desired sweetness and consistency. If you’re making a dairy-free version, adding cornstarch helps thicken the frosting beautifully.
- Refrigerate the frosting until ready to use. When the brownies are fully cooled, spread the frosting evenly over the top. You can chill the frosted brownies or keep the frosting cold and frost just before serving. Both ways work great depending on your timing.
Once frosted, slice into squares and enjoy! They’re perfect with a cold glass of milk or a cup of your favorite coffee. If you love this, you might also enjoy other luscious desserts like the Pineapple Cream Cheese Pound Cake, which shares that same creamy frosting magic.
Substitutions & Additions
One of the best things about this recipe is how flexible it is! Here are some ideas to tailor the brownies to your taste or dietary needs:
- Dairy-free options: Use coconut oil or vegan butter instead of regular butter, and substitute vegan cream cheese for the frosting. Adding cornstarch to the frosting helps it thicken nicely without dairy.
- Food coloring alternatives: You can try natural red food coloring from beet juice powder or pomegranate juice for a more natural approach, though the color might be less vibrant.
- Flavor boosts: Add 1/2 cup of white chocolate chips or chopped nuts (like pecans or walnuts) into the batter for extra texture and flavor. For a festive touch, swirl some raspberry jam into the batter before baking.
- Frosting variations: For a lighter topping, try whipped cream cheese frosting or even a simple dusting of powdered sugar. If you love that cream cheese frosting flavor, consider pairing these brownies with the creamy layers in the No Bake Brownie Cheesecake Cups for a decadent dessert spread.
Tips for Success
Here are some personal tips I’ve picked up over the years to help you nail this recipe every time:
- Don’t skip sifting: Cocoa powder tends to clump, and sifting makes sure the batter stays smooth and even.
- Measure your flour carefully: Too much flour can make brownies cakey. Use a kitchen scale or spoon and level your flour when measuring.
- Watch your baking time: Oven temperatures vary, so start checking at 30 minutes. Overbaking dries out the brownies, and underbaking leaves them too gooey.
- Cool completely before frosting: Cream cheese frosting melts easily on warm brownies. Patience here pays off!
- Make ahead: You can bake the brownies a day in advance and store them in an airtight container. Make the frosting the next day and frost just before serving for the freshest taste.
If you’re interested in more easy crowd-pleasers, check out the Easy Pecan Pie Recipe — it’s another one of those desserts that’s simple to make but always impresses.
How to Store Red Velvet Brownies
Storing your brownies properly is key to keeping them moist and delicious. Here’s what I recommend:
- Room temperature: If unfrosted, brownies can be stored in an airtight container for up to 3 days.
- Refrigerator: Once frosted, store brownies in the fridge to keep the cream cheese frosting fresh. They’ll stay great for up to 5 days.
- Freezing: You can freeze unfrosted brownies wrapped tightly in plastic wrap and foil for up to 3 months. Thaw at room temperature before frosting. Alternatively, freeze frosted brownies in a single layer on a baking sheet, then transfer to a container with parchment between layers.
When you’re ready to serve after refrigeration, bring the brownies to room temperature or warm them slightly for the best texture and flavor.
FAQs
Can I make these brownies gluten-free?
Absolutely! Substitute the all-purpose flour with a gluten-free blend of equal measure. Just make sure it contains xanthan gum or another binder to keep the texture right.
Is it necessary to use red food coloring?
While it gives classic red velvet its signature look, the brownies will still taste delicious without it. You can also try natural alternatives like beet powder if you prefer.
Can I use store-bought frosting?
Yes, but homemade cream cheese frosting is so simple and fresh-tasting that I highly recommend making it yourself. It really elevates the brownies!
How do I get fudgy brownies instead of cakey?
Focus on not overmixing your batter, measuring flour carefully, and keeping baking time just right. The mix of butter, sugars, and eggs here helps create that perfect fudgy texture.
Ready to fill your kitchen with the irresistible aroma of red velvet brownies? Trust me, once you bake this recipe, you’ll want to keep it handy for every special moment. For more cozy and comforting treats, don’t forget to explore the wide range of recipes available at Recettia.
And if you’re looking for inspiration and beautiful dessert ideas, be sure to follow our Pinterest page where we share all kinds of wonderful recipes and baking tips!
Irresistible Red Velvet Brownies
Ingredients
Equipment
Method
- Step 1: Preheat oven to 350°F (175°C). Line an 8×8 inch square baking pan with parchment paper, leaving an overhang for easy removal.
- Step 2: Melt the butter and pour into a medium mixing bowl. Add light brown sugar and granulated sugar, whisking until smooth and pulling away from the bowl sides.
- Step 3: Add eggs, vanilla extract, red food coloring, and white vinegar to the butter-sugar mixture. Mix well until fully combined.
- Step 4: Sift together cocoa powder, salt, and flour. Gently whisk the dry ingredients into the wet mixture until just combined. Avoid overmixing.
- Step 5: Pour batter into the prepared pan and smooth the top with a spatula for even baking.
- Step 6: Bake for 30-40 minutes. Begin checking at 30 minutes with a toothpick; look for moist crumbs without wet batter. The top should be crinkly.
- Step 7: Allow brownies to cool completely in the pan before frosting to prevent melting.
- Step 8: Make the cream cheese frosting by beating cream cheese, softened butter, vanilla extract, and a pinch of salt until smooth and fluffy. Gradually add powdered sugar, adjusting to desired sweetness and thickness. Add cornstarch if making dairy-free.
- Step 9: Refrigerate frosting until ready to use. Spread evenly over cooled brownies. Chill or frost just before serving as preferred.