Oh my goodness, friend, do you ever get that craving for something utterly rich, delightfully creamy, and wonderfully chocolatey, but you just don’t have the time (or the patience!) for a big baking project? I totally get it. We’ve all been there, dreaming of that perfect dessert that somehow magically appears in front of us. Well, today, I’m pulling back the curtain on a little secret weapon that’s going to make those dreams a reality: these Loaded Brownie Cheesecake Cups! They transport me straight back to my grandma’s kitchen, where every sweet treat felt like a hug, but without any of the fuss. Seriously, these cups are so easy, so quick, and so incredibly memorable, they’re about to become your new go-to for pretty much any occasion!
Why You’ll Love Loaded Brownie Cheesecake Cup
- Fast: No baking required, just assembly and a quick chill!
- Easy: Simple ingredients, simple steps, perfect for beginner bakers and seasoned pros alike.
- Giftable: Pack them in cute jars or containers for a delightful homemade gift.
- Crowd-pleasing: Who doesn’t love the combo of rich brownies and creamy cheesecake?
Ingredients
Gathering your ingredients for these delightful cups is half the fun! Most of these you probably already have lurking in your pantry or fridge, which is exactly how I like my recipes – convenient and delicious.
- Fudgy Brownies: You’ll need about 2 cups of crumbled fudgy brownies. This is your foundation, so make sure they’re extra good! You can bake your favorite homemade batch (maybe try my recipe for Grandma’s Easy Lunch Lady Brownies for an irresistible base!) or grab a box mix for convenience.
- Cream Cheese: Make sure it’s softened! This is crucial for a super smooth, lump-free cheesecake filling. Take it out of the fridge a good hour before you start.
- Powdered Sugar: Also known as confectioners’ sugar. It sweetens our cheesecake without adding any grainy texture.
- Vanilla Extract: A splash of this magic elixir really brings out all the flavors in the cheesecake. Don’t skip it!
- Heavy Whipping Cream: This gets whipped up to light, airy perfection, giving our cheesecake filling that dreamy, cloud-like texture.
- Chocolate Ganache: You can buy a pre-made sauce or easily whip up your own by melting chocolate with a little heavy cream. It’s that glossy, rich chocolate drizzle we all adore.
- Caramel Sauce: Another store-bought hero or a quick homemade batch will do the trick. That salty-sweet caramel swirl is everything!
- Extra Brownie Crumbs: For that final, irresistible garnish. Because can you ever have too many brownies? I think not!
How to Make Loaded Brownie Cheesecake Cup
Alright, sweet friend, let’s get to the fun part! You’re going to be amazed at how quickly these come together. Seriously, it’s almost too easy!
- Whip Up Your Dreamy Cheesecake Filling: First things first, grab a medium bowl. You’re going to beat together your softened cream cheese, powdered sugar, and that wonderful vanilla extract. Beat it until it’s super smooth and creamy, without a single lump in sight. Trust me, a well-softened cream cheese makes all the difference here! In a separate bowl, whip your heavy cream until it forms stiff peaks. You want it nice and fluffy. Now, here’s the gentle part: carefully fold that whipped cream into your cream cheese mixture until it’s just combined. Don’t overmix! You want to keep all that beautiful airiness.
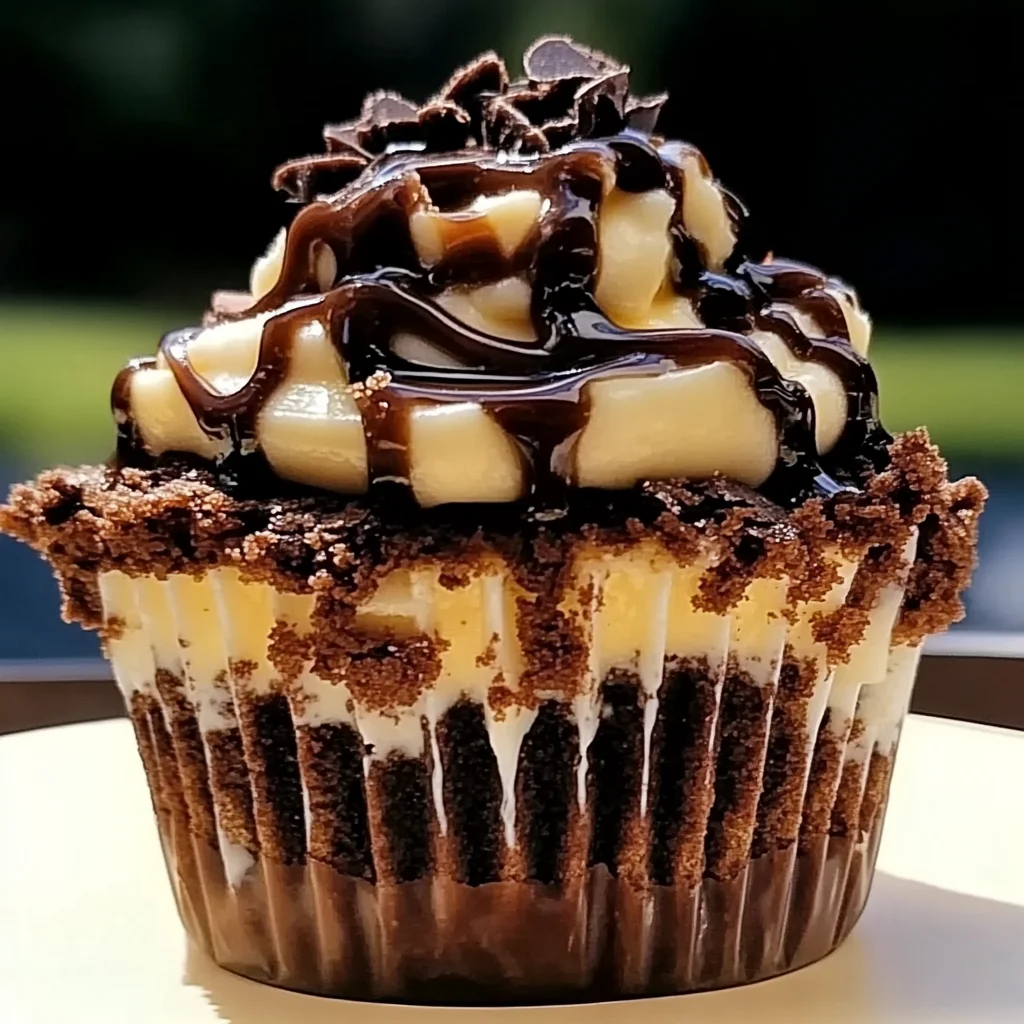
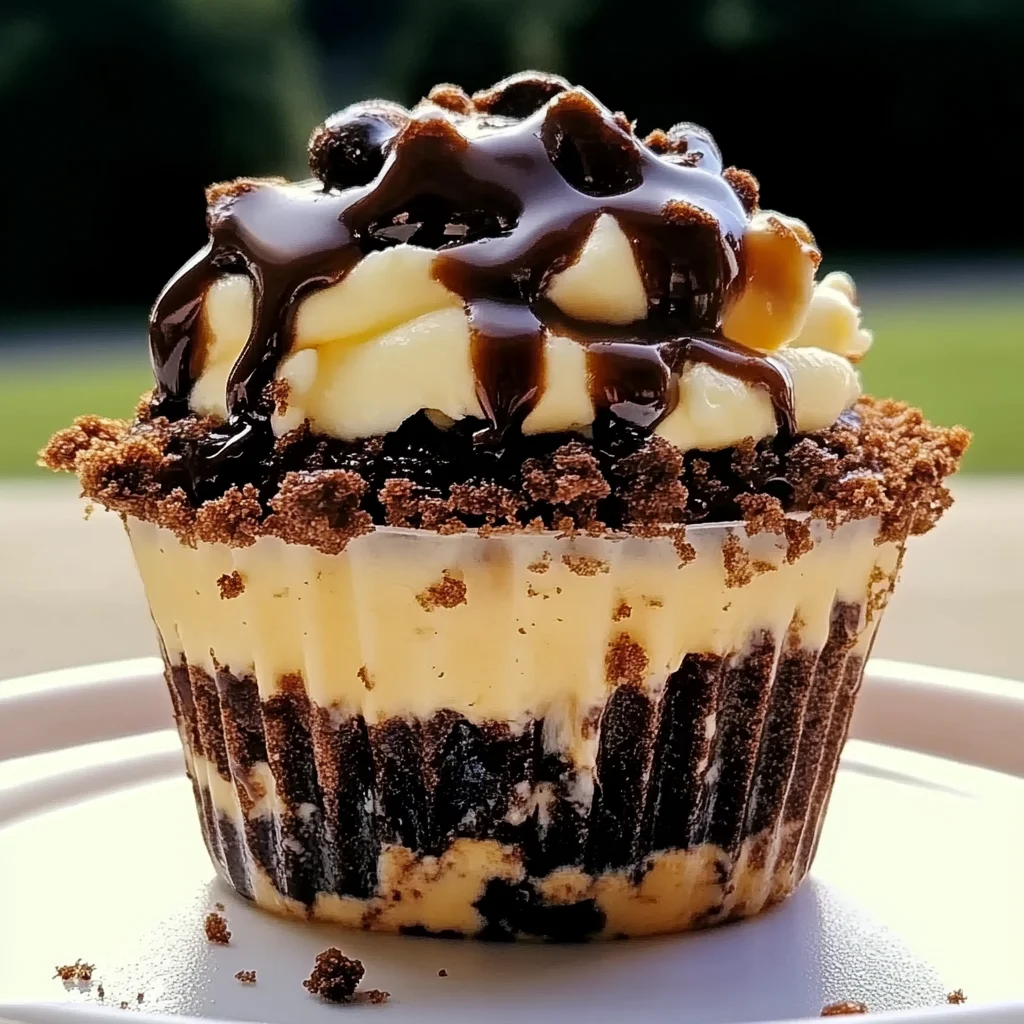
- Layer Up the Goodness: Now for the assembly line! Grab your favorite individual serving cups – mason jars, cute dessert glasses, or even small bowls work perfectly. You’ll start by placing a generous layer of those fudgy crumbled brownies at the bottom of each cup. This is your delicious base. Next, either spoon or pipe (if you’re feeling fancy, a piping bag makes it look extra professional!) a luscious layer of your freshly made cheesecake filling over the brownies. Now for the fun part: drizzle a little chocolate ganache and some gooey caramel sauce over the cheesecake layer. Oh, the anticipation! Repeat these layers – brownie, cheesecake, ganache, caramel – until your cups are beautifully full.
- Chill Out and Serve: Once your layers are all set, it’s time for the final touches. Garnish the very top with some extra brownie crumbs for texture, and don’t be shy with another drizzle of chocolate ganache and caramel sauce. They deserve it! Now, pop these beauties into the refrigerator. They need at least 1 hour to chill and set up nicely. This waiting game is the hardest part, I swear! Once they’re perfectly chilled, grab a spoon and dive into your new favorite dessert. Enjoy every single bite!
Substitutions & Additions
The beauty of these Loaded Brownie Cheesecake Cups is how versatile they are! Think of this recipe as a delicious canvas for your creativity.
- Brownie Base: Not feeling brownies? No problem! You can totally swap them out for crushed Oreo cookies, graham cracker crumbs, or even chunks of your favorite chocolate chip cookies.
- Cheesecake Flavors: Want to switch up the cheesecake? A hint of almond extract instead of vanilla, or even a teaspoon of espresso powder, could be delightful! For another fantastic no-bake dessert that plays with creamy flavors, you might love my Easy No-Bake Caramel Pretzel Bars too!
- Topping Extravaganza: This is where you can really go wild!
- Candy Bars: Chop up Snickers, Reese’s peanut butter cups, or Kit Kats for a candy-lover’s dream.
- Nuts: Toasted pecans, walnuts, or slivered almonds add a lovely crunch.
- Fruit: Fresh raspberries or strawberries would cut through the richness beautifully.
- Other Sauces: Raspberry coulis, white chocolate sauce, or even a peanut butter drizzle!
- Whipped Cream: A dollop of extra whipped cream on top never hurts!
Tips for Success
Making these cheesecake cups is pretty straightforward, but a few little pointers can ensure they turn out absolutely perfect every single time.
- Softened Cream Cheese is Key: I can’t stress this enough! If your cream cheese isn’t soft enough, you’ll end up with lumps in your filling. Let it sit on the counter for at least an hour before you start.
- Don’t Overmix the Whipped Cream: When you fold in the whipped heavy cream, be gentle! Overmixing can deflate all that lovely air, making your cheesecake filling less light and fluffy.
- Chill Time Matters: Rushing the chilling process means a softer, less set cheesecake. Give it at least an hour, or even better, two, for optimal texture. If you’re a fan of rich, chilled desserts, you’ll definitely appreciate the structure that proper chilling brings, much like the layers in a No-Bake Chocolate Lasagna.
- Prep Ahead: You can prepare the crumbled brownies and even the chocolate ganache and caramel sauce a day or two in advance. Store them separately, and then assemble your cups closer to serving time for maximum freshness.
- Portion Control: These are rich! Using smaller cups can be a great way to enjoy this decadent treat without going overboard.
How to Store Loaded Brownie Cheesecake Cup
Got leftovers? Lucky you! These cheesecake cups store wonderfully, so you can enjoy them for a few days.
- Refrigerator: Keep them covered tightly with plastic wrap or in an airtight container in the refrigerator for up to 3-4 days. The brownie layer might get a tiny bit softer, but the flavors will still be absolutely delicious.
- Freezing: While you can freeze these, the texture of the cream cheese might change slightly upon thawing. If you choose to freeze, cover them very tightly and store for up to 1 month. Thaw in the refrigerator overnight before enjoying.
FAQs
Here are some quick answers to common questions you might have about these delightful cups!
Q: Can I use store-bought brownies?
A: Absolutely! Store-bought fudgy brownies are a fantastic shortcut and work perfectly for this recipe. It makes these cups even faster to assemble.
Q: How can I make my own chocolate ganache?
A: It’s super easy! Heat about 1/2 cup heavy cream until simmering, then pour it over 1 cup of chocolate chips (semi-sweet or dark). Let it sit for 5 minutes, then whisk until smooth and glossy. Let it cool slightly before drizzling.
Q: Can I make these in a larger dish instead of individual cups?
A: Yes, you can! Layer everything into a large trifle dish or a 9×13 inch baking dish for a delicious “Brownie Cheesecake Lush” style dessert. Just make sure to adjust your serving sizes accordingly!
Q: Are these good for meal prepping or making ahead for a party?
A: They are absolutely perfect for making ahead! Assemble them a day before your event, cover them, and keep them chilled in the refrigerator. They’ll be ready to impress when it’s time to serve.
For more delicious recipes and kitchen inspiration, be sure to follow us on Pinterest!
Decadent No-Bake Loaded Brownie Cheesecake Cups
Ingredients
Equipment
Method
- Step 1: In a medium bowl, beat softened cream cheese, powdered sugar, and vanilla extract until super smooth and creamy. In a separate bowl, whip heavy cream until it forms stiff peaks. Gently fold the whipped cream into the cream cheese mixture until just combined, being careful not to overmix.
- Step 2: Grab individual serving cups (mason jars, dessert glasses, or small bowls). Place a generous layer of fudgy crumbled brownies at the bottom of each cup. Spoon or pipe a luscious layer of cheesecake filling over the brownies. Drizzle with chocolate ganache and caramel sauce. Repeat these layers until your cups are beautifully full.
- Step 3: Garnish the top with extra brownie crumbs and another drizzle of chocolate ganache and caramel sauce. Pop these beauties into the refrigerator for at least 1 hour to chill and set up nicely. Serve immediately once chilled.