There’s something incredibly comforting about the smell of freshly baked cookies wafting through your home. It instantly takes me back to childhood afternoons spent sneaking spoonfuls of dough and eagerly waiting for the timer to ring. If you’re like me, you love a cookie that’s both simple to make and bursting with flavor—one that makes everyone ask for “just one more.” That’s exactly why these Peanut Butter Butterfinger Cookies have become a personal favorite. They’re quick to whip up, packed with that rich peanut butter goodness, and studded with crunchy Butterfinger candy pieces that add the perfect nostalgic crunch.
Whether you’re baking for a last-minute gift, a cozy night in, or a festive gathering, these cookies are the kind of treat that feels like a warm hug. And the best part? They’re incredibly easy to make, even if you’re just starting your baking journey. So grab your mixing bowl, and let’s dive into a recipe that’s sure to become a new classic in your cookie repertoire!
Why You’ll Love Peanut Butter Butterfinger Cookies
- Fast: Ready to bake in under 20 minutes, perfect for when cravings hit.
- Easy: Minimal ingredients and straightforward steps make baking stress-free.
- Giftable: These cookies make a charming homemade gift that anyone will appreciate.
- Crowd-pleasing: The peanut butter and Butterfinger combo is a guaranteed hit with kids and adults alike.
Ingredients
Before you start mixing, let’s take a look at the ingredients that make these cookies so irresistible:
- Unsalted butter: Using softened butter helps create that soft, chewy texture we all love in cookies.
- Granulated sugar and light brown sugar: This duo balances sweetness and moisture for the perfect cookie bite.
- Creamy peanut butter: The star of the show! It gives the cookies a rich, nutty flavor and tender crumb.
- Large egg: Acts as a binder and adds moisture, so make sure it’s at room temperature for best mixing.
- Pure vanilla extract: Enhances all the other flavors and adds that warm, sweet aroma.
- All-purpose flour: The base that holds everything together; spooned and leveled for accuracy.
- Baking soda and baking powder: These help the cookies rise just right and keep them from being too dense.
- Kosher salt: A small amount balances sweetness and brings out the peanut butter flavor.
- Butterfinger candy: Chopped into pieces, these add a fun, crunchy texture and that classic candy bar flavor that’s hard to beat.
How to Make Peanut Butter Butterfinger Cookies
Now for the fun part! Baking these cookies is a breeze when you follow these simple steps:
- Preheat your oven to 350°F (175°C) and line two large baking sheets with parchment paper. This prevents sticking and helps the cookies bake evenly.
- Beat the butter: In a large bowl, beat your softened butter on medium speed until it’s smooth and creamy. This usually takes about a minute.
- Add sugars: Toss in the granulated sugar and light brown sugar. Beat this mixture for around 2 minutes until it’s light, fluffy, and oh-so-silky. Don’t forget to scrape down the sides of your bowl to get everything mixed well.
- Mix in peanut butter: Add the creamy peanut butter and beat until it’s fully blended with the butter and sugars.
- Incorporate egg and vanilla: Crack in your room temperature egg and pour in the vanilla extract. Mix until everything is combined, scraping the bowl once more to catch any lingering bits.
- Add the dry ingredients: Instead of mixing the flour, baking soda, baking powder, and salt together separately, sprinkle the baking soda, baking powder, and salt over the flour right in the bowl. Gently stir these dry ingredients on top of the flour to distribute evenly.
- Combine wet and dry: Mix on low speed just until the dough starts to come together. It’s okay if you see a few streaks of flour—overmixing can lead to tough cookies.
- Fold in Butterfinger: Gently fold in the chopped Butterfinger candy pieces. This is where the magic happens—the candy bits add delightful crunch and flavor in every bite.
- Shape your cookies: Using a large cookie scoop (about 2 tablespoons), drop dough balls onto the prepared baking sheets. Leave about 2 inches of space between each cookie to allow for spreading.
- Bake: Place one baking sheet at a time in the center of your oven. Bake for 10 to 12 minutes, or until the edges are set and lightly golden, while the centers remain soft and tender.
- Cool and press: Let the cookies cool on the baking sheet for at least 10 minutes. If you want to give them a beautiful presentation, gently press the cookies down with a spatula right after baking and add a few more Butterfinger pieces on top.
- Transfer to wire rack: Once slightly cooled and firm, move the cookies to a wire rack to cool completely before enjoying.
I love how these cookies come out soft with just the right amount of chewiness, and the Butterfinger pieces keep their crunch perfectly. If you want to explore more cozy cookie recipes, you might enjoy my take on giant chocolate chip cookies—they’re a crowd-pleaser too!

Substitutions & Additions
Feel like putting your own spin on these Peanut Butter Butterfinger Cookies? Here are some substitutions and creative upgrades to try:
- Nut butters: Swap creamy peanut butter for almond butter or sunflower seed butter if you want a twist or need a peanut-free option.
- Butterfinger alternatives: If Butterfinger candy isn’t available, chopped Heath bars or even crunchy peanut butter cups work wonderfully.
- Adding chocolate: For extra indulgence, fold in semi-sweet chocolate chips or drizzle melted chocolate over cooled cookies.
- Texture boosters: Toss in chopped roasted peanuts or mini toffee bits for added crunch and flavor variety.
- Sweetener swaps: You can replace light brown sugar with coconut sugar for a subtle caramel note and a slightly healthier option.
- Flour options: For a gluten-free twist, try a 1:1 gluten-free baking flour blend, but be sure to check that your other ingredients are gluten-free too!
One thing I’ve found helpful is experimenting with mix-ins. If you love rich, creamy desserts, you might also want to check out my no-bake peanut butter pie for a luscious treat that requires zero oven time.
Tips for Success
These tips come from my own baking adventures and will help you get the best results every time:
- Softened butter is key: Make sure your butter is soft, not melted. This helps create a light, fluffy dough that yields soft cookies.
- Don’t overmix: When you add the flour and leavening, mix just until combined. Overworking the dough can make cookies tough.
- Room temperature egg: Using an egg straight from the fridge can cause the dough to seize or the batter to mix unevenly.
- Use parchment paper or silicone mats: This prevents sticking and helps the cookies bake evenly without burning on the bottom.
- One sheet at a time: Baking one tray at a time in the center of the oven ensures even heat and perfect baking.
- Press candy pieces after baking: For a pretty presentation and extra candy on top, gently press more Butterfinger pieces on warm cookies before cooling.
- Prep ahead: You can portion your cookie dough balls and freeze them on a baking sheet. Once frozen, transfer to a sealed bag. Bake from frozen, adding a couple of minutes to the baking time.
If you enjoy making sweet treats that are both easy and indulgent, you might love my cozy and simple soft chewy pumpkin spice sugar cookies—perfect for chilly evenings!
How to Store Peanut Butter Butterfinger Cookies
Storing your cookies properly is essential to keep them fresh and delicious for days. Here’s how to best store Peanut Butter Butterfinger Cookies:
- Room temperature: Store cookies in an airtight container at room temperature for up to 4 days. Adding a slice of bread inside the container can help keep them soft by absorbing excess moisture.
- Refrigeration: If you want them to last longer, you can refrigerate them for up to a week, but be aware they might firm up a bit. Let them come to room temperature before serving for best texture.
- Freezing: These cookies freeze beautifully! Place them in a single layer on a baking sheet to freeze, then transfer to a freezer-safe bag or container. They’ll keep for up to 3 months. Thaw at room temperature or warm briefly in the microwave.
Keeping these storage tips in mind means you can enjoy these delightful cookies over several days or save some for a sweet surprise later on.
FAQs
Can I use crunchy peanut butter instead of creamy?
Absolutely! Using crunchy peanut butter will add a bit more texture to the cookies, making them even more interesting. Just be aware it might slightly change the dough consistency.
Can I make these cookies vegan?
To make this recipe vegan, you can swap the butter for a plant-based alternative and use a flax or chia egg instead of a regular egg. However, Butterfinger candy contains dairy, so you might want to substitute with a vegan-friendly candy or chocolate.
Why are my cookies spreading too much?
If your cookies are spreading too much, it could be due to butter being too soft or the dough being too warm. Chill the dough for 15-30 minutes before baking to help control spreading.
Can I double this recipe?
Yes! Doubling the recipe works great. Just be sure to mix the dough thoroughly and bake in batches for even cooking. You might need to adjust baking times slightly depending on your oven.
If you love discovering new recipes and creative ideas, don’t forget to explore the amazing collection at Recettia where you can find everything from savory meals like one-pot smoky BBQ meatball pasta to sweet delights like the pineapple cream cheese pound cake. There’s a recipe for every craving and occasion!
Happy baking, my friend! I hope these Peanut Butter Butterfinger Cookies bring a little extra sweetness and joy to your kitchen.
Don’t forget to follow us on Pinterest for more delicious recipes, tips, and kitchen inspiration!
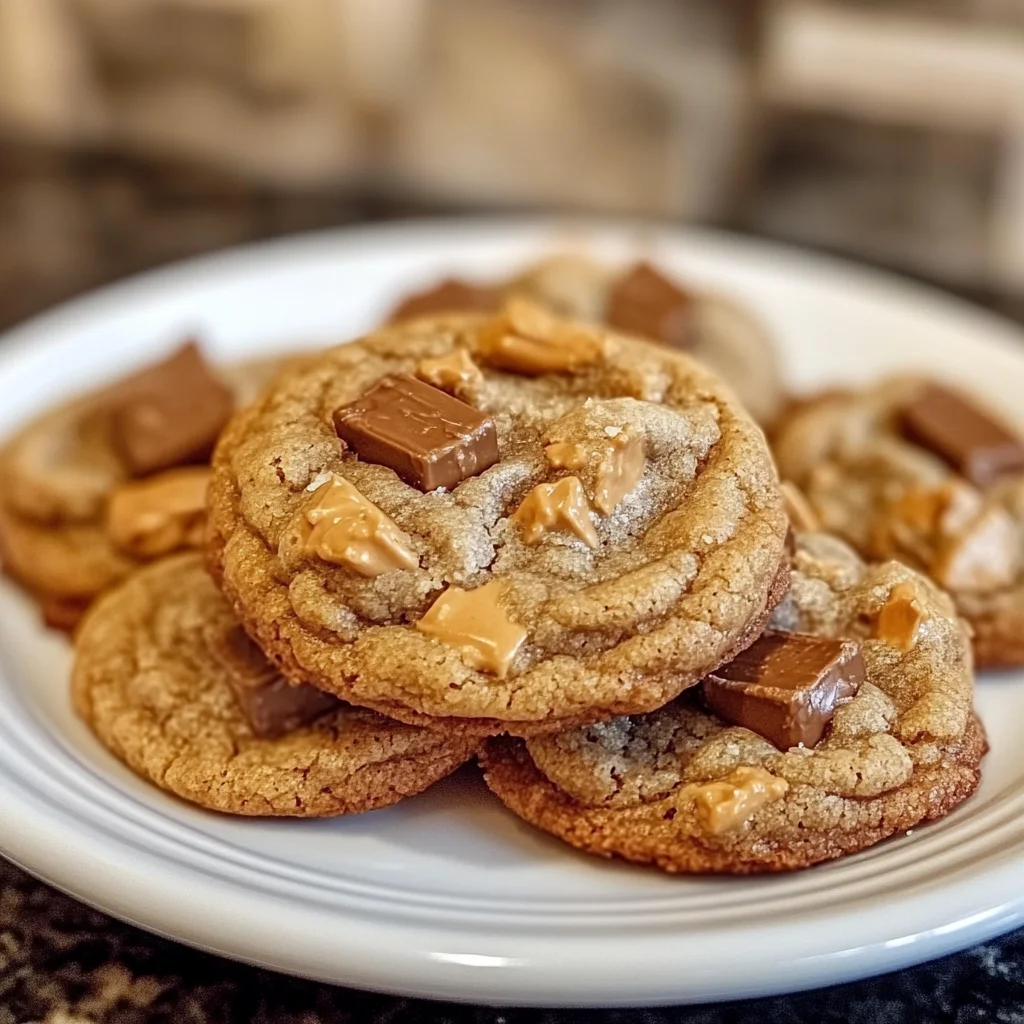
Peanut Butter Butterfinger Cookies
Ingredients
Equipment
Method
- Step 1: Preheat your oven to 350°F (175°C) and line two large baking sheets with parchment paper.
- Step 2: Beat the softened butter in a large bowl on medium speed until smooth and creamy, about 1 minute.
- Step 3: Add granulated sugar and light brown sugar, then beat for about 2 minutes until light and fluffy, scraping down the bowl as needed.
- Step 4: Mix in creamy peanut butter until fully combined with the butter and sugars.
- Step 5: Add the egg and vanilla extract, mixing until combined, scraping the bowl once more to incorporate all ingredients.
- Step 6: Sprinkle baking soda, baking powder, and kosher salt over the flour in the bowl and gently stir to distribute evenly.
- Step 7: Mix on low speed just until the dough starts to come together; some streaks of flour are okay.
- Step 8: Gently fold in chopped Butterfinger candy pieces for crunch and flavor.
- Step 9: Using a large cookie scoop (about 2 tablespoons), drop dough balls onto the baking sheets, spacing about 2 inches apart.
- Step 10: Bake one sheet at a time in the center of the oven for 10 to 12 minutes, until edges are set and lightly golden but centers remain soft.
- Step 11: Let cookies cool on the baking sheet for at least 10 minutes. Optionally, gently press more Butterfinger pieces on top while warm.
- Step 12: Transfer cookies to a wire rack to cool completely before enjoying.