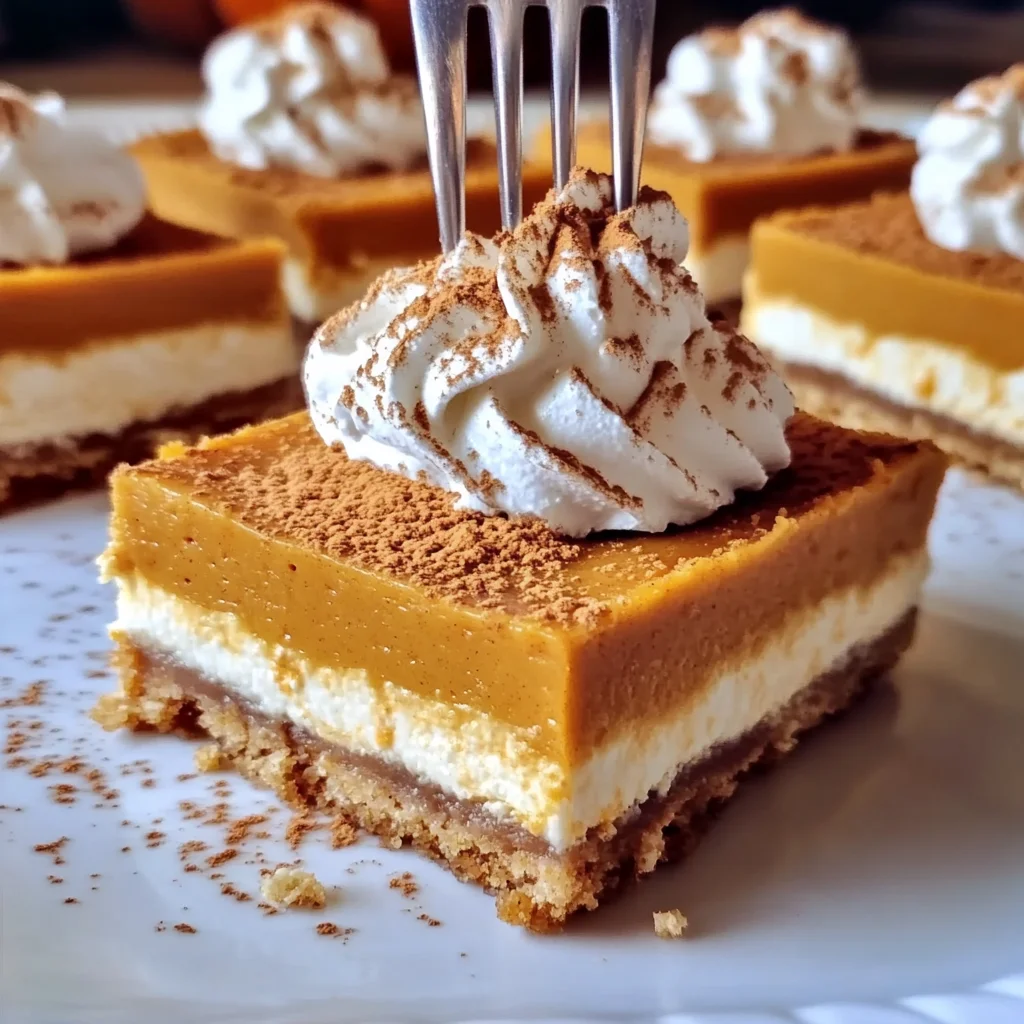
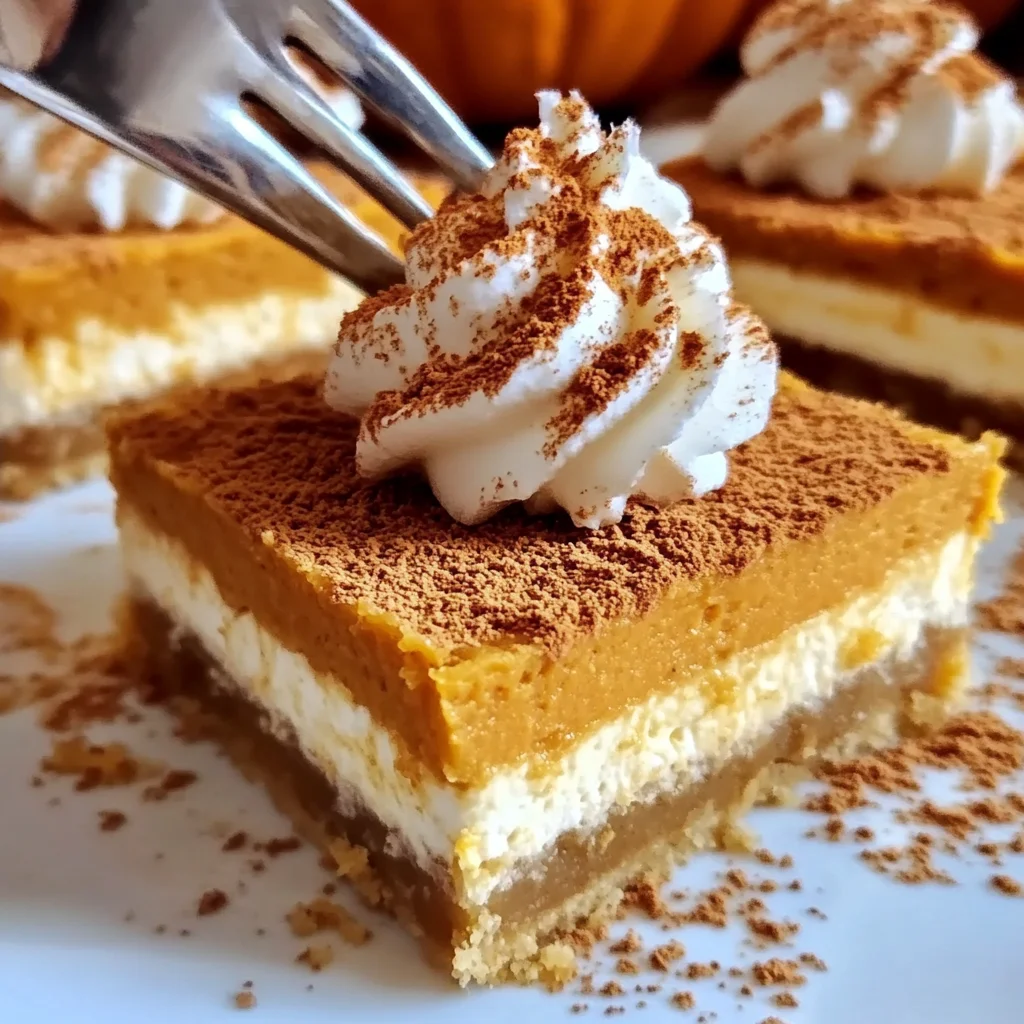
Oh, friend, there’s just something magical about autumn, isn’t there? The crisp air, the cozy sweaters, and of course, all those wonderful pumpkin spice smells wafting from the kitchen. But let’s be real, sometimes you want that incredible taste of fall without turning on the oven, especially when life gets busy. That’s where these incredible No-Bake Pumpkin Pie Cheesecake Bars come in! I’m telling you, this recipe is a total game-changer. It brings all the creamy, dreamy flavors of pumpkin pie and cheesecake together in one unbelievably easy-to-make bar. You’ll be amazed at how quickly you can whip up this crowd-plepleasing dessert, perfect for a weeknight treat or a holiday gathering!
Why You’ll Love No Bake Pumpkin Pie Cheesecake Bars
- Fast: Seriously, these come together in a flash. No baking time needed!
- Easy: With simple ingredients and straightforward steps, anyone can make these.
- Giftable: These beautiful bars make wonderful edible gifts for neighbors or friends.
- Crowd-pleasing: Who doesn’t love the combination of pumpkin, cheesecake, and graham cracker crust? They disappear fast!
- No Oven Required: Keep your kitchen cool and your energy bills low!
Ingredients
Gathering your ingredients is half the fun! Here’s what you’ll need to create these delightful bars:
- For the Crust:
- 12 full graham cracker sheets: You’ll want to crush these into fine crumbs. A food processor works wonders, but a zip-top bag and a rolling pin do the trick too!
- 8 tablespoons (1 stick) unsalted butter, melted: This binds the crust together, giving it that perfect buttery crunch.
- For the Cream Cheese Layer:
- 24 ounces cream cheese (3 blocks), softened: Make sure it’s properly softened at room temperature – it makes for a much smoother, lump-free filling!
- 3 tablespoons granulated sugar: Just enough sweetness to balance the tang of the cream cheese.
- 3 tablespoons milk: Helps achieve that perfect creamy consistency.
- 1 teaspoon vanilla extract: A classic flavor enhancer that makes everything taste better.
- 8 ounces frozen whipped topping, thawed: Like Cool Whip! Gently folding this in keeps the cream cheese layer light and airy.
- For the Pumpkin Layer:
- 30 ounces pumpkin puree (not pie filling): This is crucial! You want pure pumpkin, not the pre-spiced pie filling.
- 2 cups milk: The base for our pudding mix.
- 10.2 ounces instant vanilla pudding mix (two 5.1 oz boxes): This is our thickening agent and adds a lovely vanilla sweetness.
- 2 teaspoons ground cinnamon: Essential for that warm, inviting fall flavor.
- 2 teaspoons pumpkin pie spice: The ultimate autumn spice blend to truly make these bars sing!
How to Make No Bake Pumpkin Pie Cheesecake Bars
Let’s get cooking (or rather, no-cooking)! You’ll be amazed at how simple these steps are.
- First things first, let’s get that crust ready! In a medium bowl, combine your finely crushed graham cracker crumbs with the melted butter. Give it a good mix until everything is well coated. Now, firmly press this mixture into the bottom of a greased 9×13-inch pan. I like to use the bottom of a glass or a flat measuring cup to really get it packed down evenly. Once that’s done, pop it into the refrigerator to chill while you prepare the fillings.
- Next up, the dreamy Cream Cheese Layer! Grab a large bowl and your electric mixer. Add the softened cream cheese, granulated sugar, milk, and vanilla extract. Beat these together until the mixture is beautifully smooth and creamy – no lumps allowed! Then, with a gentle hand, fold in the thawed whipped topping. You want to keep it light and fluffy. Carefully spread this luscious cream cheese mixture evenly over your chilled graham cracker crust.
- Now for the star of the show: the Pumpkin Layer! In another bowl, whisk together the pumpkin puree, milk, both boxes of instant vanilla pudding mix, ground cinnamon, and pumpkin pie spice. Whisk vigorously for a couple of minutes until the mixture starts to thicken up nicely. It’ll go from watery to a delicious, pudding-like consistency. Once it’s thickened, carefully spread this vibrant pumpkin layer over your cream cheese layer.
- The hardest part is waiting! Cover the pan loosely with plastic wrap and refrigerate for at least 4 hours. But honestly, if you can wait, letting them chill overnight truly makes all the flavors meld together perfectly and ensures they slice beautifully. When you’re ready, slice them into bars and serve!
Substitutions & Additions
One of the joys of cooking is making a recipe your own! Here are a few ideas to customize your no-bake pumpkin bars:
- Crust Variations: Not a fan of graham crackers? You could try crushed gingersnap cookies or shortbread cookies for a different twist. Just use the same amount of crumbs and melted butter.
- Spice it Up: If you love a bolder spice profile, feel free to add a pinch of ground ginger or nutmeg to your pumpkin layer.
- Toppings Galore: Before serving, consider a dusting of cinnamon, a dollop of extra whipped cream, a sprinkle of toasted pecans, or a drizzle of caramel sauce for an extra special touch.
- Make it Individual: Instead of a 9×13 pan, you could layer these in individual ramekins or small glass jars for adorable single-serving treats, much like our No-Bake Mini Tiramisu Domes!
Tips for Success
- Soften Cream Cheese: I can’t stress this enough! Room temperature cream cheese is key for a smooth, lump-free cheesecake layer. Take it out of the fridge at least an hour before you start.
- Read the Pudding Box: Double-check that you’re using instant pudding mix, not cook-and-serve. The instant variety sets up much quicker and without heat.
- Chill Time is Crucial: Don’t skimp on the refrigeration time. This allows both layers to firm up properly, making for neat, easy slices.
- Grease Your Pan: A little cooking spray or butter on your pan will make removing the bars much easier. You can also line the pan with parchment paper, leaving an overhang on the sides, to easily lift out the entire slab before cutting.
- Clean Slices: For super clean slices, run your knife under hot water and wipe it clean between each cut.
How to Store No Bake Pumpkin Pie Cheesecake Bars
These bars are best enjoyed chilled! Store any leftovers in an airtight container in the refrigerator for up to 3-4 days. While they’re technically safe to eat longer, the crust can get a bit soft after a few days. I honestly don’t think you’ll have to worry about them lasting that long anyway!
FAQs
Q: Can I use real whipped cream instead of frozen whipped topping?
A: You can, but it might not hold up as well over time. Frozen whipped topping (like Cool Whip) is more stable and helps the cream cheese layer maintain its texture longer. If you do use fresh whipped cream, make sure it’s very stiffly whipped.
Q: What if I can’t find pumpkin pie spice?
A: No problem! You can easily make your own by combining 1 ½ teaspoons ground cinnamon, ¼ teaspoon ground nutmeg, ¼ teaspoon ground ginger, and a pinch of ground cloves. This homemade blend works wonderfully in this recipe and even in other fall favorites like this Better Than Anything Pumpkin Cake!
Q: Can I freeze these No Bake Pumpkin Pie Cheesecake Bars?
A: Yes, you can! Wrap the entire pan or individual bars tightly in plastic wrap and then aluminum foil. They can be frozen for up to 1 month. Thaw them in the refrigerator overnight before serving. They make a great make-ahead option, similar to how I often prep a batch of No-Bake Peanut Butter Pie for unexpected guests!
Q: How do I ensure my graham cracker crust doesn’t get soggy?
A: Pressing the crust very firmly into the pan is key! This helps create a dense barrier. Also, chilling it thoroughly before adding the wet layers gives it a head start. If you’re really concerned, you can brush a thin layer of melted white chocolate over the chilled crust before adding the filling, but I find it’s usually not necessary for this recipe.
For more delicious recipes and kitchen inspiration, be sure to follow us on Pinterest!
No-Bake Pumpkin Pie Cheesecake Bars
Ingredients
Equipment
Method
- Step 1: Get the Crust Ready. In a medium bowl, combine finely crushed graham cracker crumbs with the melted butter. Mix until well coated. Firmly press this mixture into the bottom of a greased 9x13-inch pan, using the bottom of a glass or flat measuring cup to pack it down evenly. Pop it into the refrigerator to chill while preparing the fillings.
- Step 2: Prepare the Cream Cheese Layer. In a large bowl, using an electric mixer, beat softened cream cheese, granulated sugar, milk, and vanilla extract until beautifully smooth and creamy. Gently fold in the thawed whipped topping to keep it light and fluffy. Carefully spread this luscious cream cheese mixture evenly over your chilled graham cracker crust.
- Step 3: Make the Pumpkin Layer. In another bowl, whisk together the pumpkin puree, milk, both boxes of instant vanilla pudding mix, ground cinnamon, and pumpkin pie spice. Whisk vigorously for a couple of minutes until the mixture thickens into a delicious, pudding-like consistency. Carefully spread this vibrant pumpkin layer over your cream cheese layer.
- Step 4: Chill and Serve. Cover the pan loosely with plastic wrap and refrigerate for at least 4 hours. For best results and perfectly melded flavors, chill overnight. When ready, slice them into bars and serve immediately.