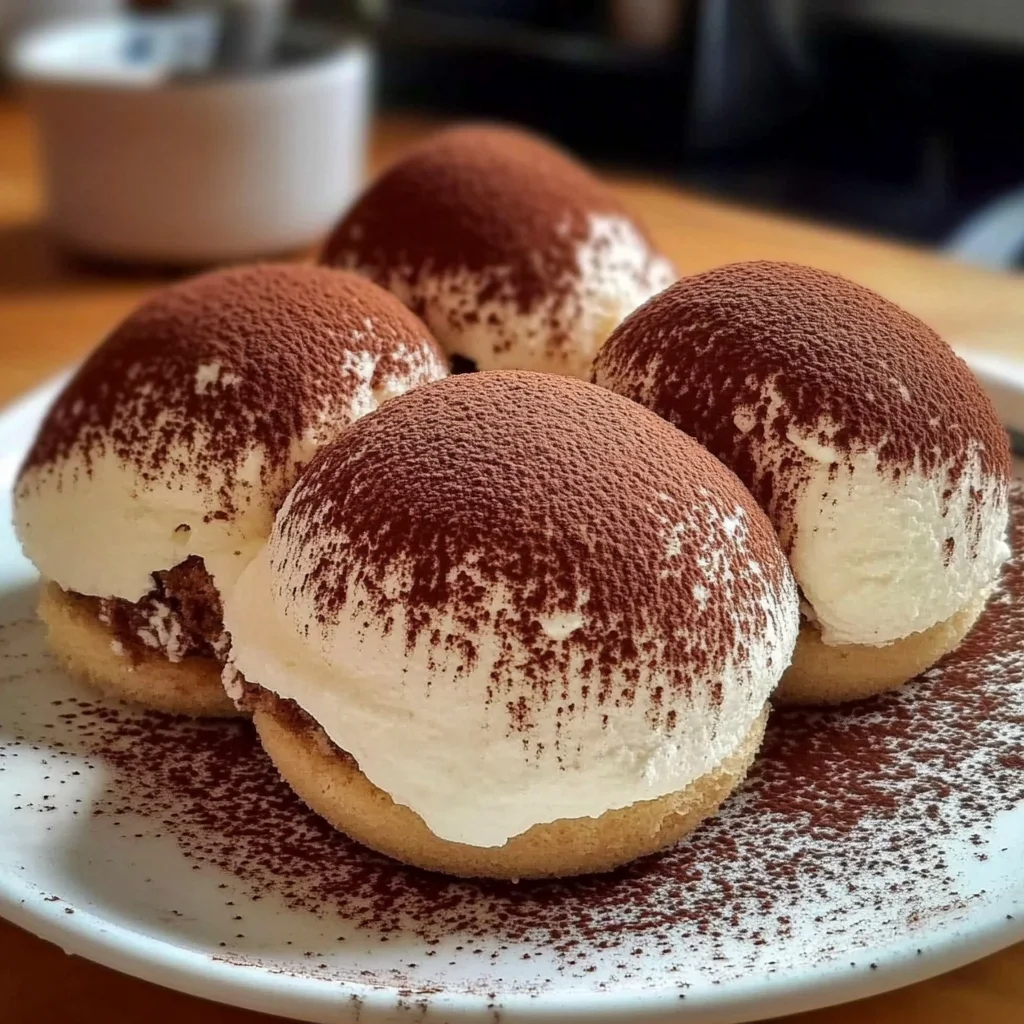
Remember those cozy evenings, gathered around the table, the air thick with laughter and the comforting aroma of coffee and something sweet? For me, a classic tiramisu always brings back those cherished memories. It’s rich, it’s creamy, it’s got that perfect coffee kick, but let’s be honest, sometimes the traditional preparation can feel like a bit of a project. Well, guess what, my friends? I’m about to introduce you to a game-changer: Tiramisu Domes! These little beauties capture all the magic of your favorite Italian dessert in individual, adorable, and super easy portions. No baking, minimal fuss, and maximum flavor – seriously, your dessert game is about to get a major upgrade. You’ll be amazed at how quickly you can whip up these memorable treats!
Why You’ll Love Tiramisu Domes
- Fast: Seriously, these come together quicker than you might think!
- Easy: No fancy techniques, just simple steps to deliciousness.
- Giftable: Pop them in a cute box, and you’ve got the perfect homemade present.
- Crowd-pleasing: Who doesn’t love individual, perfectly portioned desserts?
Ingredients
Alright, let’s gather our simple treasures for these Tiramisu Domes. You don’t need a pantry full of exotic items for this, just a few key players that create pure magic!
- For the Cream Filling:
- 250 g (1 cup) Mascarpone Cheese: This is the star of our show, giving that signature rich, creamy texture. Make sure it’s at room temperature for easy blending!
- 200 ml (¾ cup) Heavy Cream, chilled: Our secret to fluffy, dreamy cream. Keep it nice and cold until you’re ready to whip it up.
- 70 g (⅓ cup) Sugar: Just enough sweetness to balance the richness.
- 2 Egg Yolks (pasteurized if possible): These add to the luxurious texture and classic tiramisu flavor. Using pasteurized yolks is a great safety tip for no-bake recipes.
- 1 tsp Vanilla Extract: A touch of warmth and aromatic sweetness.
- For the Coffee Layer:
- 100 ml Strong Espresso or Coffee, cooled: The heart and soul of tiramisu! Make it strong – a good quality brew makes all the difference.
- 1 tbsp Sugar: To sweeten our coffee dip just a tad.
- 6–8 Ladyfinger Biscuits (Savoiardi): These light, airy cookies are perfect for soaking up all that wonderful coffee flavor.
- For the Assembly:
- Unsweetened Cocoa Powder: For that iconic dusty finish. Don’t skip it!
- Optional: Coffee Beans or Chocolate Shavings: For a fancy touch – totally up to you!
How to Make Tiramisu Domes
Ready to get started? This is where the fun really begins! Follow these steps, and you’ll have a dessert that looks like you spent hours on it, but is actually super straightforward.
- Whip Up the Yolks: Grab a mixing bowl and whisk those egg yolks and sugar together. You want them to turn pale and beautifully creamy. Keep whisking until they look light and fluffy – this incorporates air and dissolves the sugar.
- Add the Mascarpone Magic: Now, add your room-temperature mascarpone cheese and that lovely vanilla extract to your yolk mixture. Blend it until everything is wonderfully smooth. No lumps allowed! This rich base is what makes tiramisu so decadent.
- Whip the Cream: In a separate, clean, and cold bowl (a chilled metal bowl works wonders!), whip your super chilled heavy cream until it forms stiff peaks. You’ll know it’s ready when you can pull your whisk out, and the peaks hold their shape beautifully.
- Fold It In: Time for the grand union! Gently, gently fold your whipped cream into the mascarpone mixture. Take your time here; you don’t want to deflate all that lovely air you just whipped in. Once it’s just combined, pop that gorgeous cream into the fridge to chill while we prep the rest. If you’re looking for more quick and delicious ideas, you’ll love my recipe for no-bake chocolate lasagna!
- Sweeten the Coffee: In another small bowl, mix your cooled, strong espresso or coffee with the extra tablespoon of sugar until it’s completely dissolved. This coffee mixture is going to be the flavor bomb for our ladyfingers.
- Dip the Ladyfingers: This step is key! Quickly dip each ladyfinger into the coffee mixture. You literally want a quick dunk – a second or two on each side. If you soak them too long, they’ll get soggy, and we want them to hold their shape. Personal tip: I often do a quick count in my head, “one-thousand-one, one-thousand-two,” and then flip!
- Line Your Molds: Now for the dome creation! Line your silicone dome molds or small, individual bowls with the dipped ladyfingers. You’re creating a little edible shell for our cream. Make sure they fit snugly. If you’re looking for other easy no-bake treats, you might enjoy making some easy no-bake caramel pretzel bars – they’re another fantastic option for when you want a quick dessert!
- Fill ‘Em Up: Spoon or pipe that dreamy mascarpone cream filling into each ladyfinger shell. Fill them up generously – this is the good stuff!
- Cap It Off: Cover the cream filling with another quickly-dipped ladyfinger, or if your mold allows, fill the dome completely with more cream for a smoother top.
- Chill Out (Literally!): Pop your filled domes into the freezer for about 2 hours, or until they are nice and firm. This firming time is crucial for easy unmolding and holding their beautiful shape.
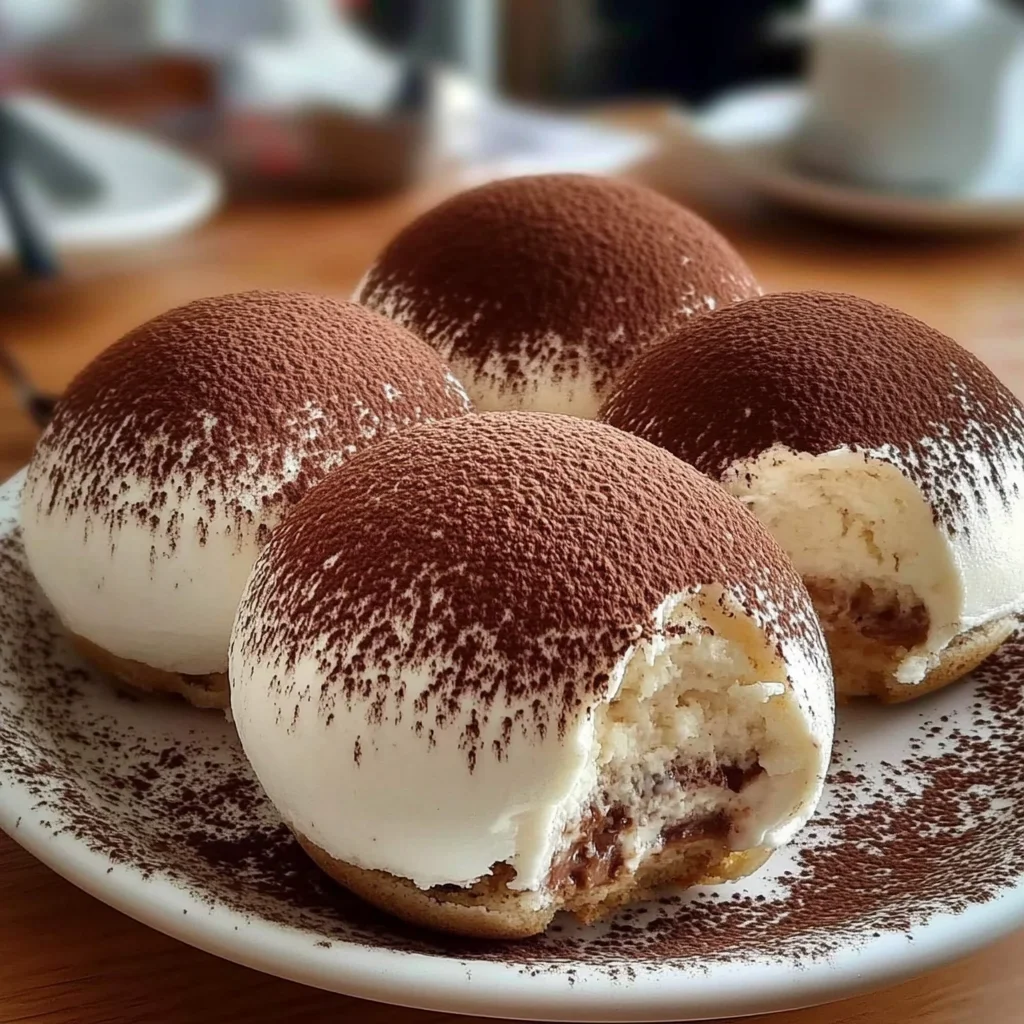
- Unmold and Dust: Once firm, carefully unmold your tiramisu domes. They should release pretty easily from silicone molds. Then, with a fine-mesh sieve, generously dust each dome with unsweetened cocoa powder. This gives them that classic tiramisu look and a lovely bitter contrast.
- Garnish and Serve: If you’re feeling fancy, garnish with a few whole coffee beans or some delicate chocolate shavings. Serve these beauties chilled! They’re perfect for a special occasion or just because. You can find more delicious and simple recipes, like this ultimate classic carrot cake, over on my main blog page!
Substitutions & Additions
Part of the fun of cooking (and dessert-making!) is making a recipe your own. Here are a few ideas to customize your Tiramisu Domes:
- Coffee Alternatives: Not a coffee fan? No problem! You can dip your ladyfingers in chocolate milk, a light fruit juice (like orange or raspberry for a different twist), or even a little bit of your favorite liqueur like Kahlua or Amaretto for an adults-only version.
- Cream Cheesy Twist: If mascarpone is hard to find or a bit pricey, you can use a mix of cream cheese and heavy cream (about 1:1 ratio) for a slightly tangier, still delicious cream.
- Spice it Up: Add a pinch of cinnamon or a tiny dash of almond extract to your mascarpone cream for an extra layer of flavor.
- Topping Fun: Instead of just cocoa, try dusting with cinnamon, powdered sugar, or even finely chopped chocolate. For decoration, sprinkles or a drizzle of chocolate sauce would be lovely!
- Liqueur Boost: For an authentic Italian kick, a splash of Marsala wine or rum in your coffee dip is divine.
Tips for Success
Even though these Tiramisu Domes are super easy, a few little tricks can make them absolutely perfect every time!
- Chill Your Cream & Bowl: I can’t stress this enough! Cold heavy cream whips up faster and holds its shape better. A chilled mixing bowl and whisk attachments help tremendously.
- Don’t Over-Soak Ladyfingers: This is probably the most common mistake. Ladyfingers are like sponges – they’ll soak up liquid fast. A quick dip is all you need to keep them from becoming mushy.
- Room Temperature Mascarpone: While the heavy cream needs to be cold, your mascarpone will blend much smoother if it’s at room temperature. This prevents lumps in your beautiful cream filling.
- Gentle Folding: When you’re combining the whipped cream with the mascarpone mixture, fold it gently. You want to keep as much air in that whipped cream as possible for a light, airy texture.
- Prep Ahead: You can make the mascarpone cream mixture a day ahead and store it in the fridge. This makes assembly even quicker when you’re ready to serve.
How to Store Tiramisu Domes
These delicious domes are best enjoyed fresh, but they also store wonderfully for a few days, so you can make them ahead!
- Refrigeration: Store your Tiramisu Domes in an airtight container in the refrigerator for up to 3-4 days. Dust with cocoa just before serving if you like, as it can absorb moisture over time.
- Freezing: For longer storage, you can keep them in the freezer for up to 2-3 weeks. Wrap each dome individually in plastic wrap before placing them in an airtight container. Thaw in the refrigerator for a few hours before serving.
FAQs
Can I make Tiramisu Domes without eggs?
While egg yolks contribute to the classic richness, you can omit them if you prefer. Some recipes use only mascarpone, sugar, and whipped cream, or a small amount of sweetened condensed milk for richness. The texture might be slightly different but still delicious!
What if I don’t have silicone dome molds?
No problem at all! You can use small ramekins, teacups, or even line a muffin tin with plastic wrap to create individual portions. Just make sure to chill them thoroughly for easy unmolding. Alternatively, you could assemble them in a small baking dish for a more traditional tiramisu “slice” presentation.
Can I use regular coffee instead of espresso?
Absolutely! Just make sure it’s strong. Brew it a bit more concentrated than you usually would for drinking, as the flavor will be diluted slightly by the ladyfingers and cream.
Are Tiramisu Domes suitable for meal prepping?
Yes, they are! You can assemble them a day or two in advance and keep them chilled in the refrigerator. This makes them a perfect make-ahead dessert for parties or busy weeknights. Just dust with cocoa right before serving for the freshest look.
Craving more delicious and easy recipes? Be sure to follow us on Pinterest for daily inspiration!
Tiramisu Domes
Ingredients
Equipment
Method
- Step 1: Whip Up the Yolks: Grab a mixing bowl and whisk egg yolks and sugar together until they turn pale, light, and fluffy, ensuring the sugar is dissolved.
- Step 2: Add the Mascarpone Magic: Add room-temperature mascarpone cheese and vanilla extract to the yolk mixture. Blend until wonderfully smooth and lump-free.
- Step 3: Whip the Cream: In a separate, clean, and cold bowl, whip super chilled heavy cream until it forms stiff peaks that hold their shape.
- Step 4: Fold It In: Gently fold the whipped cream into the mascarpone mixture until just combined, being careful not to deflate the air. Chill the cream in the fridge.
- Step 5: Sweeten the Coffee: In another small bowl, mix the cooled, strong espresso or coffee with the extra tablespoon of sugar until fully dissolved.
- Step 6: Dip the Ladyfingers: Quickly dip each ladyfinger into the coffee mixture, for only a second or two on each side, to prevent sogginess.
- Step 7: Line Your Molds: Line your silicone dome molds (or small individual bowls) with the dipped ladyfingers, creating an edible shell.
- Step 8: Fill 'Em Up: Spoon or pipe the chilled mascarpone cream filling generously into each ladyfinger shell.
- Step 9: Cap It Off: Cover the cream filling with another quickly-dipped ladyfinger, or if your mold allows, fill the dome completely with more cream for a smoother top.
- Step 10: Chill Out (Literally!): Place your filled domes into the freezer for about 2 hours, or until they are nice and firm for easy unmolding.
- Step 11: Unmold and Dust: Once firm, carefully unmold the tiramisu domes. Generously dust each dome with unsweetened cocoa powder using a fine-mesh sieve.
- Step 12: Garnish and Serve: Garnish with whole coffee beans or chocolate shavings if desired. Serve these beauties chilled immediately.
Notes
- Coffee Alternatives: Dip ladyfingers in chocolate milk, light fruit juice (orange, raspberry), Kahlua, or Amaretto.
- Cream Cheesy Twist: If mascarpone is unavailable, use a 1:1 mix of cream cheese and heavy cream for a tangier flavor.
- Spice it Up: Add a pinch of cinnamon or a dash of almond extract to the mascarpone cream.
- Topping Fun: Dust with cinnamon, powdered sugar, finely chopped chocolate, sprinkles, or chocolate sauce.
- Liqueur Boost: Add a splash of Marsala wine or rum to the coffee dip for an authentic kick.
- Chill Your Cream & Bowl: Use cold heavy cream, a chilled mixing bowl, and whisk attachments for faster, firmer whipping.
- Don't Over-Soak Ladyfingers: A quick dip (1-2 seconds per side) is all that’s needed to prevent them from becoming mushy.
- Room Temperature Mascarpone: Ensure mascarpone is at room temperature for a smoother, lump-free cream filling.
- Gentle Folding: Gently fold whipped cream into the mascarpone mixture to retain air for a light, airy texture.
- Prep Ahead: The mascarpone cream mixture can be made a day in advance and stored in the fridge.
- Refrigeration: Store in an airtight container in the refrigerator for up to 3-4 days. Dust with cocoa just before serving.
- Freezing: For longer storage (2-3 weeks), wrap each dome individually in plastic wrap, then place in an airtight container. Thaw in the refrigerator for a few hours before serving.