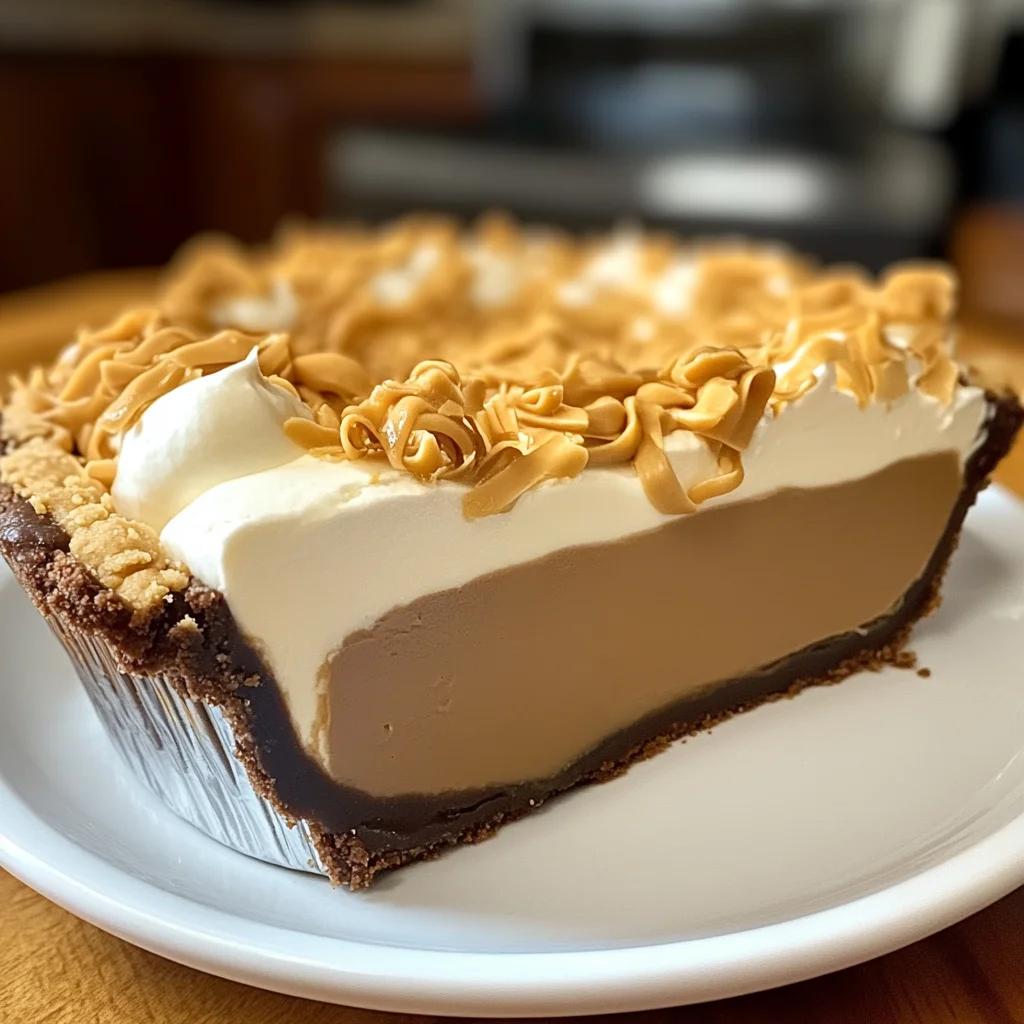
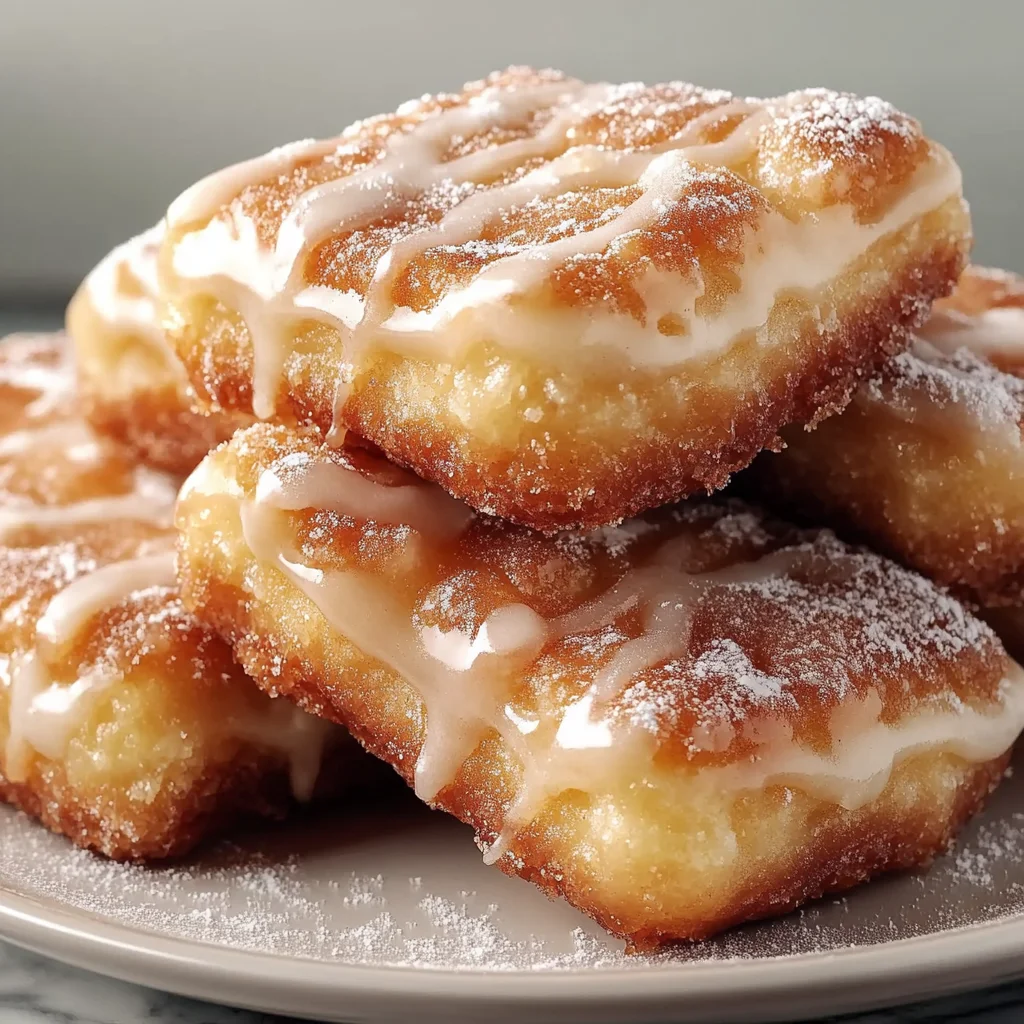
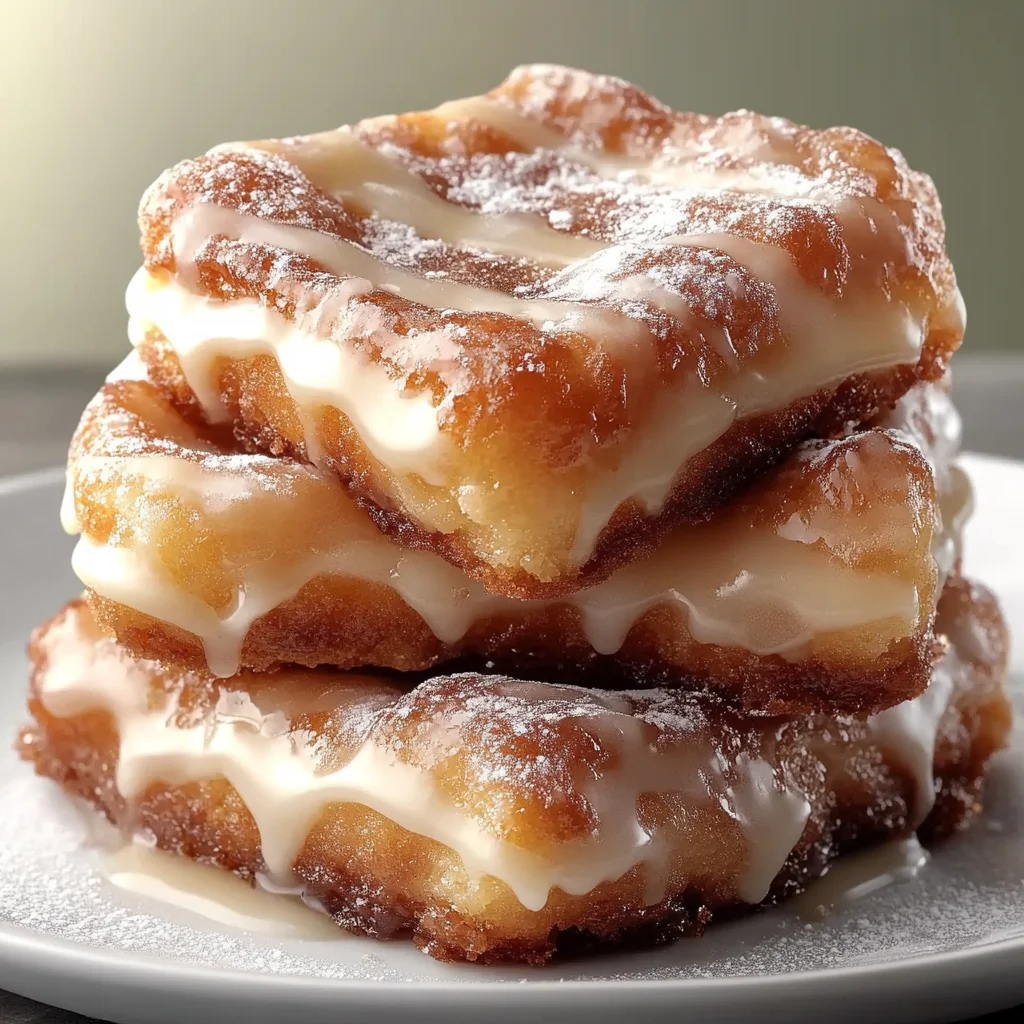
There’s something incredibly warm and comforting about the smell of maple syrup mingling with fresh-baked treats wafting through the kitchen. Maybe it reminds you of crisp fall mornings, cozy sweaters, or those special moments gathered around the table with friends and family. Maple Donut Bars bring all that nostalgia and comfort right to your home, without the hassle of deep-frying or complicated dough. Imagine a soft, cake-like bar infused with warm spices and drizzled with a luscious maple glaze—pure bliss in every bite.
If you’re looking for an easy, crowd-pleasing recipe that feels just as special as your favorite bakery finds, this one’s for you. I love how quickly these bars come together and how they’re perfect for sharing, gifting, or just sneaking a few bites when no one’s looking. Ready to make your kitchen smell like fall all year round? Let’s dive in!
Why You’ll Love Maple Donut Bars
- Fast: From start to finish, you’ll have these bars ready in under an hour.
- Easy: No fancy equipment or tricky techniques—just simple mixing and baking.
- Giftable: Wrapped up in a pretty box or tin, these bars make a sweet homemade gift.
- Crowd-pleasing: Soft, sweet, and spiced just right, they’re perfect for potlucks, brunches, or coffee breaks.
Ingredients
This recipe calls for pantry staples you probably already have, plus the star ingredient—pure maple syrup. Here’s what you’ll need:
- All-purpose flour (2 cups): The base that creates a tender crumb.
- Granulated sugar (1 cup): Adds sweetness and helps with browning.
- Baking powder (1 tablespoon): Gives the bars a nice rise without weighing them down.
- Salt (1/2 teaspoon): Balances the sweetness and enhances flavor.
- Ground cinnamon (1/2 teaspoon) and ground nutmeg (1/4 teaspoon): Warm spices that evoke that classic donut vibe.
- Unsalted butter, melted (1/2 cup): Adds richness and moisture.
- Whole milk (1 cup): Keeps the batter smooth and tender.
- Large eggs (2): Provide structure and a bit of lift.
- Vanilla extract (1 teaspoon): Deepens flavor and complements the spices.
- Maple syrup (1/2 cup): The heart of the recipe—pure, sweet, and aromatic.
- Powdered sugar (1 cup) and milk (1–2 tablespoons): For the smooth, sweet glaze that finishes the bars beautifully.
- Extra maple syrup for drizzling (optional): Because you can never have too much maple goodness!
Each ingredient plays a role in making these bars soft, flavorful, and perfectly balanced. The combination of cinnamon and nutmeg gives a subtle spice note that pairs beautifully with maple’s deep sweetness. You can even experiment with different types of milk or maple syrup grades for slight flavor variations.
How to Make Maple Donut Bars
Let me walk you through the simple steps to create this delightful treat. I promise it’s easier than you think!
- Preheat your oven to 350°F (175°C). Grease a 9×13 inch baking pan or line it with parchment paper for easy removal. I usually opt for parchment—it saves cleanup and keeps the bars intact.
- Mix your dry ingredients. In a large bowl, whisk together the flour, granulated sugar, baking powder, salt, cinnamon, and nutmeg. This ensures an even distribution of flavor and leavening.
- Combine the wet ingredients. In a separate bowl, whisk together the melted butter, milk, eggs, vanilla extract, and maple syrup until smooth. The maple syrup adds a lovely, natural sweetness and moisture.
- Bring it all together. Pour the wet mixture into the dry ingredients and gently fold with a spatula until just combined. Be careful not to overmix here—you want tender bars, not tough ones!
- Spread the batter evenly in your prepared pan. Use a spatula to smooth the top for even baking.
- Bake for 25-30 minutes. Keep an eye on your bars and test doneness by inserting a toothpick in the center; it should come out clean when ready. The edges will be lightly golden, and the aroma will fill your kitchen with cozy vibes.
- Cool the bars. Let them cool in the pan for about 10 minutes, then carefully transfer to a wire rack to cool completely before glazing. This step is key—warm bars can cause the glaze to melt and run off.
- Make the maple glaze. Whisk together the powdered sugar with 1 tablespoon of milk until smooth. Add more milk as needed to get a thick but pourable consistency. Stir in 2 tablespoons of maple syrup for that extra touch of sweetness and authenticity.
- Drizzle the glaze over the cooled bars. Use a spoon or a small piping bag for neat lines. If you’re feeling indulgent, drizzle a little extra pure maple syrup on top for a glossy finish.
- Let the glaze set. Allow the bars to rest for 10-15 minutes so the glaze firms up before slicing into squares or rectangles. This helps keep the bars neat and makes them easier to serve.
These simple steps come together to create a treat that’s perfect for morning coffee, afternoon snacks, or dessert after dinner. If you love the cozy flavors of this recipe, you might also want to try the Pineapple Cream Cheese Pound Cake for another sweet, bakery-style delight.
Substitutions & Additions
One of the best parts about recipes like this is how flexible they can be—feel free to get creative or tailor them to what you have on hand.
- Flour: You can swap all-purpose flour for a gluten-free blend if needed. Just make sure it’s a 1:1 replacement blend designed for baking.
- Milk: Dairy-free alternatives like almond or oat milk work beautifully and add their own subtle flavor.
- Butter: Coconut oil or vegan butter can be used for a dairy-free version, but keep it melted to maintain the right batter consistency.
- Spices: Feel free to amp up the cinnamon or nutmeg, or add a pinch of ground ginger or cloves for extra warmth.
- Glaze: For a richer glaze, try mixing in a bit of cream cheese or a splash of bourbon with the powdered sugar and maple syrup. It adds a decadent twist that’s hard to resist.
- Add-ins: Stir in chopped pecans, walnuts, or even mini chocolate chips into the batter before baking for extra texture and flavor. If you love pecans, check out this Easy Pecan Pie Recipe to satisfy your nutty cravings.
These little tweaks can make the bars your own, whether you want them more traditional or a bit adventurous.
Tips for Success
After making these bars a few times, I’ve learned some handy tips that make all the difference. Here’s what to keep in mind:
- Don’t overmix: When combining wet and dry ingredients, fold gently and stop as soon as it’s combined. This keeps your bars tender and light.
- Use room temperature eggs and milk: This helps the batter come together more smoothly and ensures an even bake.
- Let the bars cool completely before glazing: Otherwise, the glaze will melt and slide off, making a sticky mess.
- Use parchment paper for easy removal: It’s a game-changer for clean edges and easy slicing.
- Prep ahead: You can bake the bars a day in advance and add the glaze right before serving. Just store the unglazed bars wrapped tightly in plastic wrap.
- Slice with a warm knife: Run a sharp knife under hot water, dry it, and slice cleanly through the glaze without cracking it.
These tips will help you bake with confidence and get the best results every time.
How to Store Maple Donut Bars
Once you’ve baked and glazed your Maple Donut Bars, you’ll want to keep them fresh and delicious for as long as possible. Here’s the scoop:
- Room temperature: Store the bars in an airtight container for up to 2 days. Keep them away from direct sunlight and heat to prevent the glaze from melting.
- Refrigerator: For longer storage, place the bars in a sealed container and refrigerate for up to 5 days. The texture will remain moist, and the flavors will deepen.
- Freezing: These bars freeze beautifully! Wrap individual slices or the whole pan tightly in plastic wrap, then foil. Freeze for up to 2 months. Thaw at room temperature, then refresh the glaze before serving.
If you’re packing these bars for a brunch or a gift, I recommend chilling them slightly so the glaze stays intact and the bars hold their shape during transport.
FAQs
Can I make these bars vegan?
Yes! Swap the eggs for flax eggs (1 tablespoon ground flaxseed + 3 tablespoons water per egg) and use a plant-based milk and vegan butter. The texture will be slightly different but still delicious.
Is there a way to make these bars more like classic fried donuts?
While these bars are baked, you can add a bit more cinnamon and nutmeg to mimic the classic donut flavor. For a crispier edge, try baking in a cast iron skillet. Also, the maple glaze really brings that sweet donut vibe without frying.
Can I use pancake syrup instead of real maple syrup?
For the best flavor, I highly recommend using real pure maple syrup. Pancake syrup often contains corn syrup and artificial flavors that don’t provide the same depth or aroma.
How thick should the glaze be?
The glaze should be thick enough to coat the back of a spoon but still pourable so it drizzles nicely over the bars. If it’s too runny, add more powdered sugar; if too thick, add a bit more milk.
If you enjoy discovering easy and delicious recipes like these, be sure to explore more sweet and savory ideas on Recettia. Their collection includes everything from comforting classics to creative new favorites like the One-Pot Smoky BBQ Meatball Pasta, perfect for busy weeknights.
And if you love baking as much as I do, you might want to try the Chicago Style Bakery Apple Slices—another irresistible treat that pairs beautifully with a hot cup of coffee or tea.
Happy baking, and may your kitchen be filled with the sweet scent of maple and memories!
Don’t forget to follow me on Pinterest for more cozy recipes, helpful tips, and delicious inspiration.
Deliciously Cozy Maple Donut Bars
Ingredients
Equipment
Method
- Step 1: Preheat your oven to 350°F (175°C). Grease a 9×13 inch baking pan or line it with parchment paper for easy removal.
- Step 2: In a large bowl, whisk together the flour, granulated sugar, baking powder, salt, cinnamon, and nutmeg to evenly distribute flavor and leavening.
- Step 3: In a separate bowl, whisk together the melted butter, milk, eggs, vanilla extract, and maple syrup until smooth.
- Step 4: Pour the wet mixture into the dry ingredients and gently fold with a spatula until just combined. Be careful not to overmix.
- Step 5: Spread the batter evenly in your prepared pan using a spatula.
- Step 6: Bake for 25-30 minutes until a toothpick inserted in the center comes out clean and edges are lightly golden.
- Step 7: Let the bars cool in the pan for about 10 minutes, then transfer to a wire rack to cool completely before glazing.
- Step 8: To make the glaze, whisk powdered sugar with 1 tablespoon of milk until smooth. Add more milk if needed for a thick but pourable consistency. Stir in 2 tablespoons maple syrup.
- Step 9: Drizzle the glaze over the cooled bars using a spoon or piping bag. Optionally, drizzle extra maple syrup on top for a glossy finish.
- Step 10: Let the glaze set for 10-15 minutes before slicing into bars and serving.