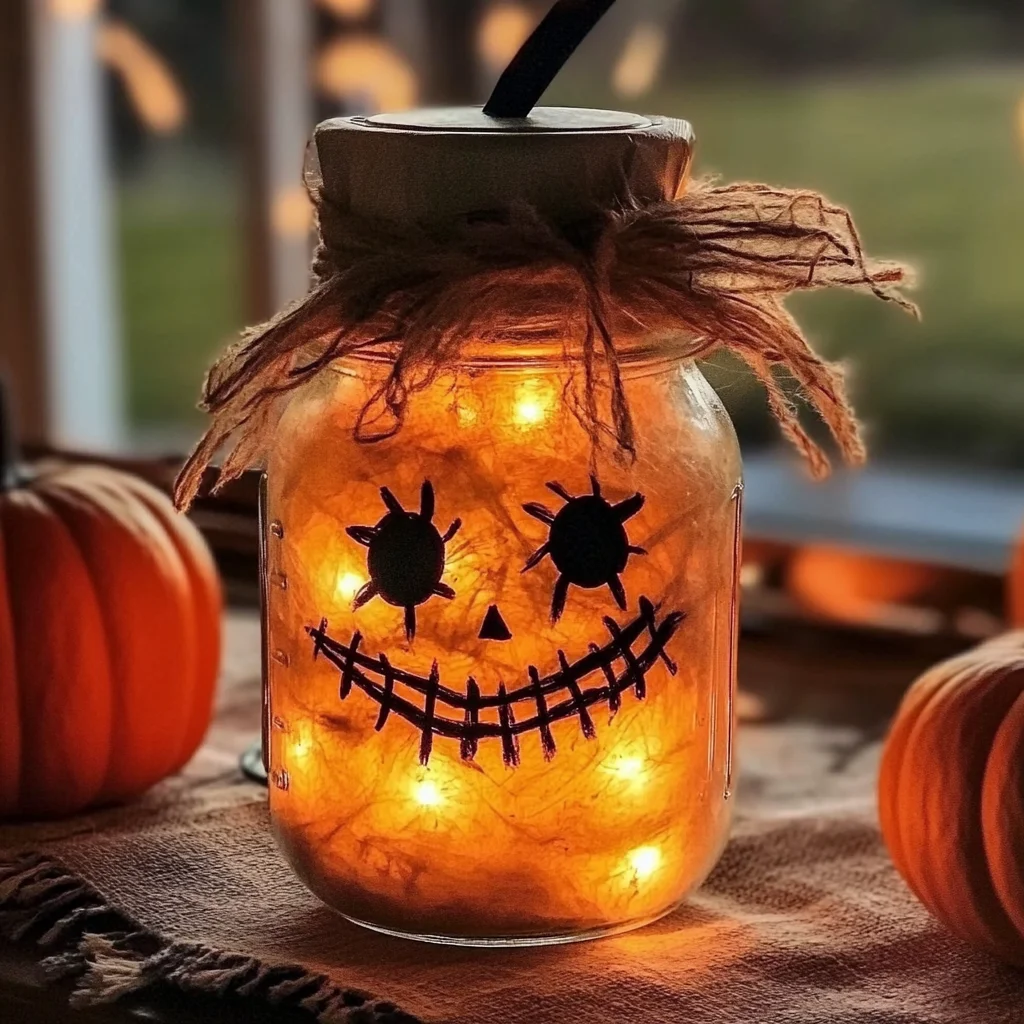
Oh, fall! There’s just something magical about the crisp air, the vibrant leaves, and the feeling of wanting to cozy up with a warm drink. For me, autumn has always been about bringing that warmth and charm indoors, creating a little haven of comfort before the chill of winter sets in. And what better way to do that than with a touch of handmade decor? Today, I’m so excited to share one of my absolute favorite, super simple, and utterly charming fall crafts: Light-Up Scarecrow Mason Jars! Picture it: crisp autumn air, the scent of pumpkin spice, and the cozy glow of homemade decorations… like these beautiful Light-Up Scarecrow Mason Jars, perhaps alongside a delightful easy pecan pie cooling on the counter. It’s pure autumn bliss!
This little project is the epitome of easy, quick, and oh-so-memorable. You’ll be amazed at how quickly you can transform a simple mason jar into a glowing, friendly scarecrow that adds a touch of rustic charm to any corner of your home. It’s perfect for a rainy afternoon craft session, a fun activity with the kids, or a thoughtful, personalized gift. Let’s get crafting!
Why You’ll Love Light-Up Scarecrow Mason Jars
- Fast: You can whip one of these up in under an hour (plus drying time!).
- Easy: No complicated steps or fancy tools required, just a few basic supplies.
- Giftable: These make the sweetest hostess gifts, teacher appreciation presents, or thoughtful tokens for friends.
- Crowd-pleasing: Everyone, from little ones to grown-ups, will adore these charming, glowing scarecrows.
Ingredients
Gathering your supplies for this project is part of the fun! Most of these you might already have around the house, or they’re super easy to find at any craft store.
- 1 clean mason jar (any size): This is your blank canvas! Pint or quart jars work wonderfully. Make sure it’s sparkling clean so your light can shine through clearly.
- Orange or amber tissue paper (or paint): This is what gives your scarecrow its warm, pumpkin-like glow. Tissue paper gives a lovely dappled effect, but craft paint works too for a more opaque look.
- Mod Podge or clear-drying glue: Our magic potion for adhering the tissue paper smoothly. Mod Podge is fantastic because it dries clear and acts as a sealant.
- Black construction paper or vinyl (for scarecrow face): For those adorable eyes, nose, and that signature stitched smile. Vinyl stickers are great if you want a super crisp look, but paper is perfectly charming.
- Burlap scraps or raffia (for “hair” and scarf): This is where the rustic, scarecrow vibe really comes to life! You can often find burlap ribbon or raffia bundles at craft stores.
- Twine or ribbon: For tying on your scarecrow’s scarf or adding a little extra embellishment.
- Battery-operated tea light or fairy lights: The heart of your light-up jar! These are much safer than real candles and give a beautiful, flickering glow.
- Hot glue gun: Your best friend for quick, secure attachment of all those little scarecrow details.
- Optional: cinnamon sticks, dried star anise, or buttons for décor: These little extras can add wonderful texture and a delightful autumnal scent if you choose.
How to Make Light-Up Scarecrow Mason Jars
Ready to bring your little scarecrow to life? Let’s get crafting step by step!
- Give Your Jar a Warm Glow: First things first, you’ll want to tear your orange or amber tissue paper into small, irregular pieces. Don’t worry about perfection here; the varied sizes add to the charm! Now, grab your Mod Podge or clear-drying glue. Brush a thin layer onto a section of your mason jar, then carefully press a piece of tissue paper onto it. Continue this process, layering the tissue paper all around the jar until it’s completely covered. Overlap the edges slightly for a seamless look. Once you’re happy with the coverage, let your jar dry completely. This might take an hour or two, so it’s a good time to grab a cup of coffee or perhaps check out some easy Halloween cupcake decorating ideas for your next project!
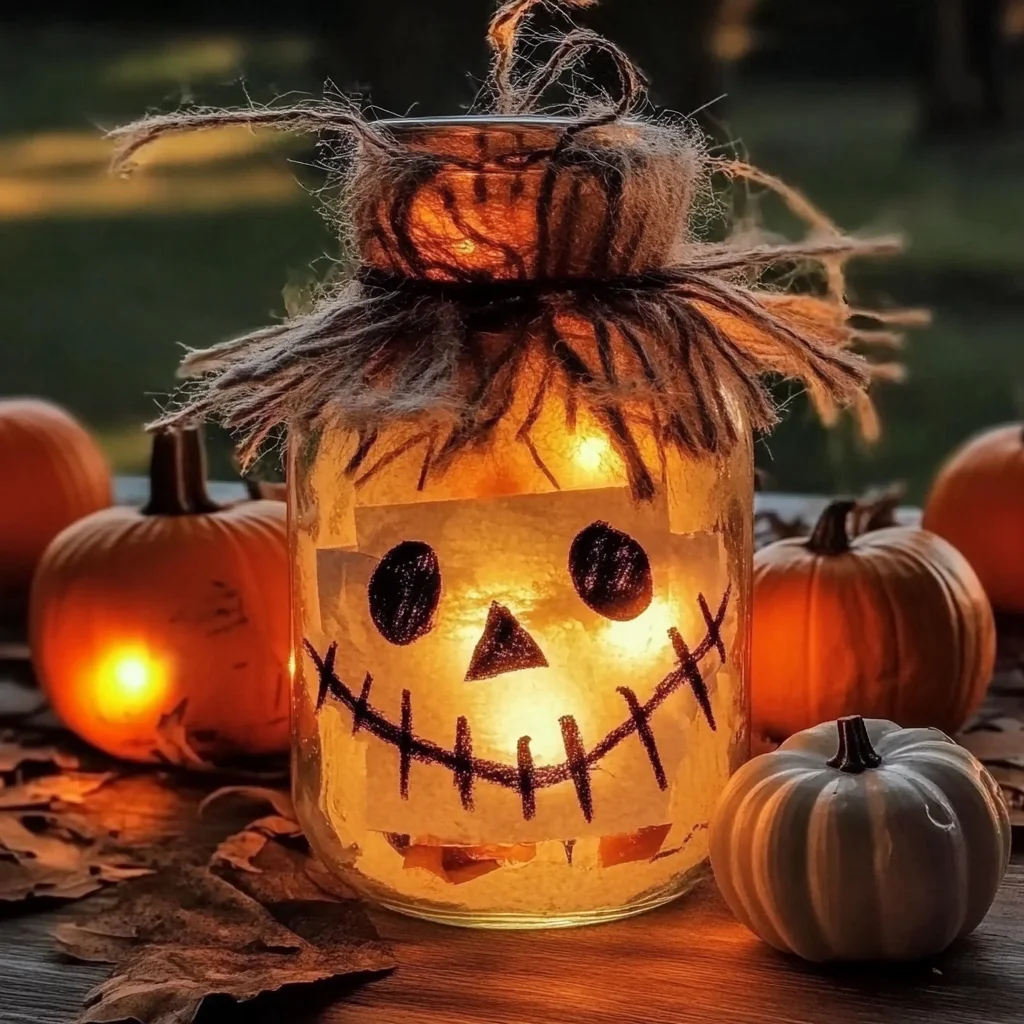
- Craft That Friendly Face: While your jar is drying, it’s time to design your scarecrow’s adorable face! From your black construction paper or vinyl, cut out two circles for eyes, a small triangle for a nose, and a cute, slightly curved line for the mouth. For that classic scarecrow stitched smile, you can cut tiny little lines to go perpendicular across the mouth. Once your jar is dry, use a dab of Mod Podge or craft glue to attach these pieces to the front of your jar, creating your scarecrow’s welcoming expression.
- Add Some Rustic Charm: Now for the fun, textural elements! Take a strip of burlap and wrap it around the rim of your jar, securing it with a bit of hot glue to give the illusion of a rustic hat. Then, gather a small tuft of raffia or straw – this will be your scarecrow’s “hair.” Secure this under the burlap hat with a dot of hot glue, letting it peek out playfully.
- Dress Your Scarecrow: Time for a cozy scarf! Cut a short length of twine or a thin strip of burlap ribbon. Tie it around the neck of your mason jar, just below the face, creating a sweet little scarf. If you have any optional fall embellishments like small cinnamon sticks, dried star anise, or even a tiny button, now’s the time to hot glue them onto the scarf or hat for an extra touch of seasonal flair. I just love how the cinnamon sticks add a subtle, comforting scent!
- Light It Up!: The grand finale! Carefully place your battery-operated tea light or fairy lights inside the finished mason jar. Turn them on, and watch your charming scarecrow come to life with a warm, inviting autumn glow. Place them on your mantel, a bookshelf, your dining table, or anywhere you need a little dose of fall cheer!
Substitutions & Additions
Feel free to get creative and make these scarecrows truly your own! Here are some ideas:
- Color Variation: Instead of orange, try yellow or even a mix of fall colors for your tissue paper or paint.
- Paint It On: If you don’t have tissue paper, you can use acrylic craft paint. Just paint a few thin, translucent coats of orange or amber onto the jar for a similar glowing effect. You could even paint subtle “patches” for a more worn look!
- Different Facial Features: Instead of paper, you could use buttons for eyes, or draw the face on with a permanent marker after the Mod Podge has dried and sealed.
- Yarn Hair: No raffia or burlap? Snip some pieces of orange, brown, or yellow yarn and glue them around the rim for softer “hair.”
- Fabric Scraps: Use small scraps of plaid flannel or gingham fabric for the scarf instead of burlap ribbon.
- Glittery Touch: A sprinkle of fine gold or copper glitter mixed into the Mod Podge (or applied on top once dry) can add a subtle sparkle, especially when the light catches it.
- Scented Spice: For a wonderful autumnal aroma, you can add a few drops of fall-scented essential oil (like cinnamon or clove) to the outside of the jar once it’s completely dry, or even just hot glue some whole cloves or star anise around the neck for a natural fragrance.
Tips for Success
- Cleanliness is Key: Make sure your mason jar is super clean and dry before you start. Any smudges or dust will show through your tissue paper or paint.
- Thin Layers of Mod Podge: When applying the tissue paper, use thin, even layers of Mod Podge. Too much can make the paper soggy and prone to tearing. You can also do a final thin coat over the tissue paper for extra durability and a smoother finish.
- Patience with Drying: Don’t rush the drying process for the Mod Podge and tissue paper. If it’s not fully dry, your face elements might not stick well, or the whole thing could feel tacky.
- Hot Glue Smarts: When using a hot glue gun, remember that a little goes a long way. Use small dots to secure burlap, raffia, and embellishments. Be careful, as hot glue can melt through thin tissue paper if applied directly and heavily. I usually apply it to the embellishment first, then carefully place it on the jar.
- Kid-Friendly Version: If crafting with kids, you can pre-cut the tissue paper and facial features. Let them use regular craft glue for the paper elements and supervise closely (or do yourself) the hot gluing for the burlap and raffia.
How to Store Light-Up Scarecrow Mason Jars
These adorable scarecrow jars are definitely something you’ll want to bring out year after year! To keep them looking their best:
- Dust Gently: If they get dusty during display, use a soft, dry cloth or a duster to gently clean them. Avoid water, as it could damage the tissue paper and Mod Podge.
- Remove Lights: Before storing for the off-season, remove the battery-operated tea light or fairy lights. This helps preserve battery life and prevents any potential battery leaks from damaging your craft.
- Wrap with Care: Wrap each jar individually in tissue paper, newspaper, or bubble wrap to protect the delicate tissue paper and embellishments from getting snagged or damaged.
- Store in a Dry Place: Keep them in a sturdy box in a cool, dry place like a closet, attic, or basement. Avoid areas with extreme temperature fluctuations or high humidity, which could affect the glue and paper.
FAQs
Q: Can I use regular white school glue instead of Mod Podge?
A: Yes, you can! Just make sure it dries clear. Mod Podge is great because it’s specifically designed as an all-in-one glue, sealer, and finish, making it a little more durable, but clear-drying school glue will work too.
Q: My tissue paper is ripping when I apply it. What am I doing wrong?
A: It sounds like you might be using too much Mod Podge, or the tissue paper pieces are too large and delicate. Try using less Mod Podge and smaller, easier-to-handle pieces of tissue paper. Also, try to dab or press gently rather than brushing aggressively once the paper is wet.
Q: How can I make these last longer outside?
A: While these are primarily designed for indoor use, you can give them a little more outdoor resilience by using an outdoor-specific Mod Podge or a clear, waterproof spray sealant (like a clear acrylic sealer) over the entire jar once everything is dry. However, they’ll still do best in a covered area, away from direct rain and prolonged moisture.
Q: Are there other fall crafts I can make with mason jars?
A: Absolutely! These jars are just one fun way to get crafty. For more creative endeavors, you can always find inspiration on Recettia, whether you’re looking for more DIY decor or delicious recipes!
We hope you have a blast making these Light-Up Scarecrow Mason Jars! They’re such a cheerful way to welcome the autumn season into your home. Happy crafting, friends!
For more delicious recipes and creative ideas, make sure to follow us on Pinterest!
Light-Up Scarecrow Mason Jars
Ingredients
Equipment
Method
- Step 1: Give Your Jar a Warm Glow: Tear orange or amber tissue paper into small, irregular pieces. Brush a thin layer of Mod Podge or clear-drying glue onto a section of your mason jar, then carefully press a piece of tissue paper onto it. Continue layering until the jar is completely covered, overlapping edges slightly. Let the jar dry completely (this may take an hour or two).
- Step 2: Craft That Friendly Face: While your jar dries, cut out two circles for eyes, a small triangle for a nose, and a curved line for the mouth (with tiny perpendicular lines for a stitched look) from black construction paper or vinyl. Once the jar is dry, use Mod Podge or craft glue to attach these pieces to the front, creating your scarecrow's face.
- Step 3: Add Some Rustic Charm: Wrap a strip of burlap around the rim of your jar, securing it with a bit of hot glue to create a rustic hat. Gather a small tuft of raffia or straw for the scarecrow’s "hair" and secure it under the burlap hat with a dot of hot glue, letting it peek out playfully.
- Step 4: Dress Your Scarecrow: Cut a short length of twine or a thin strip of burlap ribbon. Tie it around the neck of your mason jar, just below the face, to form a sweet little scarf. If desired, hot glue optional fall embellishments like small cinnamon sticks, dried star anise, or a tiny button onto the scarf or hat.
- Step 5: Light It Up!: Carefully place your battery-operated tea light or fairy lights inside the finished mason jar. Turn them on to illuminate your charming scarecrow with a warm, inviting autumn glow. Place them on your mantel, a bookshelf, or dining table for instant fall cheer.