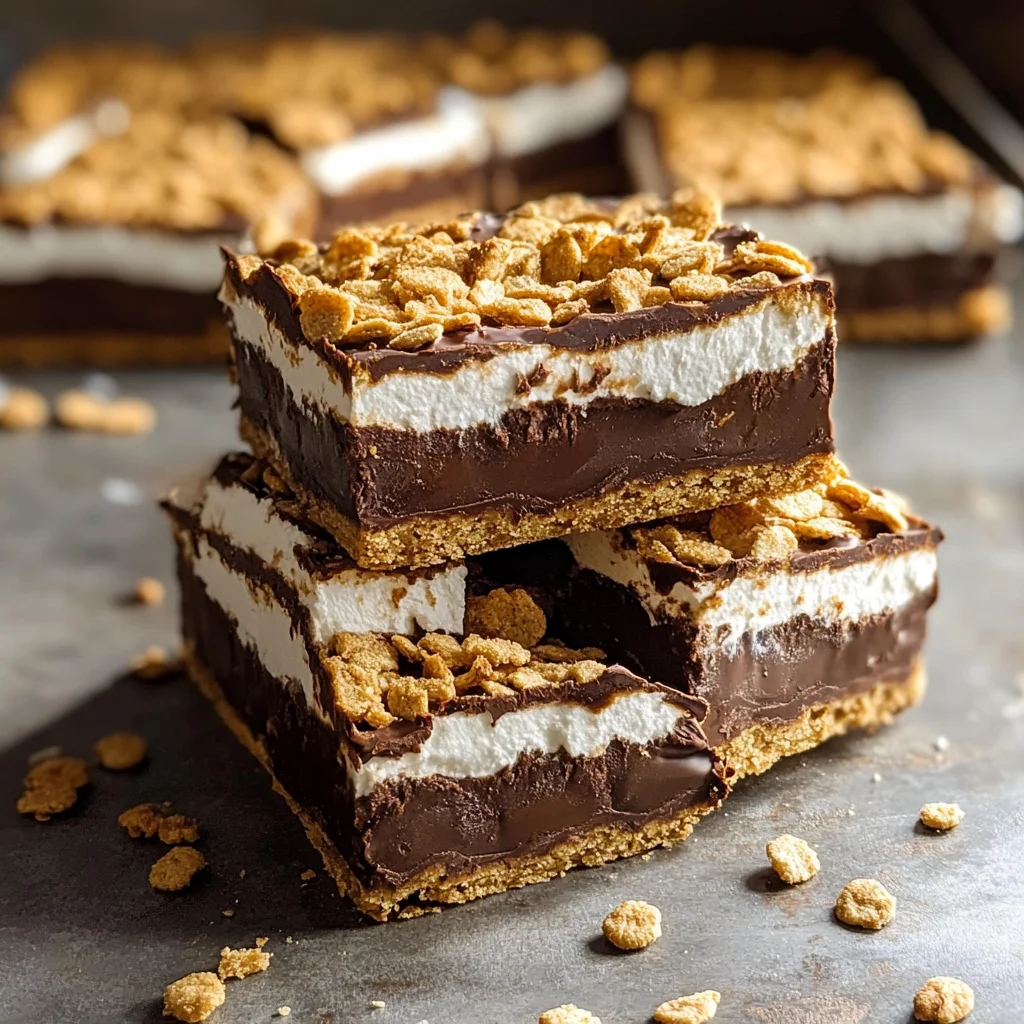
There’s something truly magical about the classic campfire s’more—gooey marshmallows, melty chocolate, and that crispy graham cracker crunch. It instantly brings back memories of summer nights, laughter around the fire, and sticky fingers. But let’s be honest, not everyone has a campfire handy whenever a sweet craving hits. That’s where these Easy S’more Bars come in—they capture all the nostalgic goodness of s’mores in a simple, oven-baked treat you can whip up anytime. Whether you’re looking for a quick dessert for a weeknight, a crowd-pleasing dish for a party, or a fun bake to share with the family, these bars are pure magic.
What I love most is how effortless they are. You don’t need to roast marshmallows one by one or hunt for sticks. Just a few ingredients, a little oven time, and you’ve got a decadent chocolate graham treat that everyone will adore. Plus, they’re perfect for gifting during the holidays or packing in lunchboxes as a special surprise. Trust me, once you try these bars, they’ll become a staple in your recipe box—right alongside other favorites like my Easy Pecan Pie or the utterly divine No-Bake Peanut Butter Pie.
Why You’ll Love Easy S’more Bars – Decadent Chocolate Graham Treat
- Fast: Ready in under 30 minutes plus cooling time, perfect for last-minute dessert cravings.
- Easy: Minimal ingredients and simple steps make it beginner-friendly.
- Giftable: Wrap them up as homemade goodies for friends and family.
- Crowd-pleasing: Everyone loves s’mores, and these bars serve them in a mess-free, shareable way.
Ingredients
Let’s talk about the stars of the show. You only need a handful of ingredients to make these bars come alive, and each one plays a special role in creating that perfect balance of flavors and textures.
- 2 cups graham cracker crumbs: This forms the crunchy, buttery base that reminds you of classic s’mores.
- 1/2 cup melted butter: Binds the graham cracker crumbs together and adds richness.
- 4 cups chocolate chips: You can use semi-sweet, milk, or even dark chocolate depending on your preference. Chocolate chips melt beautifully to give that luscious layer.
- 1 package mini marshmallows: These puff up and toast perfectly, giving you that signature gooey, golden top.
- 1/4 teaspoon salt (optional): Just a pinch to balance the sweetness and enhance the flavors.
These simple ingredients are probably already in your pantry, making this recipe even more approachable. If you want to mix things up, I’ll share some fun substitutions and additions later on.
How to Make Easy S’more Bars – Decadent Chocolate Graham Treat
Ready to dive in? Here’s how you’ll turn those ingredients into a tray of irresistible bars. I’ll walk you through each step so you feel confident and relaxed in the kitchen.
- Preheat the oven to 350°F (175°C). This ensures your oven is nice and hot when you’re ready to bake.
- Combine the graham cracker crumbs and melted butter. In a large mixing bowl, stir until the crumbs are evenly coated. This step is key because the butter helps the crust stick together and bake into a crisp, flavorful base.
- Press the crust mixture firmly into the bottom of a 9×13 inch baking pan. Use the back of a spoon or your hands to pack it down evenly. A firm crust means your bars will hold together beautifully, which is especially helpful for clean slicing later.
- Evenly spread the chocolate chips over the graham cracker crust. Don’t worry about layering them perfectly—just get a nice, even coverage so every bite has chocolate.
- Bake for 5-7 minutes. Keep a close eye here! The chocolate chips should soften but not melt completely into a liquid pool. This softening helps you spread the chocolate smoothly in the next step.
- Remove the pan from the oven and spread the softened chocolate into a smooth, even layer. A spatula works great for this. This step creates a luscious, uniform chocolate layer that sets the stage for the marshmallows.
- Sprinkle mini marshmallows evenly over the chocolate layer. Cover the surface completely—don’t be shy! The marshmallows puff up and give that iconic toasty top.
- Return the pan to the oven and bake for 8-12 minutes. Watch carefully as the marshmallows puff and turn a beautiful golden brown. This is the moment when the magic happens. If they start browning too quickly, you can loosely cover with foil to avoid burning.
- Allow the bars to cool completely on a wire rack for 1-2 hours. This cooling time is crucial because it lets the layers set up so your bars will slice neatly. I know it’s tempting to dig in right away, but trust me, patience pays off.
- Slice into bars with a sharp knife. For clean cuts, dip your knife in hot water and wipe it dry between cuts. This little trick keeps the knife from sticking to the gooey marshmallows and melty chocolate.
Substitutions & Additions
While the original recipe is perfection, I love playing around with flavors and textures to keep things exciting. Here are some ideas if you want to switch it up or make these bars your own:
- Chocolate swaps: Use white chocolate chips or peanut butter chips for a twist. Dark chocolate adds a richer, less sweet flavor if you prefer that balance.
- Marshmallow alternatives: Try using jumbo marshmallows cut in half for a chunkier texture, or even marshmallow fluff for an ultra-gooey top layer.
- Add a layer of peanut butter: Before spreading the chocolate, swirl in some peanut butter on the graham crust for a nutty surprise.
- Sprinkle in nuts or sea salt: Chopped pecans, almonds, or a light sprinkle of flaky sea salt on top can add crunch and a flavor contrast.
- Mix in dried fruit or coconut: For a tropical twist, add shredded coconut or chopped dried cherries under the marshmallow layer.
Feel free to get creative! And if you love easy, comforting desserts, you might enjoy my Pineapple Cream Cheese Pound Cake, which also brings a cozy vibe to the table.
Tips for Success
From my experience baking these bars several times (and sharing with friends who keep asking for more!), here are some tips to make your s’more bars absolutely perfect every time:
- Don’t skip firm pressing: Press the graham crust firmly and evenly so it bakes into a solid base that holds together well.
- Watch the marshmallows closely: Oven temps vary—some ovens brown marshmallows faster than others. Keep a close eye to avoid burning and remove them as soon as they turn golden.
- Cool fully before slicing: This can’t be stressed enough! Allowing the bars to cool completely helps the chocolate and crust set, making cutting cleaner and easier.
- Use a hot, clean knife: Dip your knife in hot water and wipe it dry before slicing to glide through gooey layers smoothly.
- Prep ahead: You can make the graham crust and chocolate layer a day ahead, keep it covered in the fridge, then add marshmallows and finish baking just before serving.
How to Store Easy S’more Bars – Decadent Chocolate Graham Treat
Storing these bars properly keeps them fresh and delicious for days, though I’ll warn you—they rarely last that long in my house!
- At room temperature: Keep the bars in an airtight container for up to 2 days. This is perfect if you want to enjoy them the same day or next.
- In the refrigerator: Store in an airtight container for up to 5 days. Let them come to room temperature before serving for softer texture.
- Freezing: Wrap bars tightly in plastic wrap and foil, then freeze for up to 2 months. Thaw overnight in the fridge and warm slightly in the oven or microwave to revive that melty goodness.
If you’re planning a party or family gathering, these bars are great to make ahead and store, so you’re not rushing last minute. They’re also fantastic packed in lunchboxes or snack bags for a sweet treat on the go. For more crowd-pleasing dessert ideas, be sure to check out my No-Bake Brownie Cheesecake Cups, which are equally easy and indulgent.
FAQs
Can I use regular marshmallows instead of mini marshmallows?
Absolutely! Just cut regular marshmallows into smaller pieces or halves to distribute them evenly. Mini marshmallows work best for that classic toasted top, but regular ones can add a fun, chunkier texture.
What if I don’t have graham cracker crumbs?
You can crush up any sweet, crunchy cookies like digestive biscuits or vanilla wafers as a substitute. Just make sure to adjust the butter if your crumbs are drier or fattier.
Can I make these bars gluten-free?
Yes! Use gluten-free graham cracker crumbs or your favorite gluten-free cookie crumbs. The rest of the ingredients are naturally gluten-free, making this an easy swap.
How do I prevent the marshmallows from burning?
Keep a close eye during the final baking step since marshmallows brown quickly. If they start to get too dark before fully puffing, you can cover the pan loosely with foil to protect them while they finish baking.
These Easy S’more Bars perfectly capture the spirit of campfire treats without the campfire hassle. They’re a fantastic recipe to have in your back pocket for when you want a sweet, nostalgic dessert that everyone will love. If you enjoyed this recipe, you’ll find plenty more cozy and delicious ideas at Recettia, where comfort food meets simple cooking.
Don’t forget to follow my Pinterest board for more delicious recipes and kitchen inspiration!
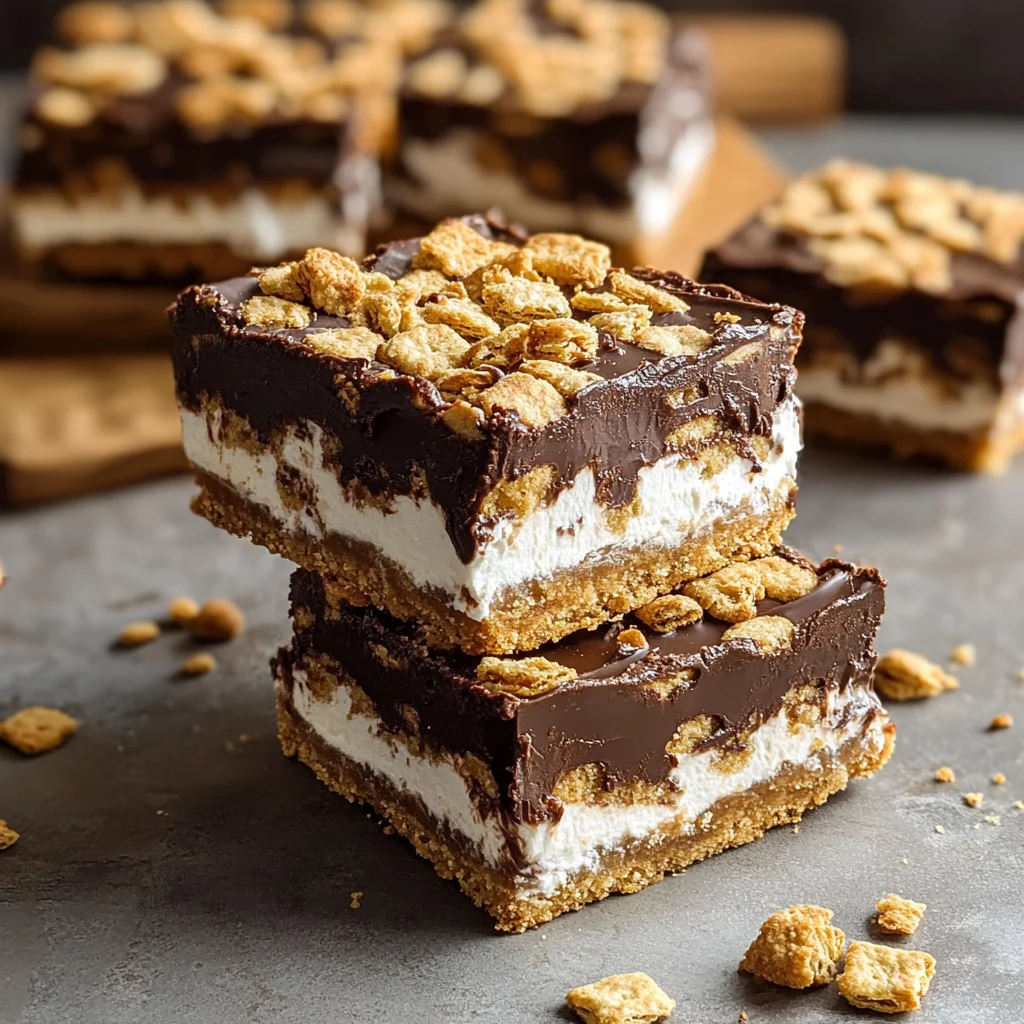
Easy S’more Bars – Decadent Chocolate Graham Treat
Ingredients
Equipment
Method
- Step 1: Preheat the oven to 350°F (175°C).
- Step 2: Combine graham cracker crumbs and melted butter in a large mixing bowl until evenly coated.
- Step 3: Press the crust mixture firmly into the bottom of a 9×13 inch baking pan to form an even, solid base.
- Step 4: Evenly spread chocolate chips over the graham cracker crust.
- Step 5: Bake for 5-7 minutes until the chocolate chips soften but do not fully melt.
- Step 6: Remove pan from oven and spread softened chocolate into a smooth, even layer using a spatula.
- Step 7: Sprinkle mini marshmallows evenly over the chocolate layer.
- Step 8: Return pan to oven and bake for 8-12 minutes until marshmallows puff up and turn golden brown. Cover loosely with foil if browning too fast.
- Step 9: Allow bars to cool completely on a wire rack for 1-2 hours to set properly.
- Step 10: Slice into bars using a sharp knife dipped in hot water and dried between cuts for clean slices.