There’s something truly magical about the first bite of banana fudge — it instantly takes you back to cozy afternoons spent with family or friends, sharing stories and sweet treats. Maybe it’s the creamy texture, the gentle banana flavor, or simply the warm memories it stirs up. Whatever it is, this banana fudge recipe is a timeless classic that’s as comforting as a hug from your grandma. And here’s the best part: it’s surprisingly easy to whip up, even if you’re not a seasoned candy-maker. Whether you’re looking for a quick homemade gift idea or a special treat to impress your loved ones, you’re going to love how simple and delicious this recipe is.
I remember making fudge with my mom when I was a kid, and the kitchen would be filled with the sweet aroma of melting sugar and butter. This banana fudge brings that same cozy feeling but with a fun twist of banana flavor that feels fresh and unique. If you’re craving a no-fuss dessert that’s bursting with nostalgia and just the right amount of sweetness, then stick with me. We’re going to make this fudge together step by step, and I’ll share my favorite little tips along the way!
Why You’ll Love Banana Fudge
- Fast: This recipe comes together in less than an hour, making it perfect for last-minute cravings or gifts.
- Easy: No candy thermometer or complicated techniques required — just simple stirring and patience.
- Giftable: Wrapped up in a pretty box or jar, banana fudge makes a sweet, thoughtful gift anyone would adore.
- Crowd-pleasing: Whether it’s a holiday party, potluck, or family gathering, this fudge disappears fast!
Ingredients
Let’s take a look at the ingredients you’ll need for this banana fudge. I love how straightforward the list is — and you might already have most of these in your pantry or fridge!
- Banana flavoring (2 tsp): This is the star of the show, giving the fudge that unmistakable banana essence without using fresh bananas, which can change the texture.
- Yellow food color gel (½ tsp): Just a touch adds that classic banana fudge glow. Food coloring is optional but really makes it look inviting.
- Salted sweet cream butter (¾ cup): Butter adds richness and creaminess — don’t skip it or substitute with margarine!
- Half and half (½ cup) & heavy cream (⅓ cup): These dairy ingredients keep your fudge silky smooth and luscious.
- Clear vanilla flavoring (1 tsp): Vanilla complements the banana flavor perfectly without turning the fudge brown like regular vanilla extract might.
- Granulated sugar (3 cups + 2 tbsp): Sweetness and structure come from here, so be sure to measure carefully.
- White baking chips (1¾ cups): I recommend Ghirardelli white baking chips for the best melting and flavor. They add sweetness and body to the fudge.
- Marshmallow fluff (7 oz): This makes the fudge extra creamy and gives it a light, fluffy texture.
- Crushed Nilla wafers (2 tbsp, optional): A fun garnish for a little crunch and added nostalgia.
How to Make Banana Fudge
Now, let’s get into the fun part — making your banana fudge! I’ll guide you through each step so you can feel confident and enjoy the process.
- Prepare your pan: Line a 9×9-inch baking dish with parchment paper, making sure the paper extends up all sides. This will make it super easy to lift the fudge out later. Lightly spray the parchment with nonstick cooking spray and set aside.
- Mix banana flavor and color: In a small bowl, stir together the banana flavoring and yellow food color gel. Set this mixture aside for later. This step ensures your banana flavor is evenly distributed in the fudge.
- Melt the butter and cream: In a heavy-bottomed saucepan (3 to 4 quarts is ideal), melt the butter over medium heat. Add the half and half, heavy cream, and clear vanilla flavoring, stirring continuously to combine everything smoothly.
- Add the sugar: Pour in the granulated sugar and keep stirring as the mixture comes to a gentle simmer. This usually takes about 6 to 7 minutes. Once simmering, continue stirring for 3 more minutes to dissolve the sugar completely and create the perfect fudge base. Be patient here — constant stirring prevents burning and ensures even heating.
- Incorporate the white baking chips: Remove the saucepan from heat and add the white baking chips. Cover the pan and let it sit for 3 to 4 minutes so the chips can soften. Then stir until the chips melt and the mixture is smooth and creamy.
- Mix in marshmallow fluff: Add the marshmallow fluff and stir until it’s fully blended into the fudge base. This step adds a wonderful fluffiness and richness that makes this fudge stand out.
- Add banana flavor and color: Pour in the banana flavor and yellow color mixture you prepared earlier. Stir well to evenly distribute the flavor and color throughout the fudge.
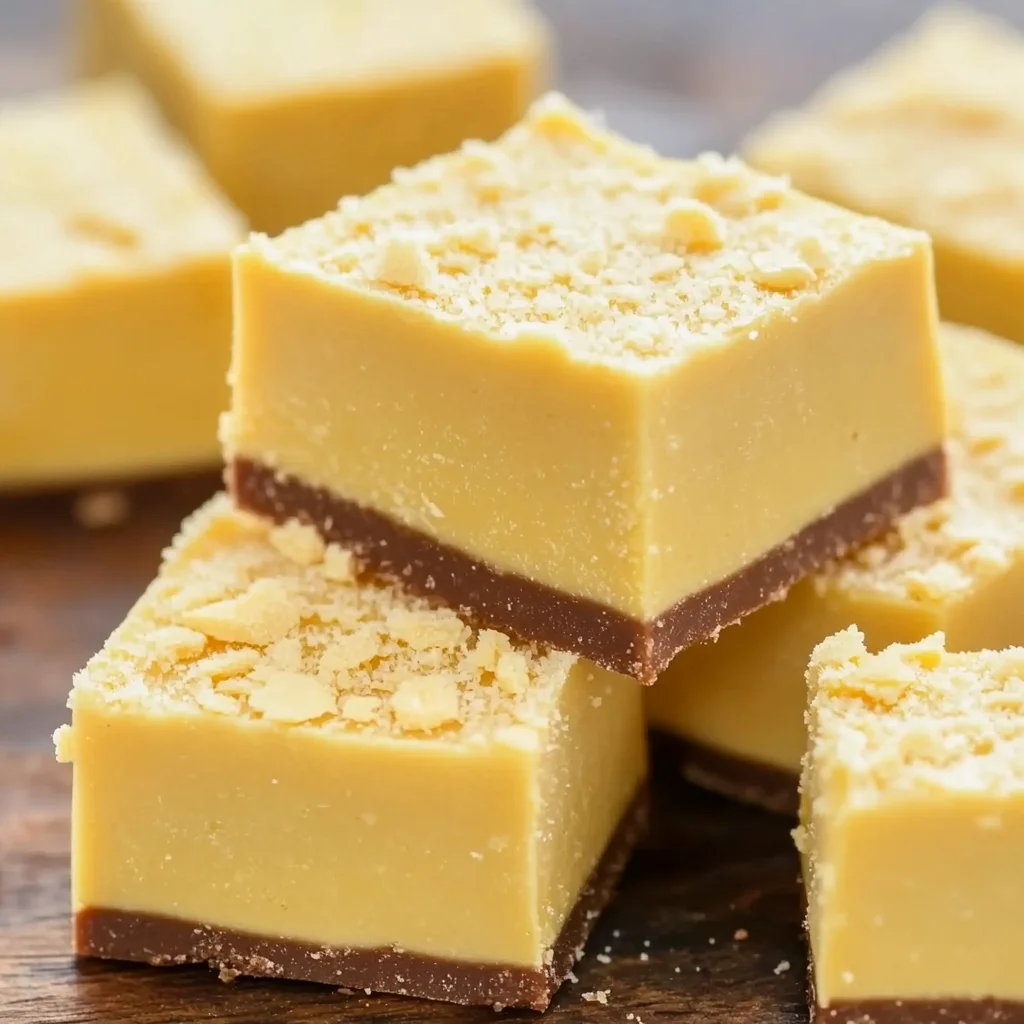
- Pour and garnish: Spread the fudge evenly into your prepared baking dish using a spatula. If you want to add a little extra texture and nostalgic crunch, sprinkle the crushed Nilla wafers on top. Then cover the dish tightly with aluminum foil.
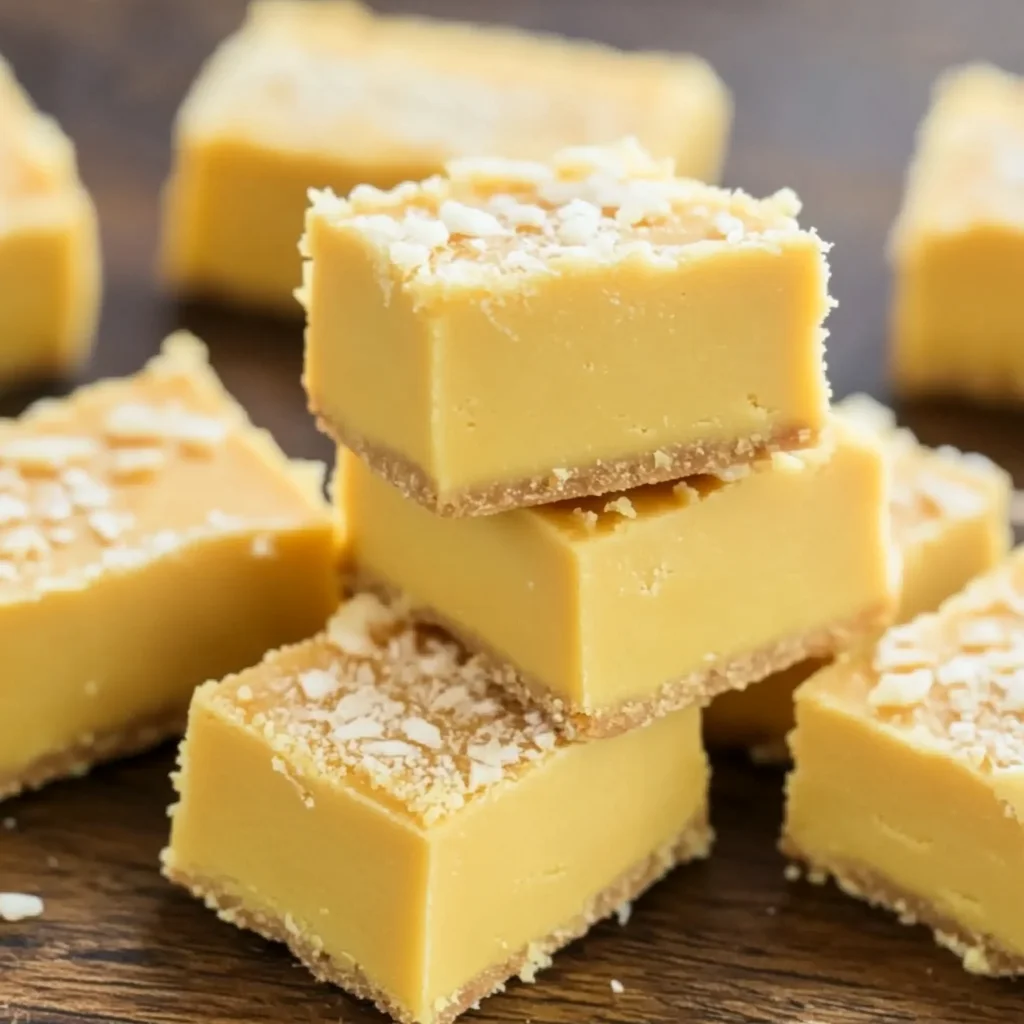
- Let it set: Let the fudge sit at room temperature for 30 minutes, then transfer it to the refrigerator to chill for at least 4 hours, or until firm. Once set, use the parchment paper to lift the fudge out of the pan and cut it into 25 squares (5×5). Store your banana fudge in the refrigerator until you’re ready to serve.
This recipe pairs wonderfully with other nostalgic treats — if you love classic desserts, you might also enjoy checking out the cozy and comforting Cozy Easy Moist Banana Bread, which shares that same warm vibe and banana magic.
Substitutions & Additions
While this banana fudge recipe is fantastic as-is, don’t hesitate to get creative or adapt it to what you have on hand. Here are some ideas to personalize your fudge experience:
- Banana flavor alternatives: If you don’t have banana flavoring, you can try using a ripe banana puree, but be aware this will change the texture and may make the fudge softer. For a more natural flavor, a small amount of banana extract works well too.
- Food coloring options: If you prefer to skip artificial colors, you can omit the yellow food color gel. The fudge will still taste amazing, just a bit less vibrant.
- White baking chips swaps: If you don’t have white baking chips, consider using white chocolate bars chopped into small pieces, though melting may take a bit longer. For a twist, try mini banana chips or dried fruit sprinkled on top after setting.
- Extra mix-ins: Add chopped nuts like walnuts or pecans for crunch, or swirl in a bit of peanut butter for a banana-peanut butter combo that’s out of this world. You might even want to sprinkle some mini chocolate chips on top for an extra treat.
- Garnishes: Instead of crushed Nilla wafers, try crushed graham crackers, toasted coconut flakes, or even a drizzle of caramel sauce for a fancy touch. For a fun holiday twist, colored sprinkles work beautifully!
If you’re a fan of no-bake recipes that come together quickly and satisfy your sweet tooth, you’ll love exploring other favorites like the No Bake Peanut Butter Pie, which is just as creamy and dreamy.
Tips for Success
Making fudge might sound intimidating, but with a few simple tips, you’ll be a pro in no time. Here’s what I’ve learned from making this banana fudge many times over:
- Use a heavy-bottomed saucepan: This helps distribute heat evenly and prevents scorching your fudge mixture. Thin pans can cause hot spots and burnt sugar flavors.
- Stir constantly but gently: Keep the mixture moving to avoid burning but don’t whisk vigorously, which can incorporate too much air and change the fudge texture.
- Don’t rush the simmer phase: Allowing the sugar to dissolve fully is key to smooth, creamy fudge. Use a gentle simmer rather than a rolling boil.
- Cover the pan after adding the white chips: This step lets them melt evenly without stirring and ensures a glossy, smooth finish.
- Use parchment paper for easy removal: Lining your pan well makes cutting and serving a breeze and keeps your edges neat.
- Let fudge set fully in the fridge: While it’s tempting to sneak a taste early, chilling for at least 4 hours gives the fudge the perfect texture and firmness.
- Prep ahead: This fudge keeps well in the fridge for up to a week, so you can make it ahead for parties or gifts. Just be sure to store it covered tightly to prevent it from drying out.
If you want to expand your dessert repertoire, these tips will come in handy for other rich, creamy recipes like the No Bake Brownie Cheesecake Cups, which also rely on gentle heat and careful mixing for perfect results.
How to Store Banana Fudge
Once your banana fudge is perfectly set and cut into squares, storing it properly is key to keeping that creamy texture and fresh flavor. Here’s what I recommend:
- Refrigerate: Store fudge in an airtight container in the refrigerator. It will keep well for up to a week, so you can enjoy it over several days.
- Freeze for longer storage: If you want to make it ahead for a big event, fudge freezes beautifully. Wrap individual pieces in plastic wrap and place them in a freezer-safe container or bag. Thaw in the fridge overnight before serving.
- Room temperature: Because this fudge contains dairy and marshmallow fluff, it’s best not to leave it out at room temperature for more than a few hours to prevent softening or spoilage.
Whenever I store fudge, I like to add a piece of wax paper between layers if stacking in containers — this keeps the pieces from sticking together and makes serving easier.
FAQs
Q: Can I use fresh bananas instead of banana flavoring?
A: Fresh bananas add moisture and will change the fudge’s texture, making it softer and less firm. Banana flavoring is recommended to maintain that classic fudge consistency.
Q: Why do I need to cover the pan after adding white baking chips?
A: Covering allows the chips to melt evenly with residual heat without stirring, which helps achieve a smooth, glossy fudge.
Q: Can I use regular vanilla extract instead of clear vanilla flavoring?
A: You can, but regular vanilla extract might darken the fudge slightly. Clear vanilla flavoring keeps the fudge looking bright and banana-yellow.
Q: How do I know when the sugar mixture is ready?
A: The sugar should dissolve completely, and the mixture will be hot and simmering gently. Stirring for 3 minutes after it starts simmering ensures the sugar is fully incorporated.
If you love the charm of homemade sweets, you might also enjoy the nostalgic flavors of the Pineapple Cream Cheese Pound Cake — it’s another recipe that brings smiles and sweet memories to any table.
Thanks for spending time in the kitchen with me today! If you try this banana fudge, I’d love to hear how it turns out. And for more delicious, cozy recipes and baking inspiration, be sure to follow us on Pinterest.
Delightfully Nostalgic Banana Fudge
Ingredients
Equipment
Method
- Step 1: Line a 9x9-inch baking dish with parchment paper extending up all sides. Lightly spray with nonstick cooking spray and set aside.
- Step 2: In a small bowl, stir together banana flavoring and yellow food color gel. Set aside.
- Step 3: Melt butter in a heavy-bottomed saucepan over medium heat. Add half and half, heavy cream, and clear vanilla flavoring, stirring to combine.
- Step 4: Pour in granulated sugar and stir constantly as mixture comes to a gentle simmer (6-7 minutes). Continue stirring for 3 minutes until sugar dissolves completely.
- Step 5: Remove saucepan from heat. Add white baking chips, cover and let sit for 3-4 minutes until chips soften. Stir until smooth and creamy.
- Step 6: Stir in marshmallow fluff until fully blended.
- Step 7: Add banana flavor and color mixture, stirring well to distribute evenly.
- Step 8: Pour fudge into prepared baking dish, spreading evenly. Sprinkle crushed Nilla wafers on top if desired. Cover tightly with aluminum foil.
- Step 9: Let fudge sit at room temperature for 30 minutes, then refrigerate for at least 4 hours until firm. Use parchment paper to lift fudge out and cut into 25 squares. Store in refrigerator.