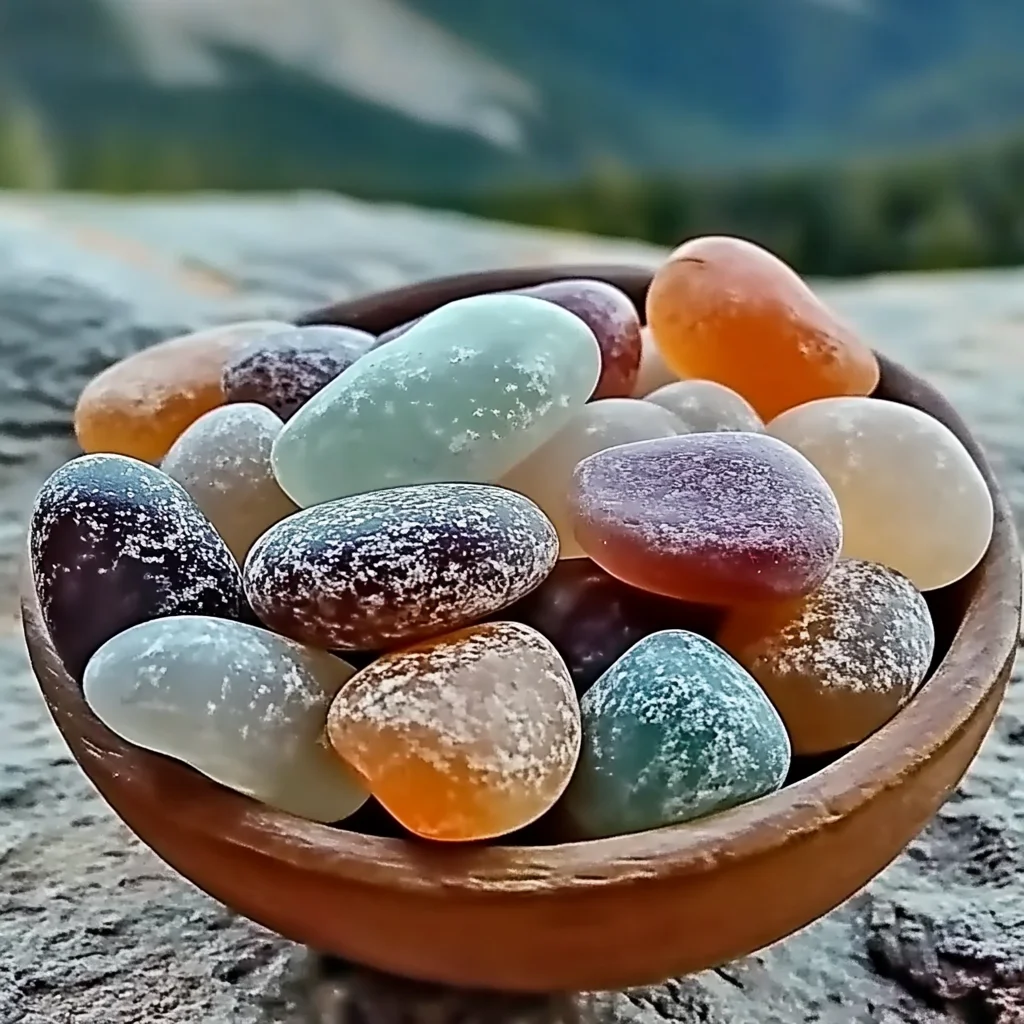
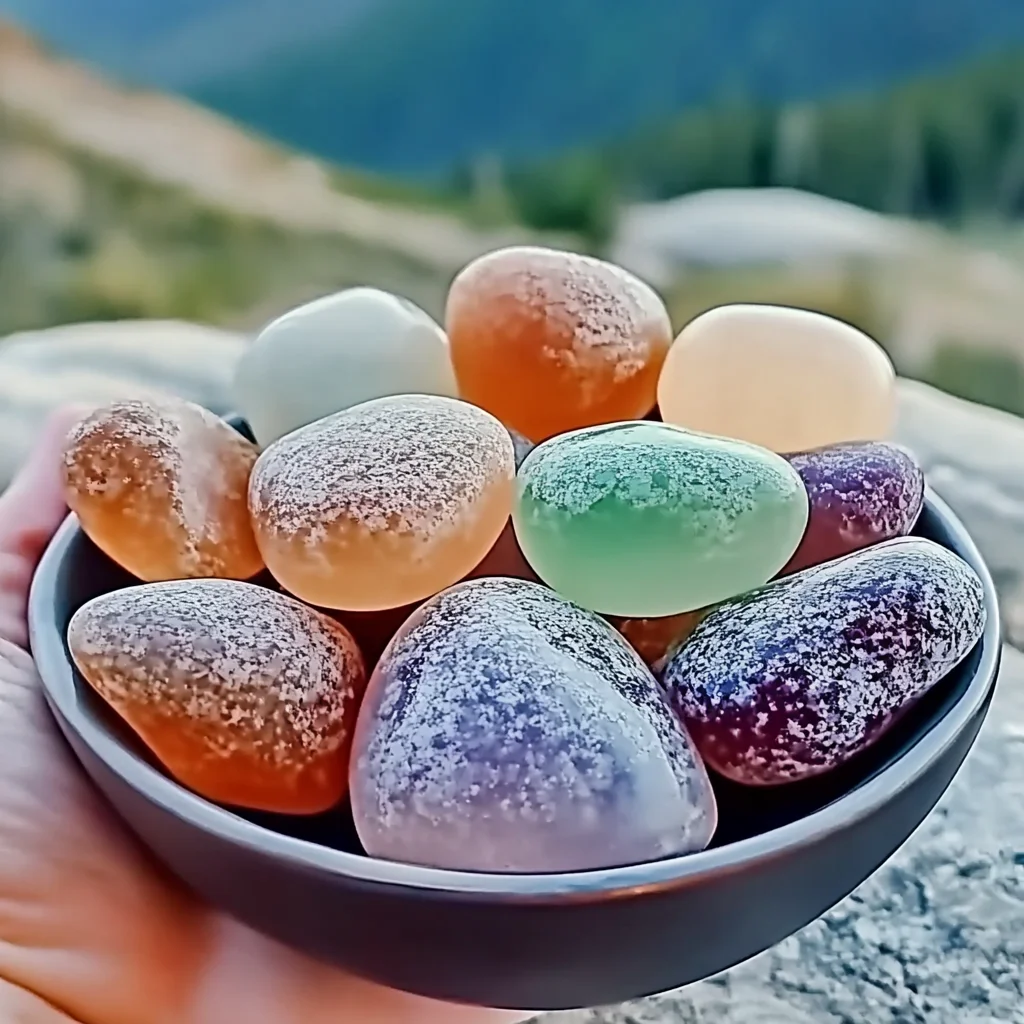
Do you remember those cozy afternoons when you’d find yourself lost in a creative project, the scent of something lovely filling the room, and the satisfaction of making something beautiful with your own hands? That’s exactly the vibe you get when you make these scented DIY aroma stones. They’re a delightful way to add a personal touch to your space, and the best part? They’re super easy and fun to create. Whether you want a natural air freshener for your home or a charming handmade gift for a friend, these aroma stones fit the bill perfectly.
I love how these little stones bring back memories of simpler times—when crafting was a way to slow down and savor the moment. They’re quick to put together, require minimal ingredients, and once dry, they scent any room gently and naturally. If you’ve ever wanted a homemade alternative to candles or sprays, these are just the ticket. Plus, if you enjoy small DIY projects like these, you might also appreciate some of my other easy and comforting recipes and crafts over at Recettia’s DIY aroma stones collection.
Why You’ll Love Scented DIY Aroma Stones
- Fast: You can mix the dough and shape your stones in under 20 minutes.
- Easy: No fancy equipment or skills needed—just simple ingredients and a bit of creativity.
- Giftable: These make thoughtful gifts that show you care, perfect for holidays or housewarmings.
- Crowd-pleasing: Everyone loves a natural scent that freshens a room without overpowering it.
Ingredients
Before you get started, let’s talk about the ingredients. Each one plays a special role in creating these charming aroma stones:
- 2 cups white all-purpose flour: The base of your dough, giving it structure and a smooth feel.
- 1 cup salt: Not just for flavor here! Salt helps dry out the dough and gives your stones a nice texture.
- 1 cup cornstarch: Adds a silky softness and helps the stones dry evenly without cracking.
- 1 cup cooled boiled water: This is your binding agent. Using boiled and cooled water ensures the dough is clean and smooth.
- 10 drops essential oils: Here’s where you add your favorite scents—lavender, eucalyptus, peppermint, or any blend you love!
- 2 tablespoons mica powder or food coloring: This adds beautiful color and a subtle shimmer to your stones, making them extra special.
I always recommend choosing essential oils that you find calming or invigorating, depending on the mood you want to create in your space. If you’re new to essential oils, lavender is a safe and universally loved choice. For a splash of color, mica powders add a lovely pearly finish that food coloring just can’t match.
How to Make Scented DIY Aroma Stones
Alright, now that you have everything ready, let’s dive into making your aroma stones step by step. I promise, it’s as simple as mixing up a batch of cookie dough!
- Mix your dry ingredients. In a large mixing bowl, combine the 2 cups of white all-purpose flour, 1 cup of salt, and 1 cup of cornstarch. Stir them together well to make sure everything is evenly distributed.
- Add the water slowly. Gradually pour in the 1 cup of cooled boiled water while stirring. You want to mix as you pour so the dough forms smoothly without lumps. It should come together into a soft but firm dough—kind of like playdough.
- Add scent and color. Now it’s time to personalize! Add about 10 drops of your favorite essential oils and 2 tablespoons of mica powder or food coloring to the dough. Knead everything together with your hands until the scent and color are evenly spread out. This is a fun step where your stones really start to come alive.
- Shape your stones. Pinch off small pieces of dough and mold them into little stone shapes. You can keep them smooth and round, or use cookie cutters and stamps to add texture. Place each shaped stone on a baking tray lined with parchment paper or a silicone mat.
- Let them dry. This is the patience part: leave your aroma stones to dry naturally for at least 12 hours. Depending on your home’s humidity, they might need a little longer. Make sure they’re completely dry and hard before using or gifting.
Once dry, these stones will slowly release their fragrance into the air, making your home smell fresh and inviting with no flames or sprays needed. I usually make a batch every few weeks to keep my living spaces smelling lovely, especially during cozy fall evenings.
Substitutions & Additions
Want to get creative? Here are some fun ideas to tweak the recipe or add your own spin:
- Swap flour types: You can use whole wheat flour for a more rustic look, though the stones might be a bit darker.
- Use baking soda instead of salt: This will still help dry the dough, but the texture will be slightly different—smoother and less grainy.
- Try different essential oil blends: Combine citrus oils like orange and lemon for an energizing scent, or mix lavender and chamomile for a relaxing vibe.
- Add dried herbs or flower petals: Press a few lavender buds or rose petals onto your stones before drying for an extra decorative touch.
- Use natural dyes: Instead of mica powder or food coloring, try beet juice powder or spirulina for a natural tint.
- Make themed stones: Shape your stones for holidays or special occasions—think hearts for Valentine’s Day or stars for the holidays.
These creative twists can make your aroma stones even more personal and special. If you want to pair these DIY stones with something sweet, you might enjoy baking up a comforting treat like the Pineapple Cream Cheese Pound Cake—a perfect way to fill your home with warmth and deliciousness!
Tips for Success
Here are a few of my best tips to make sure your aroma stones turn out perfectly every time:
- Don’t rush the drying process. The stones need to be completely dry and hard before you use them, or they’ll crumble or lose their scent quickly.
- Mix the dough thoroughly. Make sure the essential oils and color are evenly distributed so every stone smells just right and looks uniformly pretty.
- Use gloves if you’re sensitive. Essential oils can be strong on skin, so gloves help protect your hands during mixing and shaping.
- Store extras in an airtight container. If you make a big batch, keep unused stones in a sealed bag or box to preserve their scent until you’re ready to use them.
- Experiment with shapes and sizes. Smaller stones dry faster but hold less scent, while larger stones last longer but take more time to dry.
If you’re the type who likes to prepare gifts ahead of time, these aroma stones are a fantastic “make ahead” project. You can create them weeks in advance, store them properly, and then package them beautifully when the occasion arrives. Making them can feel just as rewarding as baking your favorite cozy recipes, like the easy-to-make Pecan Pie that fills your kitchen with that irresistible nutty aroma.
How to Store Scented DIY Aroma Stones
Storing your aroma stones properly will help keep their scent fresh for as long as possible. Here’s how you can care for them once they’re dry:
- Keep them in a dry place. Moisture can make the stones soften or mold, so a cool, dry spot is best.
- Use airtight containers or resealable bags. This prevents the essential oils from evaporating and keeps the scent locked in until you’re ready to use them.
- Refresh their scent as needed. When the aroma starts to fade, simply add a few drops of your favorite essential oil to the stones and let them absorb it.
The shelf life for these stones is quite long—several months to even a year if stored well. This makes them ideal for stocking up or gifting throughout the year without worry.
FAQs
Can I use any essential oils for aroma stones?
Yes! You can use any essential oils you like, but make sure they’re safe for indoor use and non-toxic, especially if you have pets or children. Popular choices include lavender, eucalyptus, peppermint, and citrus blends.
How long do the aroma stones take to dry?
Generally, it takes about 12 to 24 hours for the stones to dry completely, depending on the thickness and your home’s humidity. Thinner stones dry faster, so keep that in mind when shaping them.
Can I bake the stones to speed up drying?
While some recipes suggest baking, I recommend air drying to avoid cracking or discoloration. If you’re in a hurry, you can bake at a very low temperature (around 175°F/80°C) for 1-2 hours, but watch carefully.
Are these stones safe to handle and use around kids?
Yes, as long as you use non-toxic essential oils and supervise young children during crafting. The dough ingredients are all common pantry items, but essential oils should be used with care.
If you’re loving these scented DIY aroma stones and want to explore more creative projects, be sure to browse through other charming crafts and recipes on Recettia.
Don’t forget to follow my Pinterest for tons of inspiration, including cozy recipes and fun DIY crafts just like this one!
Scented DIY Aroma Stones
Ingredients
Equipment
Method
- Step 1: In a large mixing bowl, combine 2 cups white all-purpose flour, 1 cup salt, and 1 cup cornstarch. Stir well until evenly distributed.
- Step 2: Gradually add 1 cup cooled boiled water while stirring. Mix to form a soft but firm dough similar to playdough, with no lumps.
- Step 3: Add about 10 drops of your favorite essential oils and 2 tablespoons mica powder or food coloring. Knead the dough by hand until scent and color are evenly spread.
- Step 4: Pinch off small pieces of dough and shape into stones. Use cookie cutters or stamps if desired. Place stones on a baking tray lined with parchment paper or a silicone mat.
- Step 5: Let the stones dry naturally for at least 12 hours until completely dry and hard. Drying time may vary depending on thickness and humidity.