Hey there, sweet friends! Remember those glorious summer mornings, or even just those afternoons when you needed a little ray of sunshine in your day? There’s something so special about a vibrant, frosty drink that instantly transports you to a tropical paradise, even if you’re just in your own kitchen. Well, get ready to experience that magic with these incredible Mango Strawberry Sunrise Frappuccinos!
This isn’t just a drink; it’s a mood. It’s the kind of recipe that looks utterly fancy but is secretly incredibly easy and quick to whip up. Seriously, you’ll be amazed at how fast you can go from craving to sipping on this layered masterpiece. It’s truly memorable, perfect for a special brunch, a refreshing afternoon treat, or simply because you deserve a little extra joy today. And if you’re like me and love easy desserts that don’t heat up the kitchen, you might also adore a no-bake peanut butter pie to pair with it!
Why You’ll Love Mango Strawberry Sunrise Frappuccinos
- Fast
- Easy
- Giftable
- Crowd-pleasing
Ingredients
Gathering your ingredients is half the fun! We’re keeping things super simple here, focusing on fresh, vibrant flavors.
Strawberry Layer:
- 1 cup frozen strawberries: These are your sweet, slightly tart base. Using frozen fruit is key for that thick, frosty texture without needing a ton of extra ice.
- 1/2 cup ice: Adds to the chill factor and helps get that perfect frappuccino consistency.
- 1/2 cup milk (or strawberry juice): Use your favorite! Dairy milk, almond milk, or even a splash of strawberry juice will work beautifully.
- 1 tbsp honey or granulated sugar (optional): Taste your strawberries first. If they’re super sweet, you might not need this, but a little extra can make them sing!
- 1/2 tsp lemon juice: This is my little secret! A tiny bit of lemon juice really brightens up the strawberry flavor.
Mango Layer:
- 1 cup frozen mango chunks: The sunny, sweet star of our show! Again, frozen is best for that thick, creamy texture.
- 1/2 cup ice: Essential for that perfect slushy blend.
- 3/4 cup coconut milk or oat milk (use unsweetened for less sugar): These milks give a lovely creamy, tropical undertone to the mango. Feel free to use your preferred plant-based milk!
- 1 tbsp agave or maple syrup (optional): Adjust to your mango’s sweetness. A little natural syrup can really enhance the tropical flavor.
Optional Toppings:
- Whipped cream: A classic, creamy cloud on top!
- Sliced strawberries or mango pieces: For a fresh, colorful garnish.
- Edible glitter or tropical sprinkles: To make them extra festive and fun!
- Tiny paper umbrella or decorative straw: Because presentation matters, and who doesn’t love a cute straw?
How to Make Mango Strawberry Sunrise Frappuccinos
Alright, let’s get blending! You’re just a few steps away from sipping on pure sunshine.
- Prepare the Strawberry Layer: First things first, grab your blender. Toss in your frozen strawberries, 1/2 cup of ice, milk (or strawberry juice), that optional honey or granulated sugar, and the squeeze of lemon juice. Blend on high until the mixture is beautifully smooth and thick. You want it to be like a soft-serve consistency. Once it’s perfect, transfer this glorious red mixture to a bowl and pop it into the freezer for about 3-5 minutes. This helps it firm up just a touch, making those distinct layers easier to achieve.
- Prepare the Mango Layer: Give your blender a quick rinse – we don’t want any pink in our sunny mango layer! Now, add the frozen mango chunks, the remaining 1/2 cup of ice, your chosen coconut or oat milk, and the optional agave or maple syrup. Blend on high until this layer is also silky smooth and thick. Just like the strawberry layer, you’re aiming for that luscious, frosty consistency.
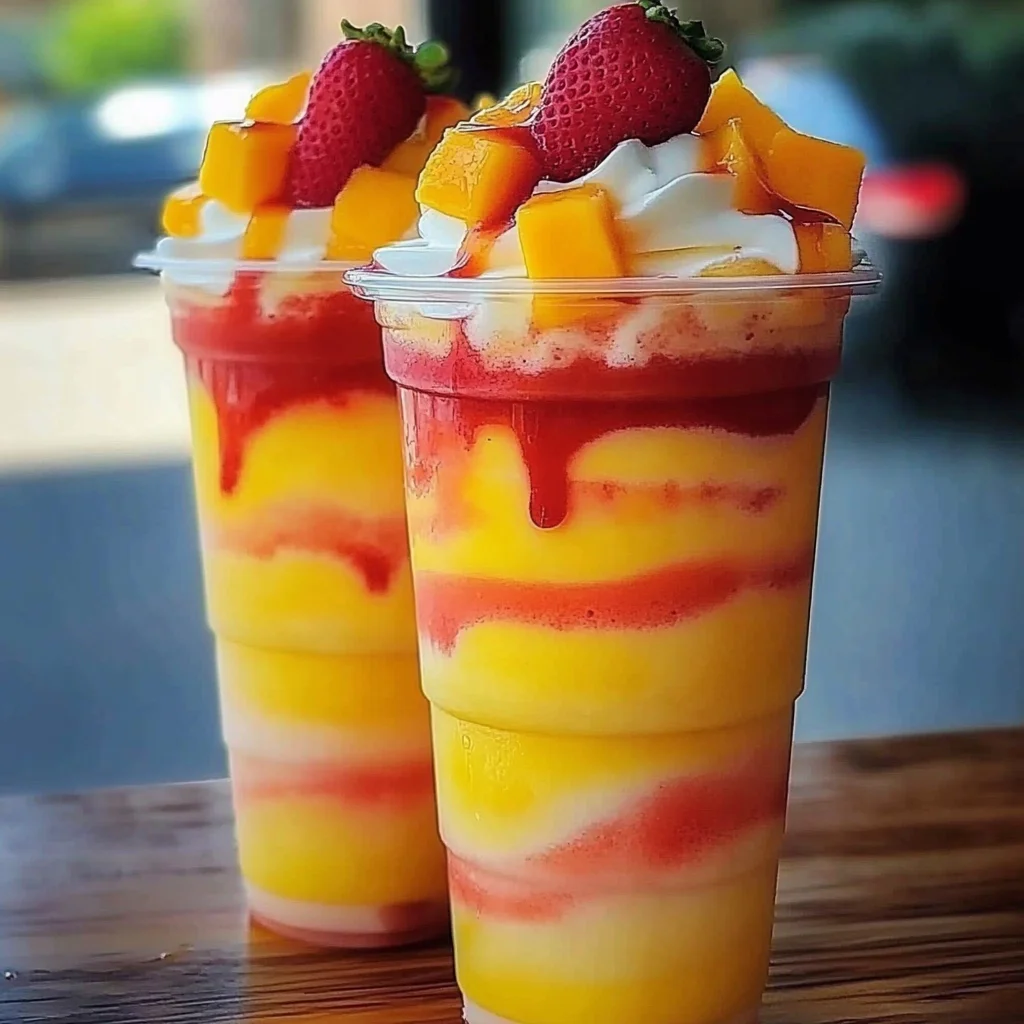
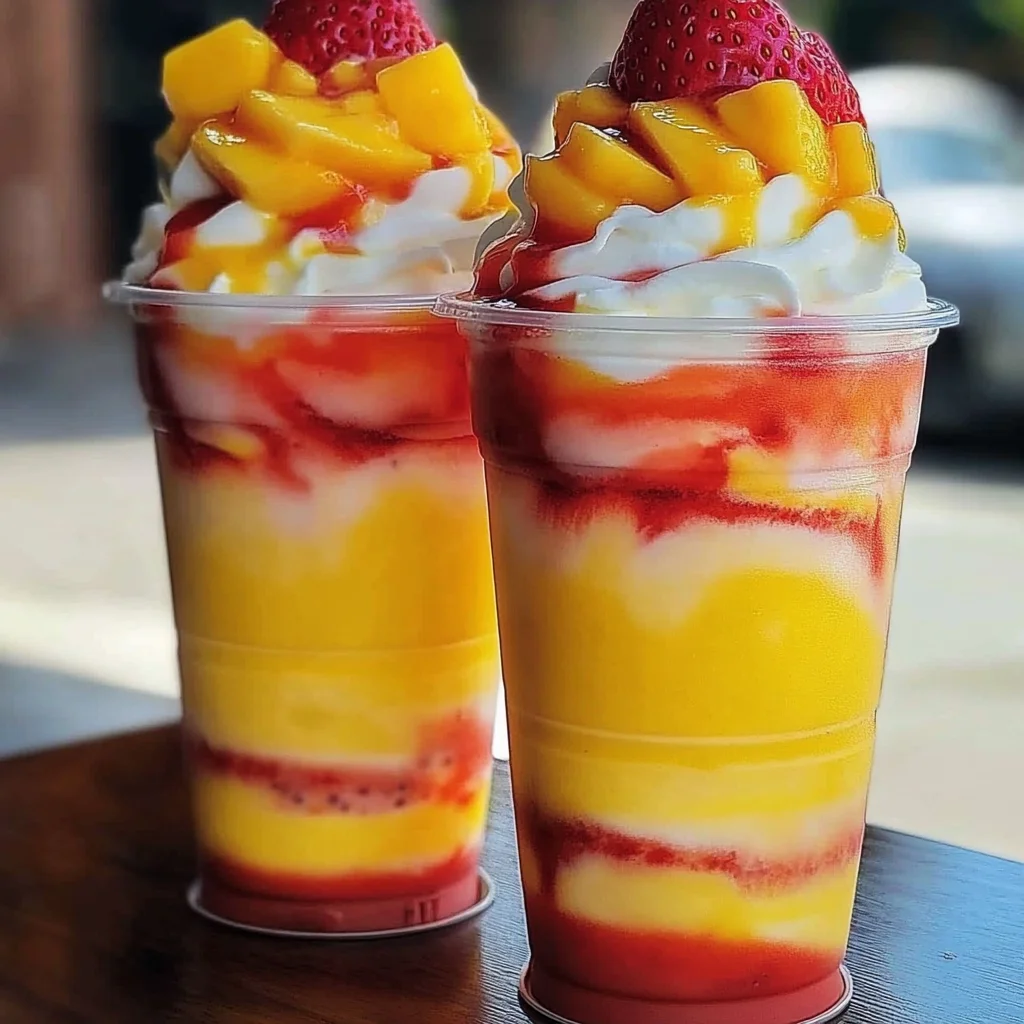
- Assemble the Frappuccinos: This is where the magic happens and you create that gorgeous sunrise effect! Grab your serving glasses. Carefully pour the mango layer into each glass, filling them about halfway. Now, for the distinct layers: gently hold a spoon, upside down, just above the surface of the mango layer. Slowly pour the strawberry mixture over the back of the spoon. This technique helps the strawberry layer float on top of the mango, creating that stunning separation instead of mixing together. Take your time, you’ve got this!
- Garnish and Serve: Now for the fun part – making them look as good as they taste! If you’re feeling fancy, top with a dollop of whipped cream, a few fresh sliced strawberries or mango pieces, and a sprinkle of edible glitter or tropical sprinkles. Pop in a decorative straw or a tiny paper umbrella, and serve immediately! These are definitely best enjoyed right away when they’re at their frosty peak.
Substitutions & Additions
This recipe is super versatile, so feel free to play around and make it your own!
- Milk Alternatives: While coconut and oat milk are fantastic, feel free to use any milk you prefer – almond milk, soy milk, or even regular dairy milk will work just fine.
- Sweetener Swaps: Not a fan of honey or agave? You can use stevia, erythritol, or another preferred natural sweetener. You can also skip the added sweetener entirely if your fruits are super ripe and sweet!
- Boost the Nutrition: Want a little extra something? Add a scoop of your favorite vanilla or unflavored protein powder to either layer for a protein-packed start to your day. A spoonful of Greek yogurt would also add a lovely tang and creaminess.
- Other Fruit Combos: While mango and strawberry are a match made in heaven, don’t be afraid to experiment! For another fruity twist, you could even try blending in some pineapple, just like the delicious flavors in our pineapple cream cheese pound cake. Peaches, raspberries, or blueberries would also be lovely additions or substitutions.
- Flavor Enhancers: A tiny splash of vanilla extract can deepen the sweetness, or a few fresh mint leaves blended into the mango layer could add an unexpected refreshing twist.
- Adult Version: For a grown-up treat, add a shot of white rum or vodka to each layer before blending. Just adjust the sweetness if needed!
Tips for Success
Getting that picture-perfect, delicious frappuccino is easy with a few simple tricks!
- Frozen is Best: I really can’t stress this enough – using frozen fruit is essential for the thick, frosty texture of a frappuccino. If you use fresh fruit, you’ll end up with more of a juice or smoothie consistency, and you’ll need a lot more ice, which can dilute the flavor.
- Powerful Blender is Your Friend: A high-speed blender will give you the smoothest, creamiest results. If your blender struggles, you might need to stop and scrape down the sides a few times, or add a tiny splash more liquid (just a tablespoon at a time!) to get things moving.
- The Spoon Trick is Key: Don’t rush the layering! That spoon-on-the-back trick truly works wonders for getting those distinct, beautiful layers. If you just pour directly, the layers will likely mix, and while still delicious, it won’t have that “sunrise” look.
- Adjust Sweetness to Taste: Fruits vary in sweetness. Always taste your mixture after blending each layer and adjust the honey/sugar/syrup as needed.
- Prep Ahead Idea: You can portion out your frozen fruit and ice into individual freezer bags for each layer ahead of time. When you’re ready to blend, just grab a bag, add your liquid and sweetener, and blend! For more incredible dessert ideas, especially those perfect for sharing, don’t miss our Chicago-style bakery apple slices.
How to Store Mango Strawberry Sunrise Frappuccinos
These frappuccinos are definitely at their absolute best when enjoyed immediately! The frosty, distinct layers and creamy texture are perfectly suited for fresh sipping.
- Best Fresh: I highly recommend making these right before you plan to serve them. The longer they sit, the more the ice will melt, and the layers will start to bleed into each other, changing the beautiful visual and the texture.
- Storing Components (Not Ideal for Frappuccinos): If you absolutely must, you could blend the individual fruit layers and store them separately in airtight containers in the freezer. However, they will freeze solid, and you’ll need to re-blend them with a little extra liquid and ice to get back to a frappuccino consistency, which can sometimes affect the texture. So, for the true “frappuccino” experience, blend and serve!
FAQs
Got questions? I’ve got answers!
Q: Can I use fresh fruit instead of frozen?
A: While you can, I strongly recommend using frozen fruit for these frappuccinos. Frozen fruit is what gives them that thick, icy, creamy texture without watering down the flavor. If you use fresh fruit, you’ll need to add a lot more ice, and the end result will be thinner and more like a regular smoothie.
Q: How do I make sure the layers stay separate?
A: The key is two-fold! First, make sure both your fruit mixtures are very thick – almost like soft-serve ice cream. Chilling the strawberry layer in the freezer for a few minutes helps with this. Second, use the spoon trick when pouring! Pouring the top layer slowly over the back of an upside-down spoon held just above the bottom layer helps it gently float on top.
Q: Can I make this dairy-free?
A: Absolutely! This recipe is designed to be easily dairy-free. Just use your favorite plant-based milks like coconut milk, oat milk, almond milk, or soy milk. All work wonderfully!
Q: What if my blender isn’t very powerful?
A: If you have a less powerful blender, you might need a little extra patience! Blend in shorter bursts, stopping to scrape down the sides frequently. You can also add an extra tablespoon or two of liquid (milk/juice) to help things move along, but try to use as little as possible to maintain that thick frappuccino consistency.
For more delicious recipe inspiration and beautiful food photography, be sure to follow us on Pinterest!
Mango Strawberry Sunrise Frappuccinos
Ingredients
Equipment
Method
- Step 1: Prepare the Strawberry Layer: Grab your blender. Toss in your frozen strawberries, 1/2 cup of ice, milk (or strawberry juice), the optional honey or granulated sugar, and the squeeze of lemon juice. Blend on high until the mixture is beautifully smooth and thick, like a soft-serve consistency. Transfer this red mixture to a bowl and pop it into the freezer for about 3-5 minutes to firm up.
- Step 2: Prepare the Mango Layer: Give your blender a quick rinse. Add the frozen mango chunks, the remaining 1/2 cup of ice, your chosen coconut or oat milk, and the optional agave or maple syrup. Blend on high until this layer is also silky smooth and thick, aiming for a luscious, frosty consistency.
- Step 3: Assemble the Frappuccinos: Grab your serving glasses. Carefully pour the mango layer into each glass, filling them about halfway. Gently hold a spoon, upside down, just above the surface of the mango layer. Slowly pour the strawberry mixture over the back of the spoon. This technique helps the strawberry layer float on top of the mango, creating a stunning separation.
- Step 4: Garnish and Serve: Top with a dollop of whipped cream, a few fresh sliced strawberries or mango pieces, and a sprinkle of edible glitter or tropical sprinkles if desired. Pop in a decorative straw or a tiny paper umbrella, and serve immediately! These are best enjoyed right away when they're at their frosty peak.