There’s something truly magical about the soft, dreamy flavors of cotton candy that instantly takes me back to those carefree summer nights at the county fair. The gentle swirl of pink and blue clouds drifting by, the sweet scent in the air, and that melt-in-your-mouth sugary delight — it’s pure nostalgia in every bite. Now, imagine capturing that whimsical cotton candy magic into a cookie that’s soft, tender, and bursting with color. That’s exactly what these Irresistibly Soft Cotton Candy Cookies do. They’re not just cookies; they’re a joyful experience, easy to whip up, and perfect for sharing with friends and family.
If you’re looking for a quick yet impressive treat that’s both playful and delicious, these cookies are going to steal your heart. The best part? You don’t need any fancy ingredients or complicated steps. Just simple pantry staples, a splash of food coloring, and a little love in the kitchen. Let me walk you through why these cotton candy-inspired cookies have become one of my all-time favorites, and how you can easily make them your new go-to recipe.
Why You’ll Love Irresistibly Soft Cotton Candy Cookies
- Fast: These cookies come together quickly, perfect for when you need a sweet fix in a flash.
- Easy: No baking expertise required—just straightforward steps that anyone can follow.
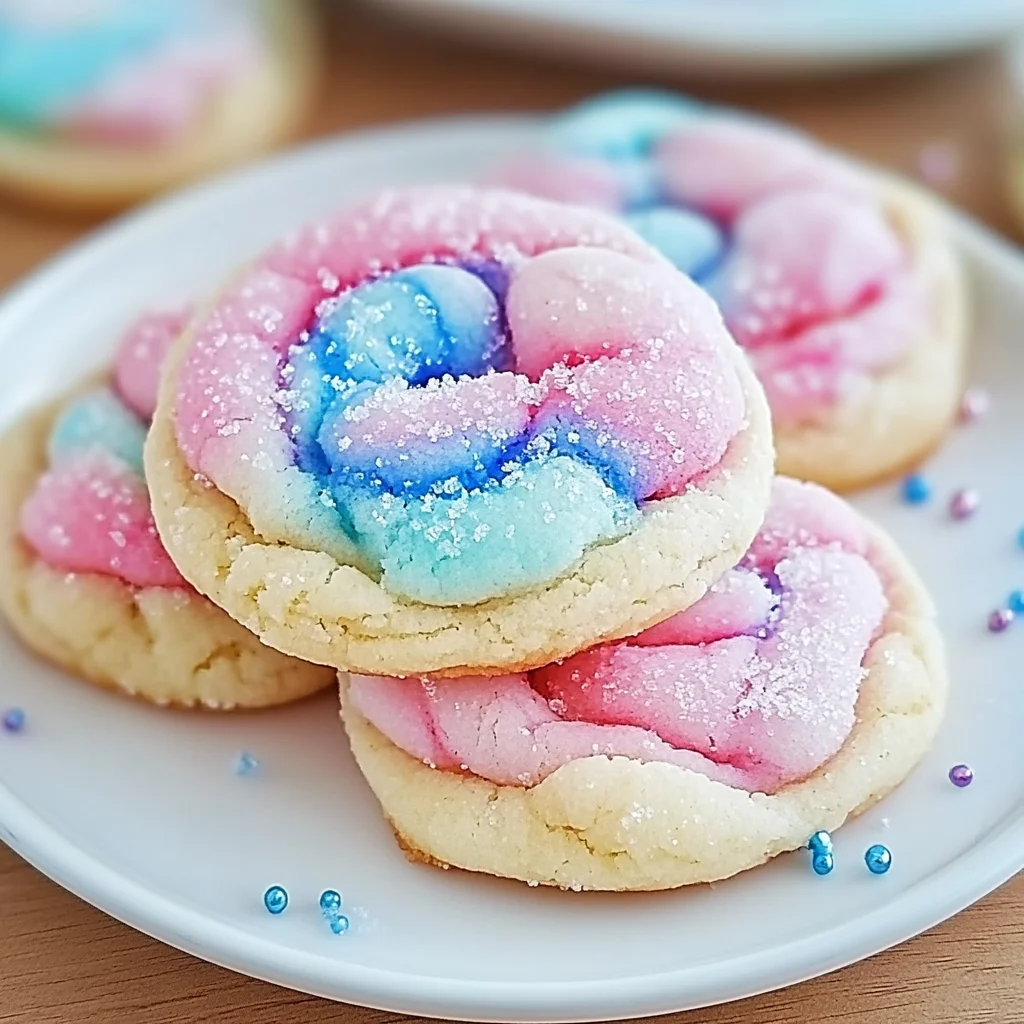
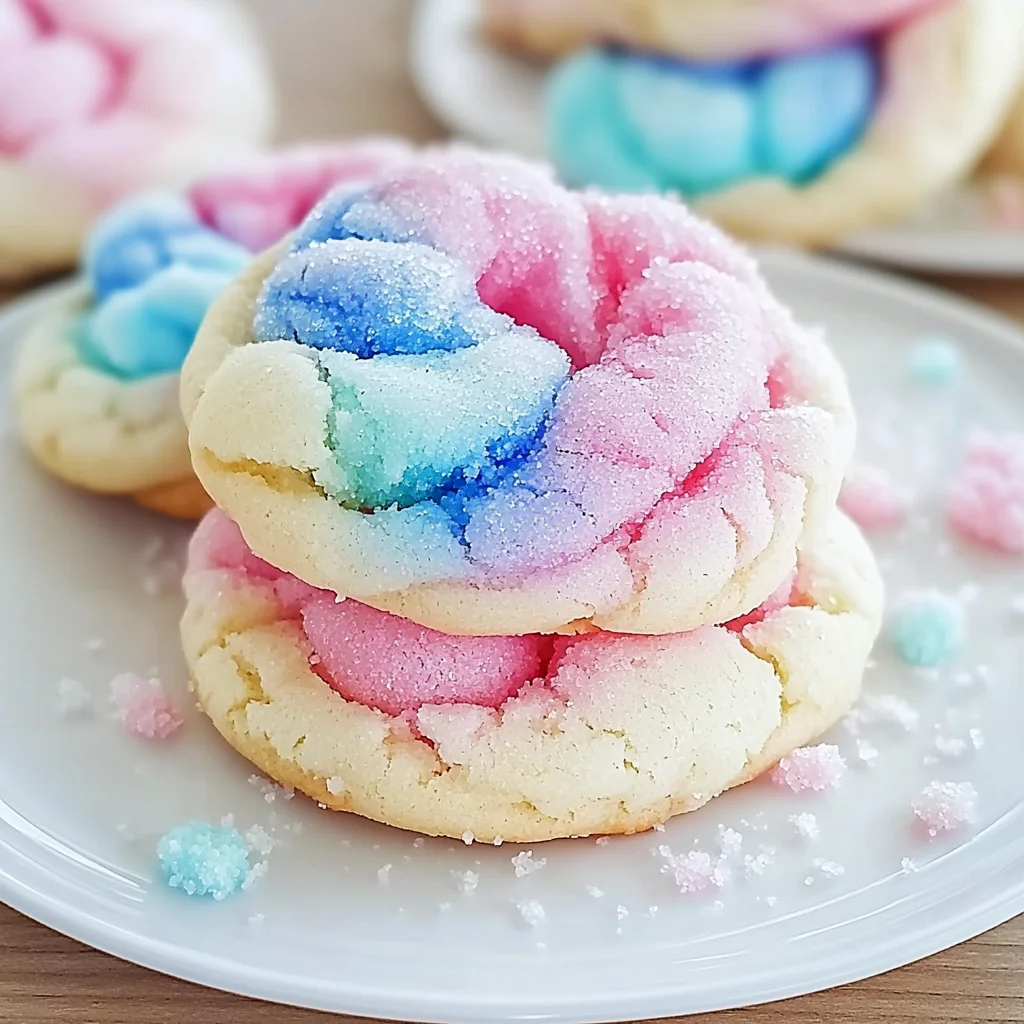
- Giftable: Their charming pastel marbled colors make them perfect for gifting during holidays, birthdays, or just because.
- Crowd-pleasing: Everyone loves a soft, chewy cookie that looks as fun as it tastes.
Ingredients
Let’s take a look at what you’ll need. Each ingredient plays a key role in making these cookies soft, flavorful, and visually stunning:
- 2 1/4 cups all-purpose flour: The base of your cookie dough, providing structure but still keeping it tender.
- 1 teaspoon baking powder: Helps the cookies rise softly without puffing up too much.
- 1/2 teaspoon baking soda: Works alongside the baking powder to create a delicate texture.
- 1/2 teaspoon salt: Balances the sweetness and enhances all the flavors.
- 1 cup unsalted butter, softened: The secret to that melt-in-your-mouth softness and rich taste.
- 1 cup granulated sugar: Adds sweetness and contributes to a slight crisp edge while keeping the centers chewy.
- 1 large egg: Binds everything together and adds moisture.
- 2 teaspoons vanilla extract: Gives a warm, aromatic depth that complements the cotton candy vibe.
- 1/4 cup buttermilk: Adds a subtle tang and extra tenderness to the dough.
- Pink gel food coloring: For that iconic cotton candy pink swirl.
- Blue gel food coloring: To create a playful contrast reminiscent of classic blue cotton candy.
Using gel food coloring instead of liquid helps keep the dough’s consistency perfect without making it too wet. You can find gels in most grocery stores or online, and they’re a baker’s best friend for vibrant color without compromising texture.
How to Make Irresistibly Soft Cotton Candy Cookies
Ready to bring these dreamy cookies to life? Follow these easy steps, and I promise you’ll be amazed at how fun and quick the process is:
- Preheat your oven to 350°F (175°C) and line a baking sheet with parchment paper. This ensures your cookies bake evenly and don’t stick — a small step that makes cleanup a breeze.
- Whisk together your dry ingredients: In a medium bowl, combine the flour, baking powder, baking soda, and salt. Mixing these first helps evenly distribute everything so your cookies rise perfectly and have consistent flavor.
- Cream the butter and sugar: In a large bowl, beat the softened butter and granulated sugar for 2-3 minutes until light and fluffy. This step is key for a tender crumb, so don’t rush it. I like to use a stand mixer, but a hand mixer works just as well.
- Add the wet ingredients: Beat in the egg, vanilla extract, and buttermilk until the mixture is smooth and well combined. The buttermilk adds a lovely tang and moisture that keeps these cookies so soft.
- Fold in the dry ingredients: Gradually add the flour mixture to the wet ingredients, folding gently until just combined. Avoid overmixing here — you want to preserve that tender texture.
- Divide and color the dough: Split the dough into two equal portions. Add pink gel food coloring to one half and blue gel food coloring to the other. Mix each portion until the colors are vibrant and evenly distributed. This part always feels like a mini art project, and it’s so satisfying to see the colors come alive.
- Create the marbled effect: Take small amounts of pink and blue dough and gently roll them together to form 1½-inch balls. Don’t overwork the dough or the colors will blend too much — you want those pretty swirls that remind everyone of cotton candy clouds.
- Bake: Place the dough balls on your prepared baking sheet, spacing them about 2 inches apart. Bake for 10-12 minutes, or until the edges are just lightly golden and the centers still look slightly underdone. This ensures the cookies remain soft and chewy once cooled.
- Cool and enjoy: Let the cookies cool on the baking sheet for a few minutes before transferring them to a wire rack. This short rest lets them set perfectly without losing that tender chew.
And voilà! You’ve got yourself a batch of the most charming, soft cotton candy cookies that are as delightful to look at as they are to eat.
Substitutions & Additions
One of the best things about this recipe is how flexible it is. Here are some fun swaps and upgrades to make these cookies your own:
- Milk instead of buttermilk: If you don’t have buttermilk, simply use regular milk with a teaspoon of lemon juice or vinegar added to mimic that tangy effect.
- Dairy-free butter substitute: Use a plant-based butter or margarine if you’re avoiding dairy. Just make sure it’s softened for easy creaming.
- Different colors: Try purple and teal for a magical unicorn-inspired twist, or classic red and green for festive holiday cookies.
- Sprinkles or edible glitter: Lightly press some pastel sprinkles or edible glitter into the dough balls before baking to add an extra sparkle — perfect for parties or gift boxes.
- Flavor boost: Add a teaspoon of almond extract or a splash of cotton candy flavoring if you want to amp up the theme even more.
If you love experimenting with colorful baked goods, you might also enjoy the Strawberry Cream Cheese Pound Cake, which is just as delightful and easy to make.
Tips for Success
Baking soft cookies that look as beautiful as these cotton candy treats takes a little care. Here are my best tips to make sure your batch turns out perfect every time:
- Don’t overmix the dough: Once you add the dry ingredients, gently fold them in just until combined to avoid tough cookies.
- Keep butter at room temperature: Softened butter cream better with sugar, creating that fluffy texture that’s key for softness.
- Use gel food coloring: It’s more concentrated than liquid and won’t throw off your dough’s texture.
- Watch baking time closely: Take the cookies out when edges are just golden and centers look slightly underbaked — they’ll finish cooking on the pan.
- Prep ahead: You can make the dough a day in advance and keep it chilled. Just bring it to room temperature before shaping and baking.
If you want to explore more soft and chewy cookie recipes, don’t miss the Soft Chewy Pumpkin Spice Sugar Cookies. They’re equally comforting and perfect for cozy fall days.
How to Store Irresistibly Soft Cotton Candy Cookies
Once baked, these cookies are best enjoyed within a few days, but they do store well if handled properly. Here’s how to keep your cotton candy cookies soft and fresh:
- Cool completely: Before storing, make sure the cookies are fully cooled to avoid sogginess.
- Airtight container: Store in an airtight container at room temperature. Layering with parchment paper helps prevent sticking.
- Softness boost: If they start to dry out, place a slice of bread in the container for a day or two — it helps maintain moisture.
- Freeze for longer storage: These cookies freeze beautifully. Wrap them tightly in plastic wrap, then place in a freezer-safe bag. Thaw at room temperature before serving.
Proper storage means you can bake these ahead for parties or gifts without worrying about losing that signature softness.
FAQs
Can I make these cookies gluten-free?
Absolutely! Use a 1-to-1 gluten-free baking flour blend that includes xanthan gum for best results. The texture will be just as tender and soft.
Why are my cookies spreading too much?
This usually happens if the butter is too warm or the dough is too soft. Try chilling the dough for 15-20 minutes before baking to help maintain the shape.
Can I use liquid food coloring instead of gel?
You can, but be cautious — liquid coloring can make the dough a bit wetter, which might affect the texture. If you only have liquid, use sparingly.
How do I get the marbled effect without the colors mixing completely?
Gently roll small amounts of each colored dough together just enough to swirl them. Avoid over-rolling, which blends the colors into one shade.
If you enjoy unique and colorful baked treats that brighten your day, these cotton candy cookies are a must-try. And if you’re curious about more easy, delicious recipes that bring joy to your kitchen, be sure to visit Recettia’s recipe collection.
For a fun twist on sweet treats, you might also want to check out the delightful No-Bake Brownie Batter Dip. It’s a luscious, no-fuss dessert that pairs perfectly with cookies like these.
Thank you for spending time with me in the kitchen today. I hope these cotton candy cookies bring a splash of color and sweetness to your day, just like they do to mine!
Don’t forget to follow us on Pinterest for more inspiring recipes and baking ideas!
Irresistibly Soft Cotton Candy Cookies
Ingredients
Equipment
Method
- Step 1: Preheat oven to 350°F (175°C) and line a baking sheet with parchment paper.
- Step 2: In a medium bowl, whisk together flour, baking powder, baking soda, and salt until evenly combined.
- Step 3: In a large bowl, beat softened butter and granulated sugar for 2-3 minutes until light and fluffy using a mixer.
- Step 4: Add egg, vanilla extract, and buttermilk to the butter mixture and beat until smooth and well combined.
- Step 5: Gradually fold the dry ingredients into the wet ingredients until just combined, being careful not to overmix.
- Step 6: Divide dough into two equal portions. Add pink gel food coloring to one, blue gel food coloring to the other, mixing each until colors are vibrant.
- Step 7: Take small amounts from each colored dough and gently roll together into 1½-inch balls, creating a marbled effect without over-mixing.
- Step 8: Place dough balls on prepared baking sheet about 2 inches apart. Bake 10-12 minutes until edges are lightly golden and centers appear slightly underdone.
- Step 9: Allow cookies to cool on baking sheet for a few minutes before transferring to a wire rack to cool completely.