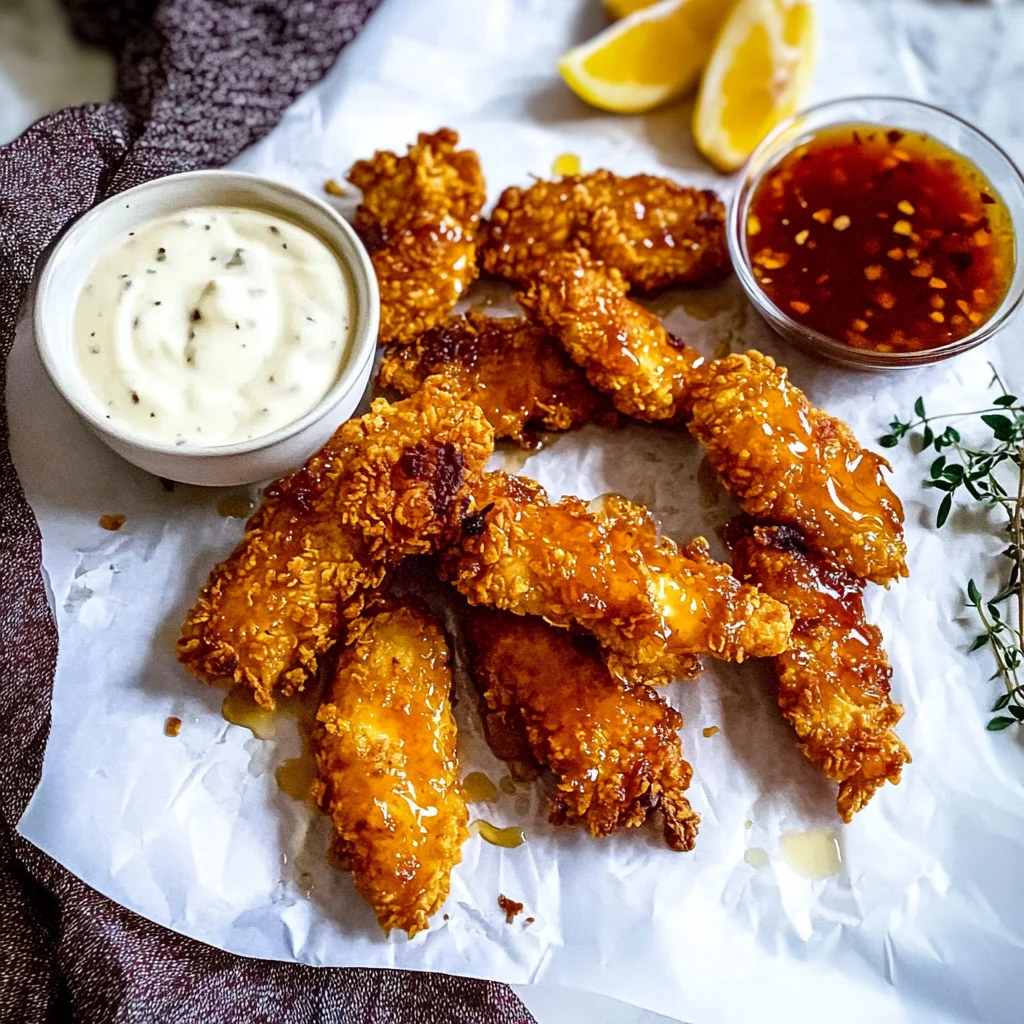
There’s something truly comforting about biting into crispy chicken tenders that have a perfect balance of spicy and sweet. Hot honey chicken tenders bring back memories of casual family dinners and lively weekend gatherings where everyone reaches for just one more bite. If you’re craving that nostalgic crunch with a fiery-sweet twist, this recipe is for you. Plus, it’s so easy and quick to whip up, you’ll find yourself making it on repeat for game nights, weeknight dinners, or even as a thoughtful gift to share with friends. Let me walk you through how to get that golden, crunchy perfection with a lovely kick of hot honey glaze.
Why You’ll Love Hot Honey Chicken Tenders
- Fast: From brining to frying or baking, the whole process fits perfectly into a busy evening.
- Easy: Simple ingredients and straightforward steps make this a no-fuss recipe you can trust.
- Giftable: Wrapped up nicely, these tenders make a delightful homemade treat for friends or family.
- Crowd-pleasing: The spicy-sweet combo appeals to all ages and taste buds—perfect for parties or casual meals.
Ingredients
Before you start, here’s a quick rundown of what you’ll need. Each ingredient plays a crucial role in building flavor and that crave-worthy texture.
- 1.25 to 1.5 lb chicken breasts: You want fresh, good-quality chicken for tender, juicy bites.
- 1 cup dill pickle juice: This is the secret to juicy, flavorful chicken. If you prefer, any flavorful brine or pickle juice works, but dill adds a lovely tang.
- ⅓ cup all-purpose flour: Or use gluten-free flour if you’re catering to dietary needs; this helps the coating stick.
- ½ tsp salt: Enhances overall flavor.
- ½ tsp red pepper flakes: Adds a subtle heat right in the breading.
- ½ tsp garlic powder & ½ tsp onion powder: These layers of seasoning bring warmth and depth.
- 3 eggs, whisked: Acts as the glue for the crispy coating.
- 4 cups crushed corn flakes: For that unbeatable crunch—feel free to add more if you want extra crispiness.
- ⅓ cup hot honey: Store-bought is perfectly fine; this glaze is the star that ties sweet and spicy together.
- ¼ cup oil for frying: Use your favorite neutral oil like canola or vegetable oil. You can also air fry or bake if you want a lighter option.
- Pickles for serving (optional): They add a refreshing tangy crunch that pairs beautifully with the tenders.
How to Make Hot Honey Chicken Tenders
Ready to dive in? Here’s a step-by-step guide that will have you savoring these hot honey chicken tenders in no time. Grab your apron and let’s get cooking!
Step 1: Brine the Chicken
Start by slicing your chicken breasts into evenly sized tenders. This ensures they cook uniformly and have that perfect bite each time. Place the tenders into a gallon-sized zip-top bag or a large bowl and pour in the dill pickle juice. Seal it up and refrigerate for at least 20 minutes; if you have more time, up to 24 hours works wonders for flavor and tenderness. I like to brine mine overnight when I’m prepping ahead to really let the flavors soak in deeply.
Step 2: Prepare Your Dredging Station
While the chicken is brining, set up three shallow bowls or plates. In the first, mix the all-purpose flour with salt, red pepper flakes, garlic powder, and onion powder. This seasoned flour is the first step to building that flavorful crust. Next, whisk your eggs in the second bowl—this will help the coating stick. Finally, crush your corn flakes until they’re roughly the texture of coarse breadcrumbs and place them in the third bowl. This triple station setup makes the breading process a breeze and keeps your kitchen organized.
Step 3: Dredge the Chicken
Take each tender out of the pickle juice and let any excess drip off. First, coat it evenly in the seasoned flour mixture, shaking off any extra. Then dip it into the whisked eggs, making sure it’s fully covered. Lastly, press it into the crushed corn flakes until it’s well coated. Place each breaded tender on a parchment-lined baking sheet. This is a great time to multitask—if you’re curious about other crispy chicken recipes, you might want to check out some amazing ideas on easy sheet pan chicken dishes to keep your dinner options fresh and exciting.
Step 4: Cook the Tenders
Here’s where you can choose your preferred cooking method:
- Pan Fry: Heat oil in a skillet over medium heat. Fry 4-6 tenders at a time for about 6-7 minutes per side, turning frequently to ensure even browning. Drain on paper towels to remove excess oil. This method gives you the crispiest, most golden crust.
- Air Fryer: Preheat your air fryer to 350ºF. Lightly spray the tenders with cooking spray to help crispiness. Cook for 15-18 minutes, flipping halfway through. This is a fantastic healthier alternative that still delivers crunch.
- Bake: Preheat the oven to 375ºF and arrange tenders on a parchment-lined baking sheet. Give them a quick spritz of cooking spray and bake for 16-18 minutes, flipping halfway through. Baking is hands-off and perfect for busy days.
Whichever method you choose, be sure the internal temperature reaches 165ºF for safe, juicy chicken. I always keep a meat thermometer handy—it’s a game-changer for perfectly cooked chicken every time.
Step 5: Finish and Serve
Once cooked, let the tenders rest for a few minutes to lock in juices. Then, the magic touch: drizzle generously with hot honey. The sweet heat glaze is what brings these tenders to life. Serve with crunchy pickles on the side for a classic flavor combo that’s sure to delight. If you’re planning a full meal, these tenders pair beautifully with a side of cheesy garlic butter skillet corn or even crispy baked sweet potatoes—check out some of those recipes on Recettia’s homepage for inspiration.
Substitutions & Additions
Feel like mixing things up? Here are some swaps and tasty add-ons that will keep this recipe fresh and fun:
- Pickle Juice Swap: If you don’t have dill pickle juice, try using lemon juice with a pinch of salt or even a mild vinegar brine for a different tang.
- Flour Alternatives: Gluten-free all-purpose flour works great here, or even almond flour for a nutty twist.
- Crunchy Coating Options: Crushed panko breadcrumbs or seasoned tortilla chips can add a unique texture instead of corn flakes.
- Heat Level: Adjust red pepper flakes to taste or add a dash of cayenne pepper for extra fire. For a smoky note, try smoked paprika in the flour mix.
- Hot Honey Variations: Make your own by combining honey with sriracha or chili oil. You can also drizzle a little extra hot honey mixed with lime zest for a bright finish.
- Serving Ideas: Try these tenders with a creamy blue cheese dip or ranch dressing, or alongside some easy homemade hush puppies for a Southern-inspired feast—you can find a fantastic recipe for hush puppies right here.
Tips for Success
- Brining Time: Don’t skip the pickle juice brine! Even 20 minutes makes a big difference, but overnight gives the best flavor and tenderness.
- Even Sizing: Slice your chicken into similar-sized tenders to ensure even cooking and avoid some pieces drying out while others are underdone.
- Crush Corn Flakes Just Right: You want a mix of fine crumbs and small chunks for the best crispy texture—not too powdery, not too chunky.
- Don’t Overcrowd the Pan: If frying, cook in batches to keep the oil temperature steady and the tenders crispy.
- Use a Thermometer: To avoid guesswork and ensure safety, aim for an internal temperature of 165ºF.
- Prep Ahead: You can brine the chicken the night before and even do the breading step in advance. Just keep the breaded tenders chilled until cooking.
How to Store Hot Honey Chicken Tenders
If you have leftovers (which might be rare because they’re so good!), here’s how to keep them tasting fresh:
- Refrigerate: Store tenders in an airtight container for up to 3 days. Reheat in the oven at 350ºF to keep them crispy rather than using the microwave.
- Freeze: For longer storage, freeze tenders in a single layer on a baking sheet, then transfer to a freezer-safe bag. They’ll keep well for up to 2 months. Reheat in the oven or air fryer straight from frozen.
- Hot Honey Sauce: Drizzle the hot honey glaze just before serving. If you store tenders with the sauce, the coating might get soggy.
FAQs
Can I use chicken thighs instead of breasts?
Absolutely! Chicken thighs are juicier and can add extra flavor. Just trim and slice them into strips similar in size to tenders for even cooking.
Is there a way to make this recipe healthier?
Yes! Baking or air frying instead of pan frying reduces oil usage while still delivering crispy tenders. Using gluten-free flour or alternative coatings can also tailor the recipe to your dietary needs.
Can I make the hot honey sauce from scratch?
Definitely. Simply warm honey on low heat and stir in your favorite chili flakes or a splash of hot sauce until you get the perfect balance of sweet and spicy.
What sides go best with hot honey chicken tenders?
Great question! Classic coleslaw, crispy fries, or a fresh garden salad work beautifully. For a comforting meal, try pairing with creamy sides like cheesy baked potatoes or a skillet of cheesy garlic butter corn. If you want to venture into dessert after this, the pineapple cream cheese pound cake is a luscious choice that complements spicy dishes wonderfully.
If you love recipes that bring a cozy, homemade touch to your table, don’t forget to explore more mouthwatering dishes at Recettia. It’s a treasure trove of easy, flavorful ideas that make every meal special.
And when you’re ready to find more inspiration, make sure to follow us on Pinterest for daily recipe ideas, tips, and kitchen hacks that will keep your cooking exciting and delicious!
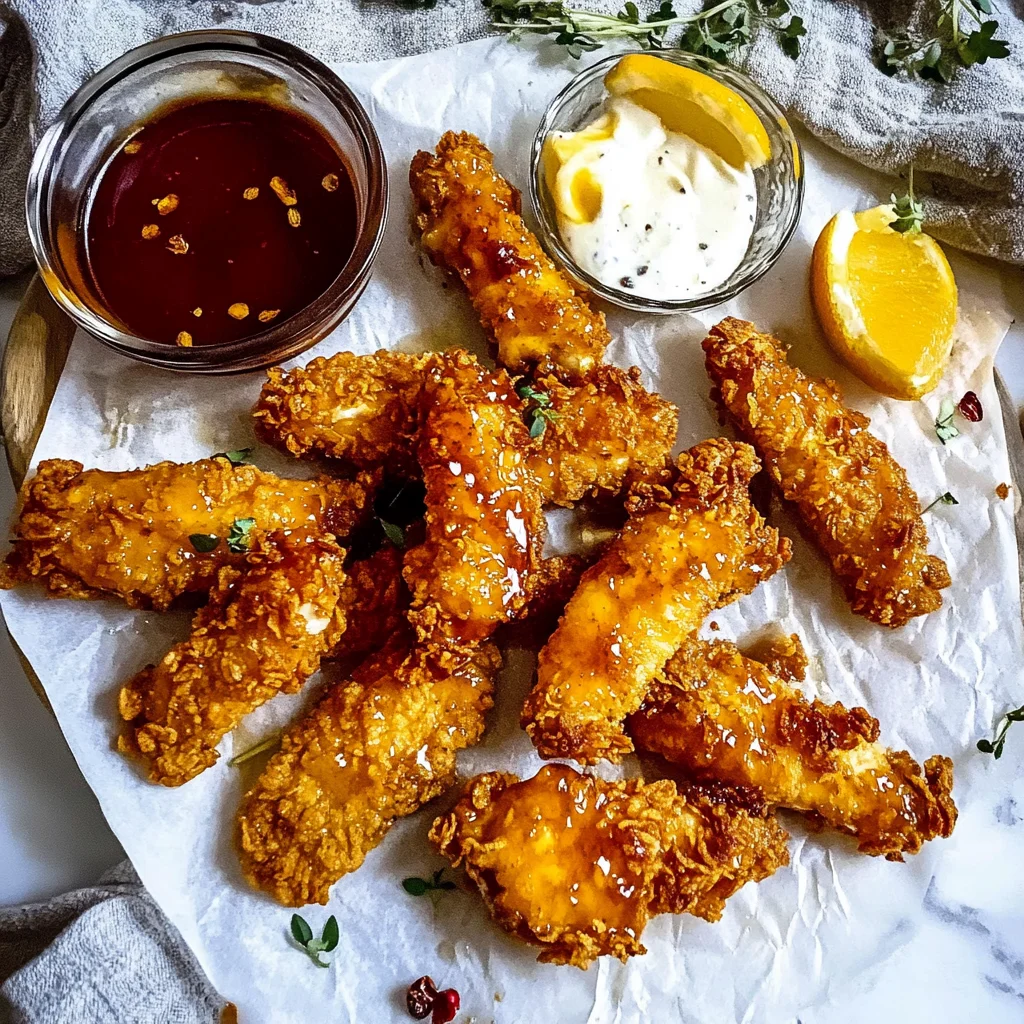
Hot Honey Chicken Tenders
Ingredients
Equipment
Method
- Step 1: Slice chicken breasts into evenly sized tenders. Place tenders in a large bowl or gallon-sized zip-top bag with dill pickle juice. Seal and refrigerate for at least 20 minutes, up to 24 hours for best flavor and tenderness.
- Step 2: Set up three shallow bowls: one with all-purpose flour mixed with salt, red pepper flakes, garlic powder, and onion powder; one with whisked eggs; and one with crushed corn flakes.
- Step 3: Remove chicken tenders from pickle juice, letting excess drip off. Coat each tender in seasoned flour, then dip into eggs, and finally press into crushed corn flakes until well coated. Place on a parchment-lined baking sheet.
- Step 4: Choose your cooking method: Pan Fry: Heat oil in skillet over medium heat and fry 4-6 tenders at a time for 6–7 minutes per side until golden and cooked through. Air Fry: Preheat air fryer to 350ºF, lightly spray tenders with cooking spray, cook 15–18 minutes flipping halfway. Bake: Preheat oven to 375ºF, spritz tenders with cooking spray, bake 16–18 minutes flipping halfway. Ensure internal temperature reaches 165ºF.
- Step 5: Let cooked tenders rest for a few minutes. Drizzle generously with hot honey glaze. Serve with pickles on the side for a refreshing crunch.