There’s something magical about the combination of rich, fudgy brownies and creamy peanut butter that instantly takes me back to cozy afternoons spent in the kitchen with family. These Fudgy Brownie Peanut Butter Tacos are like a nostalgic hug in dessert form—comforting, indulgent, and totally irresistible. If you’re a fan of chocolate and peanut butter, I promise you’re in for a memorable treat that’s surprisingly easy to whip up. Whether you’re planning a casual get-together or just craving a sweet pick-me-up, these taco-shaped brownies filled with luscious peanut butter mousse will steal the show every time.
Today, I’m going to walk you through every step of this fun and unique recipe. From baking the brownie shells to piping the dreamy peanut butter mousse, you’ll see how simple it is to create dessert tacos that look impressive but come together quickly. Bonus: these little gems make fantastic gifts or party snacks that are sure to wow your friends and family.
Why You’ll Love Fudgy Brownie Peanut Butter Tacos
- Fast: You can bake the brownie shells and mix the mousse in under an hour.
- Easy: No complicated techniques—just basic baking and mixing skills.
- Giftable: These tacos are perfect for gifting or bringing to potlucks and celebrations.
- Crowd-pleasing: Chocolate and peanut butter is a classic combo that everyone loves.
Ingredients
Let’s start with the essentials. The ingredients for these brownies and mousse are simple pantry staples, but each one plays a crucial role in making your dessert just right.
- Granulated sugar: Sweetens the brownie shells perfectly.
- Unsalted butter: Melted and slightly cooled for a tender, fudgy texture.
- Eggs: Room temperature eggs help bind the batter and add richness.
- Vanilla extract: Adds warmth and depth to both the brownie and mousse.
- All-purpose flour: Provides structure without making the brownies cakey.
- Unsweetened cocoa powder: Sifted for smoothness and intense chocolate flavor.
- Salt: Just a pinch to balance all the sweetness.
- Baking powder: Helps the brownie shells set with just a little lift.
- Creamy peanut butter: Use the classic creamy kind (not natural) for the mousse’s perfect texture.
- Cream cheese: Softened to room temperature for a silky, rich filling.
- Powdered sugar: Sweetens and smooths the peanut butter mousse.
- Heavy whipping cream: Cold and whipped to stiff peaks for a light, airy mousse.
- Toppings: Crushed chocolate sandwich cookies or peanut butter cookies add crunch, while chocolate syrup or warm hot fudge sauce finishes the look and flavor.
How to Make Fudgy Brownie Peanut Butter Tacos
Ready to dive in? Here’s the step-by-step process to create these decadent brownie tacos. Don’t worry if it sounds fancy — I’ll make sure every step feels manageable and fun.
Step 1: Prepare the Brownie Shells
Preheat your oven to 350°F (175°C) and line two large baking sheets with parchment paper. This not only prevents sticking but makes cleanup a breeze.
In a medium bowl, whisk together the melted butter and granulated sugar until well combined. The sugar will dissolve a bit into the warm butter, giving your brownie shells a lovely fudgy texture. Add the eggs one at a time along with the vanilla extract, whisking until the mixture is smooth and glossy. This is a great time to imagine the rich flavor you’re about to enjoy!
Sift together the flour, cocoa powder, salt, and baking powder. Sifting helps avoid lumps and ensures an even mix. Gently fold these dry ingredients into your wet mixture using a spatula, just until you have a smooth, thick batter. Resist the urge to overmix here — keeping it gentle means fudgier brownies.
Step 2: Shape and Bake the Brownie Circles
Drop heaping tablespoons of batter onto the prepared baking sheets, spacing them about 4 inches apart. Using the back of a spoon, spread each mound into a thin circle about 5 to 6 inches in diameter. This thinness is key – it allows the brownie to bake quickly and bend easily.
Bake one sheet at a time for 6 to 8 minutes. You want the edges to set but the centers still slightly underdone – this ensures the shells will be flexible enough to shape without cracking.
Step 3: Form the Taco Shells
Once out of the oven, let the brownie rounds cool for about 30 seconds. While they’re still warm and soft, carefully lift each round with a thin metal spatula and drape it over the handle of a wooden spoon or a similar round object to form that classic taco U-shape. Press lightly so the shape holds as it cools completely. This step is so satisfying — watching those brownies turn into adorable little tacos feels like kitchen magic.
Step 4: Make the Peanut Butter Mousse
In a large bowl, beat together the cream cheese and creamy peanut butter until smooth and well combined. Add the powdered sugar and vanilla extract, mixing until silky and sweet.
In a separate chilled bowl, whip the cold heavy cream to stiff peaks. This means when you lift your whisk, the cream stands tall without drooping. Gently fold the whipped cream into the peanut butter mixture in two additions. Folding carefully keeps the mousse light and fluffy — the texture is what makes these tacos so dreamy!
Pop the mousse in the fridge to chill for at least 30 minutes. This resting time helps it firm up just enough for piping.
Step 5: Assemble the Brownie Peanut Butter Tacos
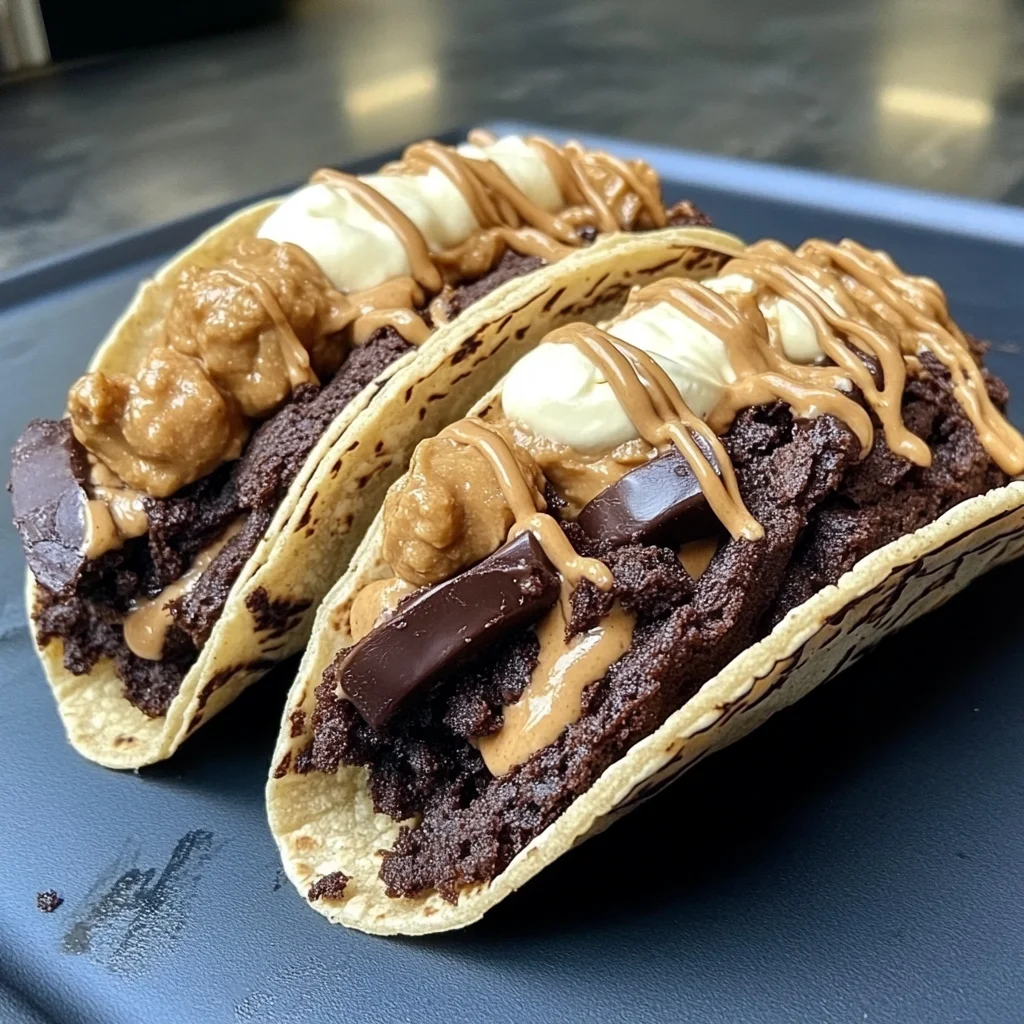
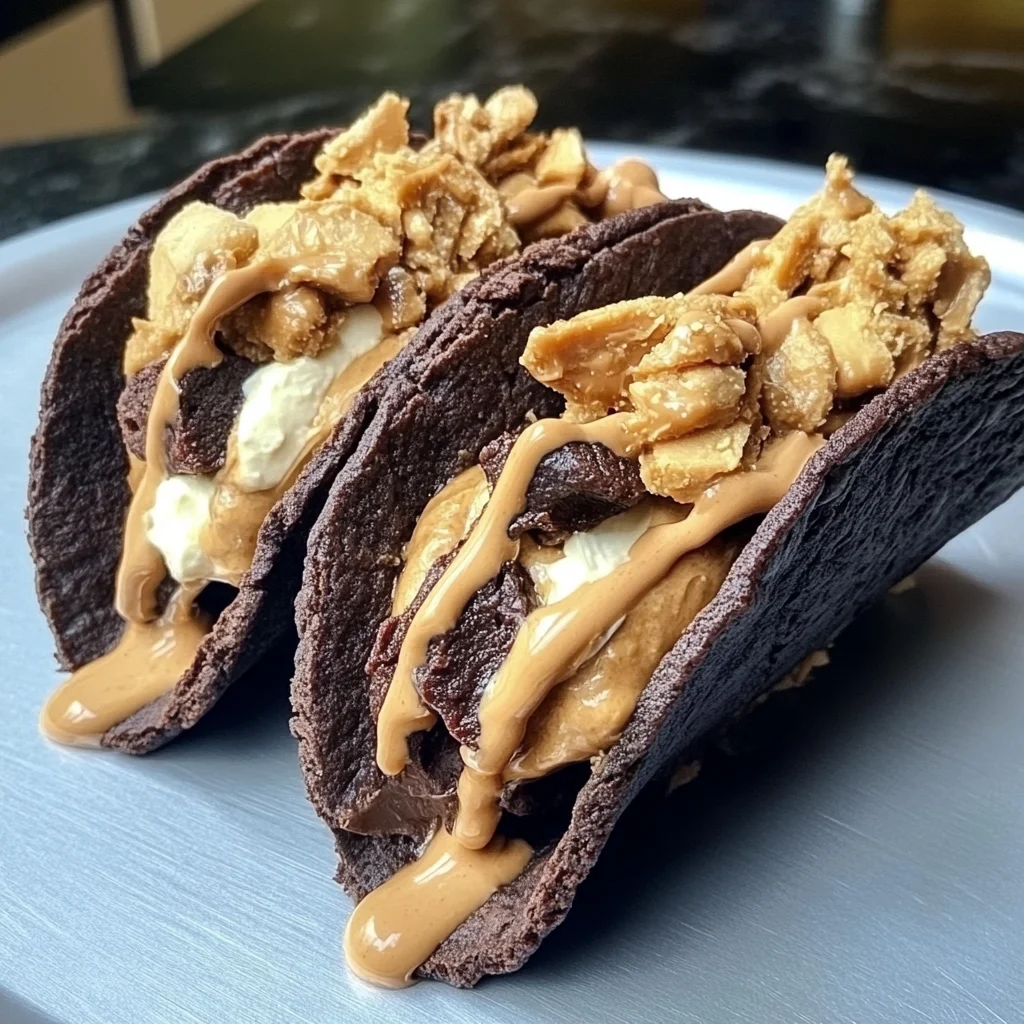
Fill a piping bag fitted with a star tip (or a zip-top bag with a small corner cut) with the chilled peanut butter mousse. Pipe generous swirls into each cooled brownie shell.
Sprinkle crushed chocolate sandwich cookies or peanut butter cookies on top for a delightful crunch, then finish with a drizzle of chocolate syrup or warm hot fudge sauce. These toppings add texture and a little extra wow factor that I love.
Refrigerate your assembled tacos for 15 to 20 minutes before serving. This helps everything set perfectly while making sure each bite is cool and refreshing.
Substitutions & Additions
One of the joys of this recipe is how customizable it is. Here are a few fun ideas if you want to switch things up or make it your own:
- Nut Butters: Swap creamy peanut butter for almond butter or sunflower seed butter if you’re allergic or just want a different flavor.
- Cookie Toppings: Try crushed pretzels for a salty crunch or chopped nuts for extra texture.
- Chocolate Variations: Use white chocolate chips mixed into the mousse or drizzle peanut butter cups melted on top for extra decadence.
- Fruit Additions: Fresh raspberries or sliced bananas tucked inside the mousse add a bright contrast to the rich chocolate and peanut butter.
- Brownie Shells: If you want a shortcut, you can try using store-bought brownie rounds or even chocolate tortillas for a different twist, although baking your own gives the best texture and flavor.
If you love no-bake treats, you might also enjoy exploring the No-Bake Peanut Butter Pie for another creamy peanut butter dessert that’s equally satisfying.
Tips for Success
Making these brownie peanut butter tacos is straightforward, but a few little tips can make your experience even better:
- Don’t overbake the shells: Pull them out when the edges are just set and centers look slightly underdone. This keeps them soft enough to bend without cracking.
- Work quickly with the warm brownie rounds: They cool fast and become brittle once cold, so be ready to shape them as soon as they come out of the oven.
- Use room temperature eggs and cream cheese: This ensures smooth mixing and a mousse without lumps.
- Chill the mousse well: It’s easier to pipe and holds its shape better when properly chilled.
- Prep ahead: You can bake the brownie shells a day in advance and store them airtight at room temperature. Make the mousse and assemble the same day for the freshest results.
For other baking adventures that bring cozy vibes to your kitchen, you might want to check out this Cozy Easy Moist Banana Bread. It’s a favorite of mine on chilly mornings!
How to Store Fudgy Brownie Peanut Butter Tacos
Once assembled, these brownie peanut butter tacos are best stored in the refrigerator. Place them in an airtight container or cover with plastic wrap to keep the mousse fresh and prevent the brownie shells from drying out.
You can keep them refrigerated for up to 3 days. Just be sure to serve them chilled for the best texture and flavor. If you want to prepare the brownie shells ahead of time, store them at room temperature in an airtight container for up to 2 days before filling.
These treats don’t freeze well once assembled because the mousse can separate or become watery when thawed. However, you can freeze the unfilled brownie shells for up to a month wrapped tightly in plastic wrap and foil. Thaw fully before shaping and filling.
FAQs
Can I use natural peanut butter for the mousse?
Natural peanut butter tends to be thinner and less creamy, which might affect the mousse’s texture. For best results, use a classic creamy peanut butter that’s smooth and stable.
What if my brownie shells crack when shaping?
If the shells crack, it usually means they cooled too much before shaping or were rolled too thin. Try shaping them immediately after baking while still warm, and handle gently. Thicker circles may be easier to work with for beginners.
Can I make the peanut butter mousse without cream cheese?
Cream cheese adds a lovely tang and richness, but if you want to skip it, try increasing the whipped cream and peanut butter slightly. The mousse will be lighter but less structured.
How do I pipe the mousse if I don’t have a piping bag?
No worries! Use a sturdy zip-top plastic bag and snip a small corner off. This makeshift piping bag works great and is easy to clean up.
If you enjoyed this recipe and want more sweet inspiration, be sure to visit Recettia — it’s packed with cozy, approachable recipes like this one!
For a fun dessert that combines rich chocolate and creamy textures in a no-bake format, you might also like the No-Bake Brownie Batter Dip. It’s perfect for easy entertaining and shares that same luscious chocolate vibe.
Thanks so much for spending time here with me in the kitchen! I hope these fudgy brownie peanut butter tacos bring a little extra joy and sweetness to your day. Happy baking, friends!
Don’t forget to follow us on Pinterest for more delicious recipes and kitchen inspiration.
Fudgy Brownie Peanut Butter Tacos
Ingredients
Equipment
Method
- Step 1: Preheat oven to 350°F (175°C). Line two large baking sheets with parchment paper.
- Step 2: In a medium bowl, whisk melted butter and granulated sugar until combined. Add eggs one at a time and vanilla extract; whisk until smooth and glossy.
- Step 3: Sift flour, cocoa powder, salt, and baking powder together. Gently fold into wet mixture until smooth and thick. Avoid overmixing.
- Step 4: Drop heaping tablespoons of batter onto prepared sheets, spacing 4 inches apart. Spread each into 5-6 inch thin circles using back of a spoon.
- Step 5: Bake one sheet at a time for 6-8 minutes until edges set but centers are slightly underdone. Remove and let cool 30 seconds.
- Step 6: While warm, carefully lift each brownie round with a thin metal spatula and drape over handle of a wooden spoon or similar object to form taco shape. Press lightly and let cool completely.
- Step 7: In a large bowl, beat cream cheese and peanut butter until smooth. Add powdered sugar and vanilla; mix until silky.
- Step 8: In a separate chilled bowl, whip heavy cream to stiff peaks. Gently fold whipped cream into peanut butter mixture in two additions until light and fluffy.
- Step 9: Chill mousse in fridge at least 30 minutes to firm up for piping.
- Step 10: Fill a piping bag or zip-top bag with star tip with chilled mousse. Pipe generous swirls into each cooled brownie shell.
- Step 11: Sprinkle crushed cookies on top and drizzle with chocolate syrup or warm hot fudge sauce.
- Step 12: Refrigerate assembled tacos 15-20 minutes before serving to let set and chill.