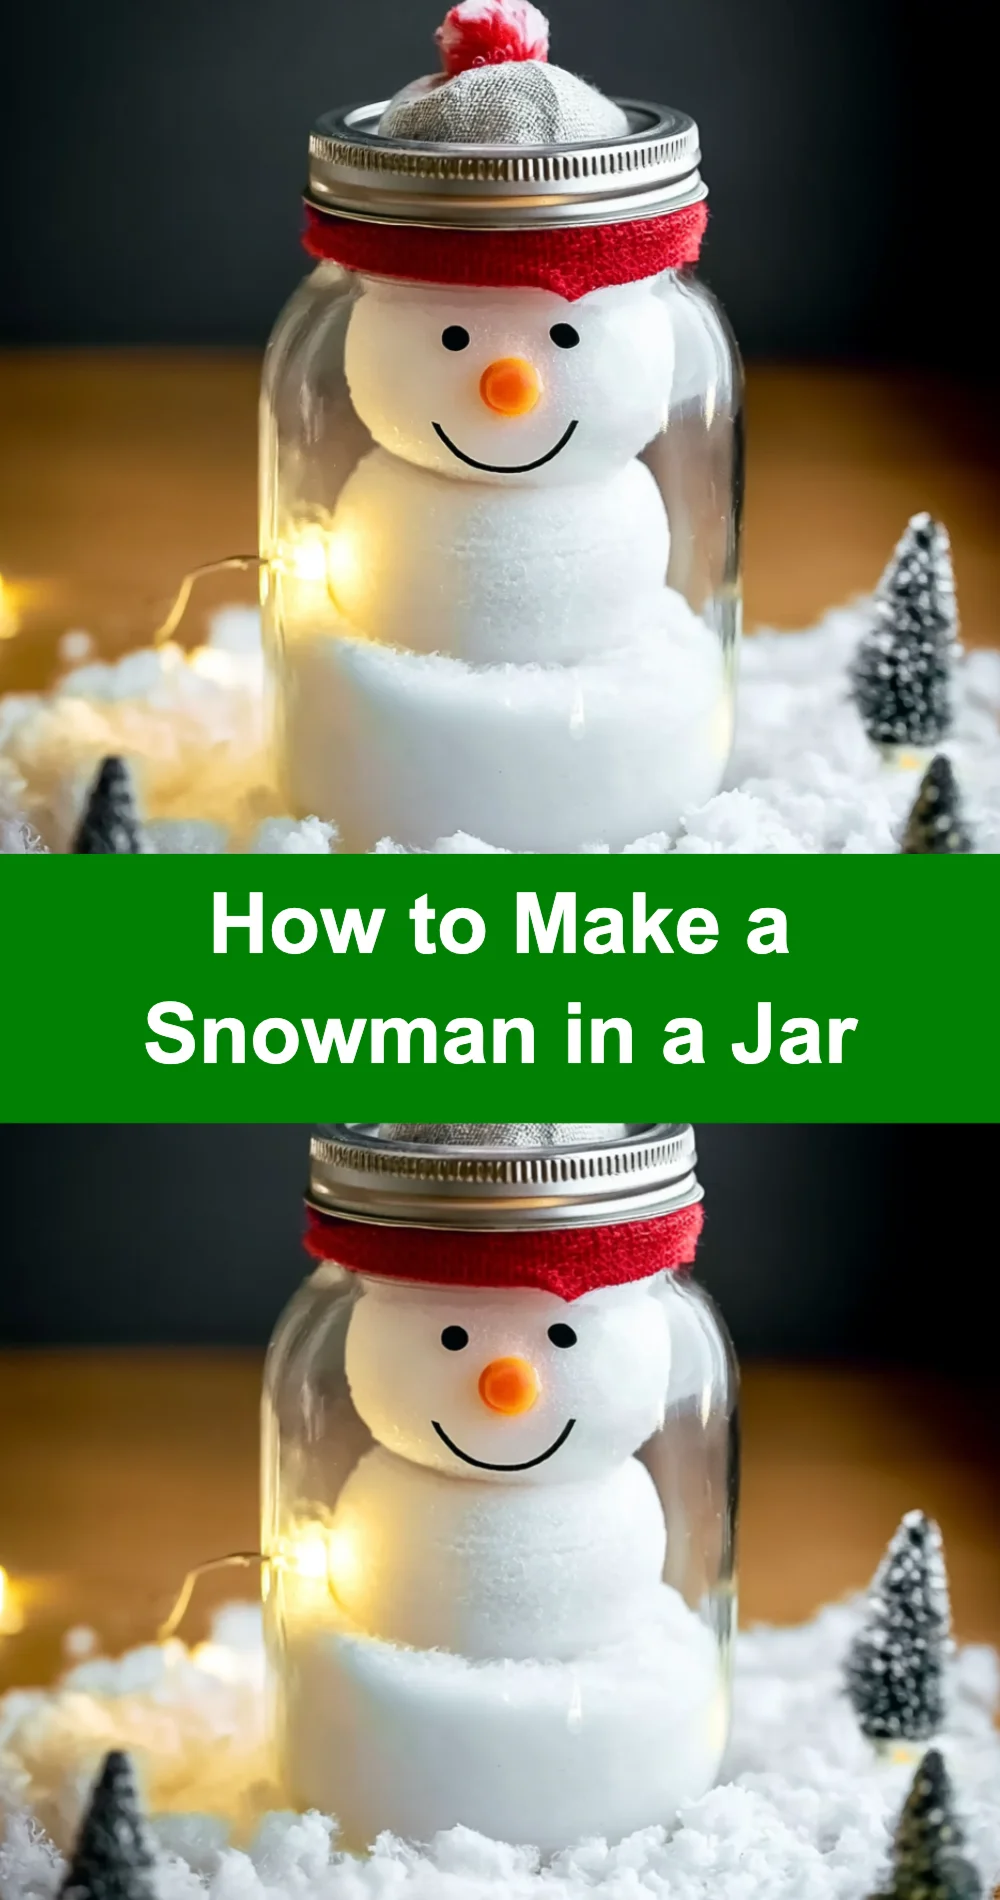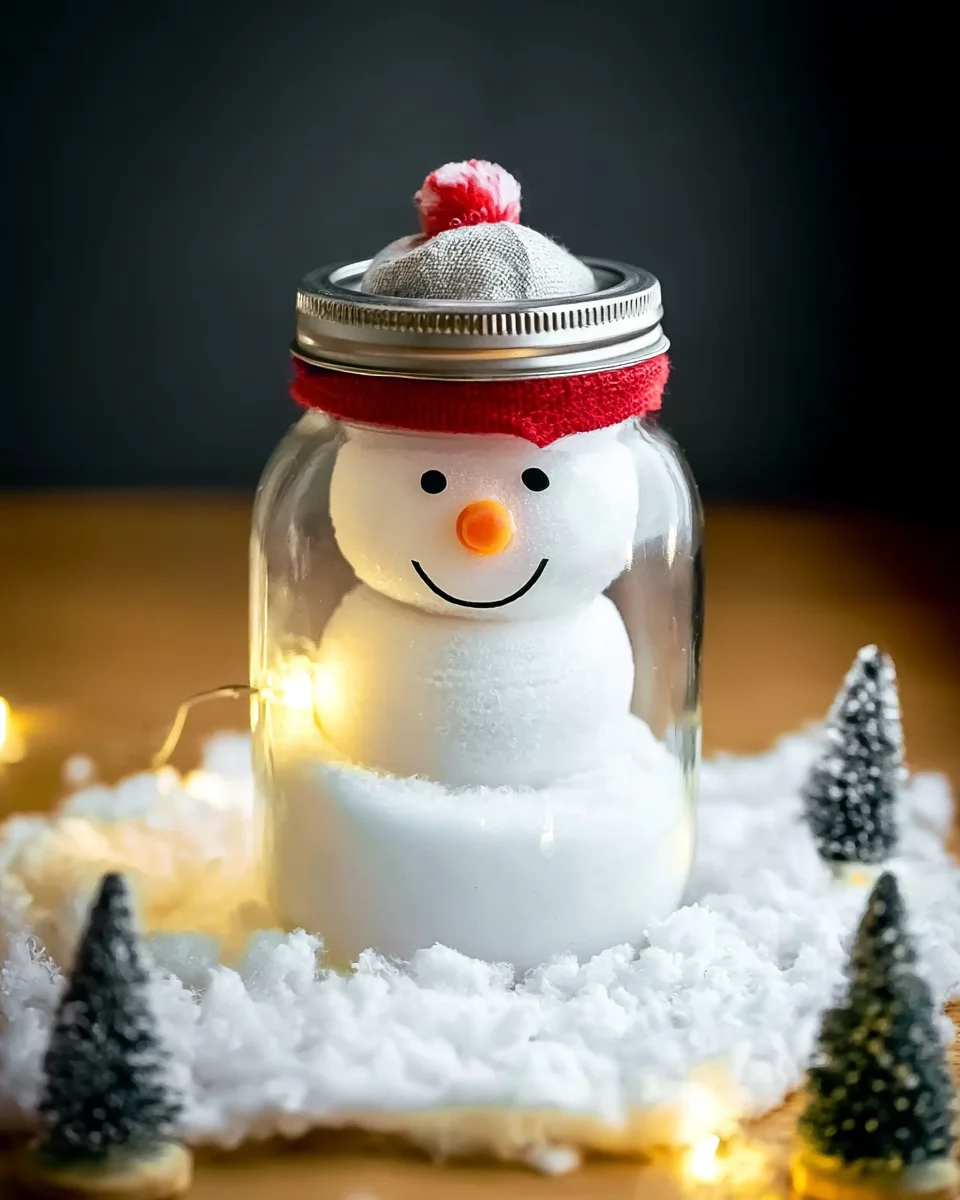
As the snow begins to fall and the air turns crisp, there’s something magical about the winter season that invites us to get cozy and create. One delightful way to capture that winter wonderland feeling is by making a snowman in a jar! This craft is not just a fun project but also a wonderful way to bring a bit of the outside snowy charm into your home. Imagine the joy of seeing your little snowman nestled in a jar, twinkling with sparkles as you shake it gently. It’s an ideal activity for families, friends, and even solo crafters looking to unwind and engage in a creative escape.
Why You’ll Love How to Make a Snowman in a Jar
- Beginner-friendly
- Budget-friendly
- Creative and fun
- Great for kids and families
- Perfect for gifts, decorating, or everyday use
- Customizable
The Heart Behind This DIY
Making a snowman in a jar is more than just a craft; it’s an opportunity to express your creativity while enjoying the soothing process of assembling your snowman. This project encourages mindfulness as you focus on each element, from the soft white faux snow to the cheerful colors of the pom-poms. It’s a perfect way to connect with loved ones, sharing laughter and stories while creating something beautiful together. Plus, seeing your handmade creation can foster a sense of pride and confidence in your crafting abilities!
A Gentle Look at the Process
You can expect a delightful journey as you gather your materials and start assembling your snowman. Each step will bring its own sense of joy, from pouring the faux snow into the jar to carefully gluing each pom-pom. You’ll feel the textures and see the colors come to life, transforming simple materials into a charming winter scene. So, let’s embrace the creative spirit and get started!
Materials You’ll Need
- 1 Mason jar (any size, but pint-sized works well) – the perfect container for your snowy scene
- White faux snow or Epsom salt – to create the snowy base
- 3 small white pom-poms – these will form the body of your snowman
- 1 small orange pom-pom – for the snowman’s cheerful carrot nose
- 2 small black beads – to bring your snowman to life with eyes
- 1 small black bead – for the mouth, adding a touch of personality
- Miniature scarf (fabric or ribbon) – to keep your snowman warm
- Small twig or pipe cleaner – for arms, giving your snowman character
- Hot glue gun and glue sticks – essential for sticking everything together
- Scissors – for trimming materials as needed
- Optional: Glitter – for that magical sparkle
Step-by-Step Directions
Step 1
Prepare your Mason jar by cleaning it thoroughly and letting it dry completely. This will ensure that your snowman is displayed beautifully without any dust or residue.
Step 2
Pour a generous layer of faux snow or Epsom salt into the bottom of the jar. This will serve as the snowy base for your snowman and create a wintery atmosphere.
Step 3
Using your hot glue gun, carefully attach the three white pom-poms on top of each other to form the body of the snowman. Make sure to allow the glue to dry completely before moving on to the next step.
Step 4
Now it’s time to give your snowman some personality! Glue the two black beads onto the top pom-pom for the eyes. Then, attach the small orange pom-pom below the eyes for the nose and use the small black bead to create a mouth by gluing it in place.
Step 5
Dress your snowman by cutting a small piece of fabric or ribbon to form a scarf. Tie it around the neck of the snowman and secure it with hot glue if necessary for a snug fit.
Step 6
For arms, you can either break small twigs into pieces and glue them to the sides of the middle pom-pom, or if you prefer pipe cleaners, cut them to your desired length and attach them in the same way.
Step 7
Carefully place the assembled snowman into the jar, ensuring it sits nicely on the layer of faux snow. If needed, add more faux snow around the snowman to secure it in place.
Step 8
For a magical touch, sprinkle some glitter inside the jar on top of the faux snow. This will make your snowman sparkle and shine as the light catches it.
Step 9
Once everything is in place and secure, screw the lid onto the jar tightly. This will keep your snowman safe and sound.
Step 10
Finally, find a cozy spot to display your snowman in a jar. It could be on a shelf, mantel, or as part of your holiday decorations, bringing a smile to anyone who sees it!
Creative Ways to Use How to Make a Snowman in a Jar
Your snowman in a jar can be used in so many delightful ways! Consider using it as a charming centerpiece for your holiday table or as a sweet decoration in a child’s room. It also makes for a heartfelt gift during the winter season, perfect for friends and family. You can create a whole set in different sizes or styles for a fun display, or even give them as party favors at winter gatherings!
How to Store, Preserve, or Maintain How to Make a Snowman in a Jar
To keep your snowman in a jar looking its best, store it in a cool, dry place away from direct sunlight. If you notice that the faux snow or glitter has settled, gently shake the jar to redistribute the materials for a fresh look.
Creative Variations and Customizations
- Change the colors of the pom-poms to create a snowman for different seasons or holidays.
- Add festive elements like mini hats or buttons to personalize your snowman.
- Consider a winter theme with snowflakes or holiday accents for a seasonal twist.
- For kids, use larger pom-poms and allow them to decorate with stickers or markers.
- For advanced crafters, try adding miniature lights inside the jar for a glowing effect.
Tips for Success
- Avoid common mistakes by ensuring your glue dries completely before moving to the next step.
- Be careful with the hot glue gun, as it can get very hot; it’s best to keep it out of reach of young children.
- Prepare your workspace by laying down newspaper or a craft mat for easy cleanup.
- After finishing your project, clean up any stray glitter or faux snow for a tidy space.
- Don’t hesitate to get creative; the more you personalize, the more unique your snowman will be!
FAQs About How to Make a Snowman in a Jar
Can beginners make this?
Absolutely! This project is beginner-friendly and perfect for those new to crafting.
Can children participate?
Yes! Kids will love creating their own snowman in a jar with some supervision for the hot glue gun.
How long does it last?
As long as it is stored properly, your snowman in a jar can last for years, bringing joy every winter!
Can I customize it?
Definitely! Feel free to add any personal touches or variations to make it uniquely yours.
A Final Creative Note
Creating a snowman in a jar is a wonderful way to embrace the winter season and unleash your creativity. Whether you’re crafting alone or with loved ones, this project celebrates the joy of making something special with your own hands. So gather your materials, let your imagination run wild, and enjoy the process! For more delicious recipes, check out cinnamon orange jam linzer cookies or berry crumble with fresh berries for treats you will love!
Don’t forget to follow our Pinterest account for more DIY inspiration.