Oh, friend, do you ever get that craving for something incredibly satisfying, wonderfully savory, and just bursting with flavor? You know, the kind of food that instantly takes you back to sunny backyard barbecues, lively game nights, or cozy family dinners where everyone’s reaching for seconds? Well, today, I’m bringing you a recipe that captures all those good vibes and more: Cheddar-Stuffed BBQ Bacon Bombs! These little bundles of joy are so easy to make, surprisingly quick, and absolutely unforgettable. Trust me, once you try them, you’ll wonder how you ever lived without them.
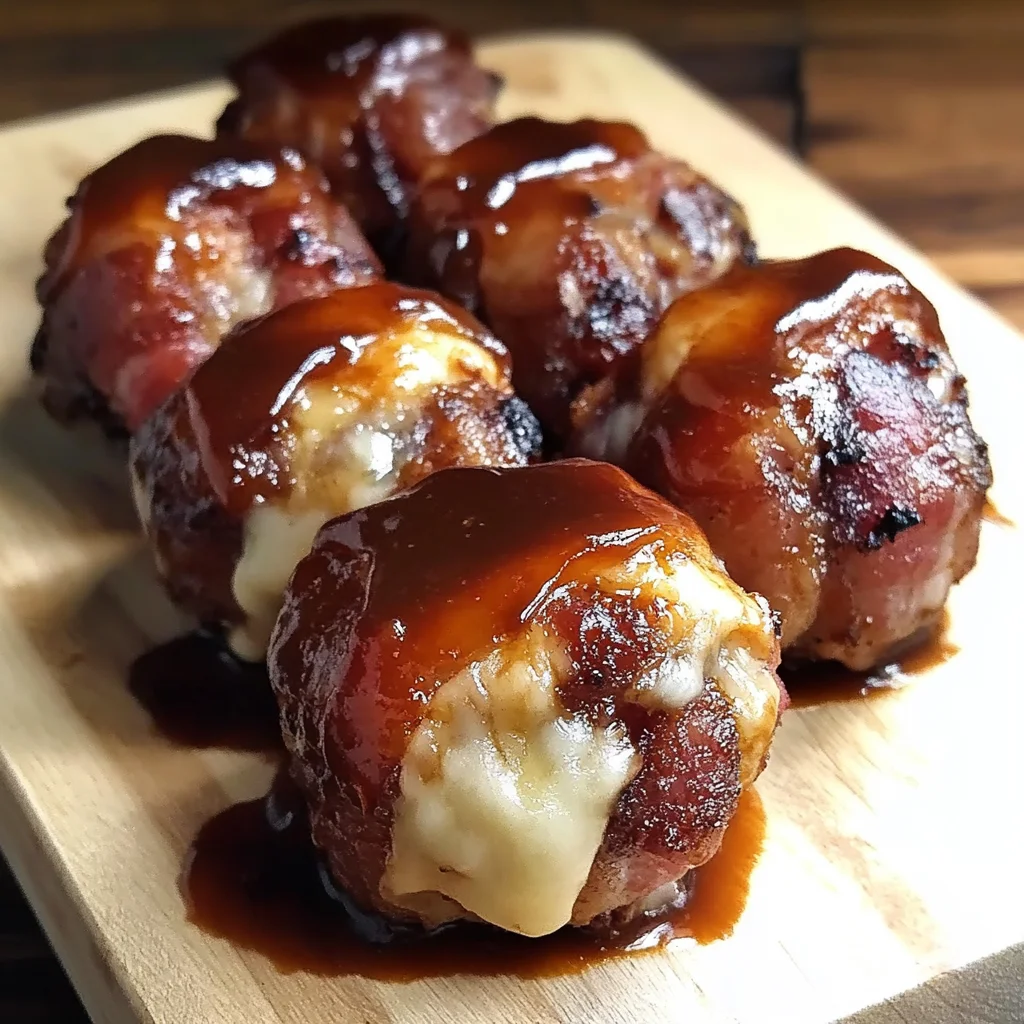
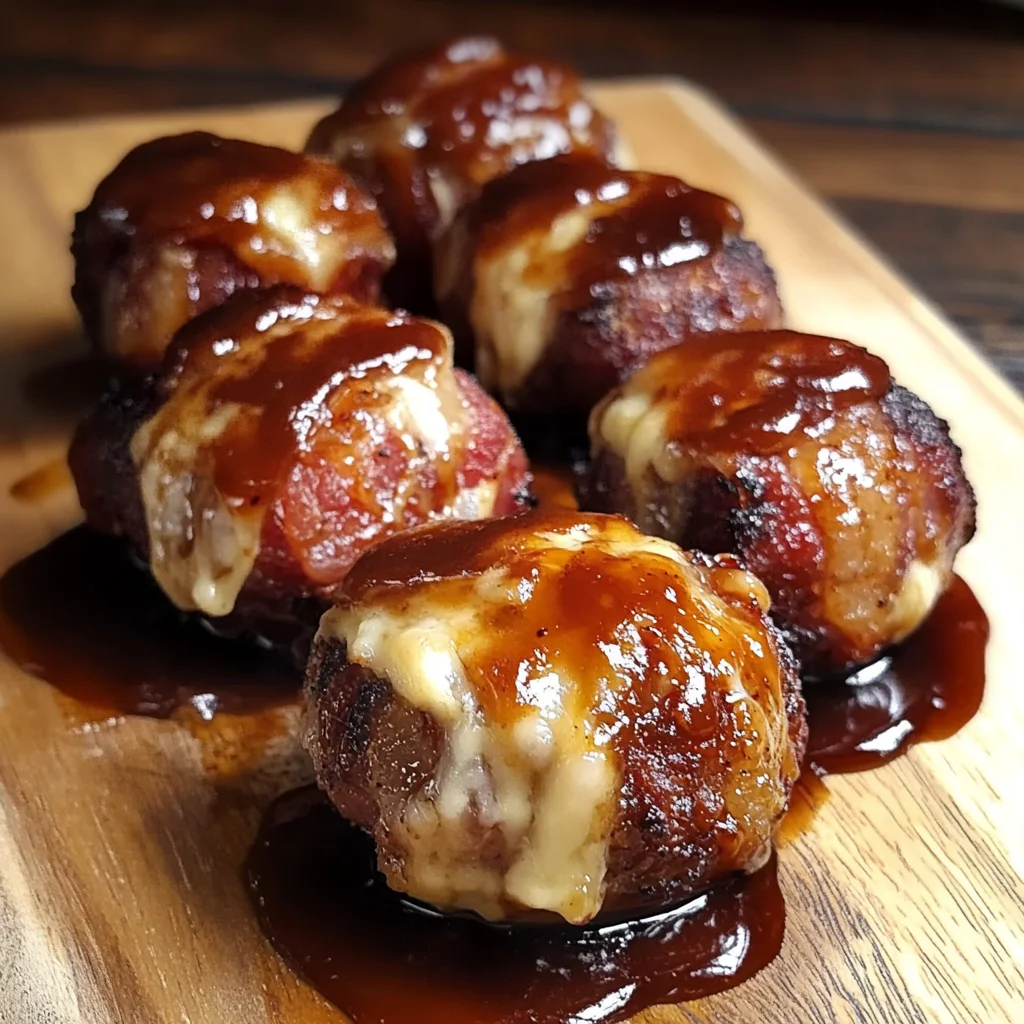
Imagine biting into a perfectly seasoned meatball, discovering a molten core of rich, gooey cheddar cheese, all wrapped up in a crispy blanket of savory beef bacon, and glistening with a tangy, sweet barbecue glaze. It’s a flavor explosion, a texture party, and pure comfort food magic all in one bite! If you’ve loved our Garlic Parmesan Cheeseburger Bombs, you’re going to adore these BBQ Bacon Bombs too!
Why You’ll Love Cheddar-Stuffed BBQ Bacon Bombs
- Fast: Get dinner or appetizers on the table in under an hour!
- Easy: Simple steps, no complicated techniques needed.
- Giftable: A delicious homemade treat that makes a perfect host/hostess gift (if they can resist eating them all first!).
- Crowd-pleasing: Guaranteed to be a hit with kids and adults alike at any gathering.
Ingredients
Gathering your ingredients for these delicious bombs is super simple. Here’s what you’ll need, along with a few friendly notes:
- 1 pound ground beef: This is the heart of our bomb! I usually go for an 80/20 blend for the best flavor and juiciness, but feel free to use leaner if you prefer.
- 1/2 cup breadcrumbs: These act like little sponges, soaking up all the delicious juices and helping to keep our meatballs tender and moist. Plain or seasoned, either works!
- 1 large egg: Our trusty binder! It helps hold everything together, so your bombs don’t fall apart during cooking.
- 1 teaspoon salt: Essential for bringing out all the wonderful savory flavors.
- 1/2 teaspoon black pepper: Just a touch of warmth and spice.
- 1/2 teaspoon garlic powder: Because, let’s be honest, everything is better with garlic!
- 1/2 teaspoon onion powder: Adds a subtle, savory depth that perfectly complements the beef.
- 1/2 cup shredded cheddar cheese: The glorious, gooey surprise in the middle! Sharp, mild, or even a cheddar blend would be fantastic here.
- 8 slices beef bacon: This is our crispy, savory wrapper! It adds so much flavor and a fantastic texture contrast.
- 1/4 cup barbecue sauce: Your favorite sticky, sweet, or smoky BBQ sauce for that irresistible glaze. Don’t be shy, pick one you absolutely love!
How to Make Cheddar-Stuffed BBQ Bacon Bombs
Ready to get cooking? Let’s make some magic happen in the kitchen!
- Get That Oven Warm: First things first, go ahead and preheat your oven to a cozy 375°F (190°C). You’ll also want to line a baking sheet with parchment paper. This little trick makes cleanup a breeze, trust me!
- Mix It Up: Grab a large mixing bowl – you know, the one that’s perfect for getting your hands a little messy in the best way possible. Add your ground beef, breadcrumbs, egg, salt, black pepper, garlic powder, and onion powder. Now, dive in there and mix everything together. You want it just combined, not overworked, so the meatballs stay tender.
- Cheese Please! It’s time for the cheesy center! Divide your meat mixture into eight equal portions. Think of them as little patties. Flatten each portion gently in your palm, then place about a tablespoon of shredded cheddar cheese right in the middle. Now, carefully bring the edges of the meat up and around the cheese, shaping it into a nice, tight ball. Make sure that cheese is completely sealed inside – we want all that melty goodness to stay put!
- Wrap ‘Em Up: Take one slice of beef bacon and lovingly wrap it around each stuffed meatball. You’ll want to tuck the ends of the bacon underneath the ball to keep it snug. This is where the “bomb” gets its fabulous exterior!
- On the Sheet They Go: Place your perfectly wrapped bacon bombs onto your prepared parchment-lined baking sheet. Give them a little space so they can crisp up nicely.
- Brush with BBQ Love: Now, for the sticky-sweet finish! Grab a pastry brush and evenly coat each bomb with your favorite barbecue sauce. This creates that irresistible glaze and adds a layer of delicious BBQ flavor.
- Bake to Perfection: Pop that baking sheet into your preheated oven. Let them bake for about 25–30 minutes. You’re looking for crispy bacon, a beautiful golden-brown color, and an internal temperature of 160°F (71°C) in the meat. That’s your cue that they’re perfectly cooked and ready to go!
- Serve Hot: As soon as they come out of the oven, those bombs are ready to be devoured! Serve them hot and watch them disappear.
Substitutions & Additions
One of my favorite things about cooking is how easily you can make a recipe your own! These Cheddar-Stuffed BBQ Bacon Bombs are super versatile. Here are some ideas to get your creative juices flowing:
- Meat Alternatives: Not a beef fan? No problem! You could easily swap the ground beef for ground turkey, chicken, or even pork. Just adjust cooking times slightly to ensure they’re cooked through.
- Cheese, Please! While cheddar is classic, imagine a spicy kick with Monterey Jack, the smoky notes of Gouda, or even a creamy Havarti. The possibilities are endless!
- Bacon Swap: If you prefer regular pork bacon, you can absolutely use it! I recommend par-cooking it slightly in a pan or microwave first until it’s about halfway done. This helps prevent it from becoming soggy and ensures it crisps up beautifully around the bomb.
- Sauce It Up: Don’t limit yourself to just barbecue sauce! Try a tangy honey mustard, a sweet and savory teriyaki glaze, or even a spicy sriracha-lime sauce for a different flavor profile.
- Mix-Ins for the Meat: Want more flavor in the meat itself? Add a dash of Worcestershire sauce, a tablespoon of finely minced green onions, or even a pinch of red pepper flakes for a little heat. Want to try another cheesy ground beef creation? You absolutely have to check out our Easy Cheesy Ground Beef Quesadillas for another family favorite!
- Extra Crunch: For an added texture, before wrapping, you could roll the meat mixture in some crushed potato chips or finely chopped crispy fried onions.
Tips for Success
Even though this recipe is super easy, a few little tricks can make all the difference for truly perfect BBQ Bacon Bombs:
- Don’t Overmix the Meat: When combining your ground beef with the seasonings and breadcrumbs, mix just until everything is integrated. Overmixing can lead to tougher meatballs, and we want them nice and tender!
- Seal That Cheese Tight: This is key to preventing any cheesy escapees! Take your time to really pinch and seal the meat around the cheddar. If you see any cracks, smooth them out.
- Uniform Size Matters: Try to make your meat portions and therefore your bombs, roughly the same size. This ensures they all cook evenly at the same rate.
- Parchment Paper is Your Friend: Seriously, don’t skip the parchment paper! It prevents sticking and makes cleanup a breeze. Plus, it helps the bacon get nice and crispy without fusing to the pan.
- Give Them Space: When placing the bombs on the baking sheet, don’t overcrowd them. Allow a little space between each one so hot air can circulate, helping the bacon crisp up and the bombs brown evenly.
- Check Internal Temperature: The best way to know if your bombs are fully cooked is with a meat thermometer. Insert it into the center of a meatball (avoiding the cheese) to ensure it reaches 160°F (71°C).
- Make Ahead Magic: You can assemble these bombs ahead of time! Prepare them all the way through step 5 (before brushing with BBQ sauce). Cover them loosely and refrigerate for up to 24 hours. When ready to bake, brush with sauce and cook as directed, adding a few extra minutes to the baking time if cooking from chilled. These bombs are great for meal prep or a party spread, much like how we prep our beloved Easy Cheesy Sausage Balls!
How to Store Cheddar-Stuffed BBQ Bacon Bombs
If you happen to have any of these delicious bombs leftover (a big “if” in my house!), here’s how to keep them fresh:
- Refrigerator: Cooked Cheddar-Stuffed BBQ Bacon Bombs can be stored in an airtight container in the refrigerator for 3-4 days.
- Reheating: For best results, reheat them in the oven or air fryer at 350°F (175°C) until warmed through and the bacon is crispy again. Microwaving is an option, but the bacon won’t be as crisp.
- Freezing (Cooked): You can freeze cooked bombs in a single layer on a baking sheet until solid, then transfer them to a freezer-safe bag or container for up to 2-3 months. Thaw in the refrigerator overnight before reheating.
- Freezing (Uncooked): If you want to prep ahead, you can assemble the bombs (through step 5, before applying BBQ sauce), then freeze them on a baking sheet until solid. Once frozen, transfer them to a freezer-safe bag. When ready to cook, you can bake them from frozen, adding about 15-20 minutes to the baking time and brushing with sauce halfway through.
FAQs
Q: Can I use regular pork bacon instead of beef bacon?
A: Yes, absolutely! If you use regular pork bacon, I recommend par-cooking it slightly (until it’s about halfway done but still flexible) before wrapping the meatballs. This ensures it crisps up nicely and isn’t chewy.
Q: How do I know when the meat is fully cooked?
A: The safest way is to use a meat thermometer. Insert it into the center of a meatball (making sure to avoid the cheese) to ensure it reaches an internal temperature of 160°F (71°C).
Q: Can I prepare these ahead of time for a party?
A: You bet! You can assemble the bombs (up to the point of brushing with BBQ sauce) and keep them covered in the refrigerator for up to 24 hours. Just add the BBQ sauce right before baking.
Q: What’s a good side dish to serve with these?
A: These bombs are pretty rich, so a fresh green salad, some crispy onion rings, a simple coleslaw, or even some roasted vegetables would make a perfect accompaniment!
For more mouthwatering recipes and kitchen inspiration, be sure to follow us on Pinterest!
Cheddar-Stuffed BBQ Bacon Bombs
Ingredients
Equipment
Method
- Step 1: Preheat your oven to 375°F (190°C). Line a baking sheet with parchment paper for easy cleanup.
- Step 2: In a large mixing bowl, combine the ground beef, breadcrumbs, egg, salt, black pepper, garlic powder, and onion powder. Mix everything together gently until just combined, being careful not to overwork the meat to keep it tender.
- Step 3: Divide the meat mixture into eight equal portions. Flatten each portion gently in your palm, then place about a tablespoon of shredded cheddar cheese in the middle. Carefully bring the edges of the meat up and around the cheese, shaping it into a nice, tight ball. Ensure the cheese is completely sealed inside.
- Step 4: Take one slice of beef bacon and lovingly wrap it around each stuffed meatball. Tuck the ends of the bacon underneath the ball to keep it snug.
- Step 5: Place your perfectly wrapped bacon bombs onto your prepared parchment-lined baking sheet. Give them a little space between each one so they can crisp up nicely.
- Step 6: Grab a pastry brush and evenly coat each bomb with your favorite barbecue sauce. This creates that irresistible glaze and adds a layer of delicious BBQ flavor.
- Step 7: Pop the baking sheet into your preheated oven. Bake for about 25–30 minutes, or until the bacon is crispy, the bombs are golden-brown, and the internal temperature of the meat reaches 160°F (71°C).
- Step 8: As soon as they come out of the oven, serve them hot and enjoy!